

Infinite Uploads business plans can automatically compress your images and convert them to next-gen formats (AVIF and WebP), right-sized as they are delivered from the CDN, with no extra plugin, and your original files are never touched. This guide covers how to turn it on and what each setting does.
Note: Image Optimization is included with our business plans. On other plans the Image Optimization section shows an Available on the Business plan message with an upgrade link. See Do I need a business plan for Image Optimization? to learn more.
Where to find the settings
From your WordPress Dashboard, open the Infinite Uploads menu and scroll down to the Image Optimization section.

Turn it on
Set Enable Image Optimization to Yes. The full set of options appears as soon as you do.
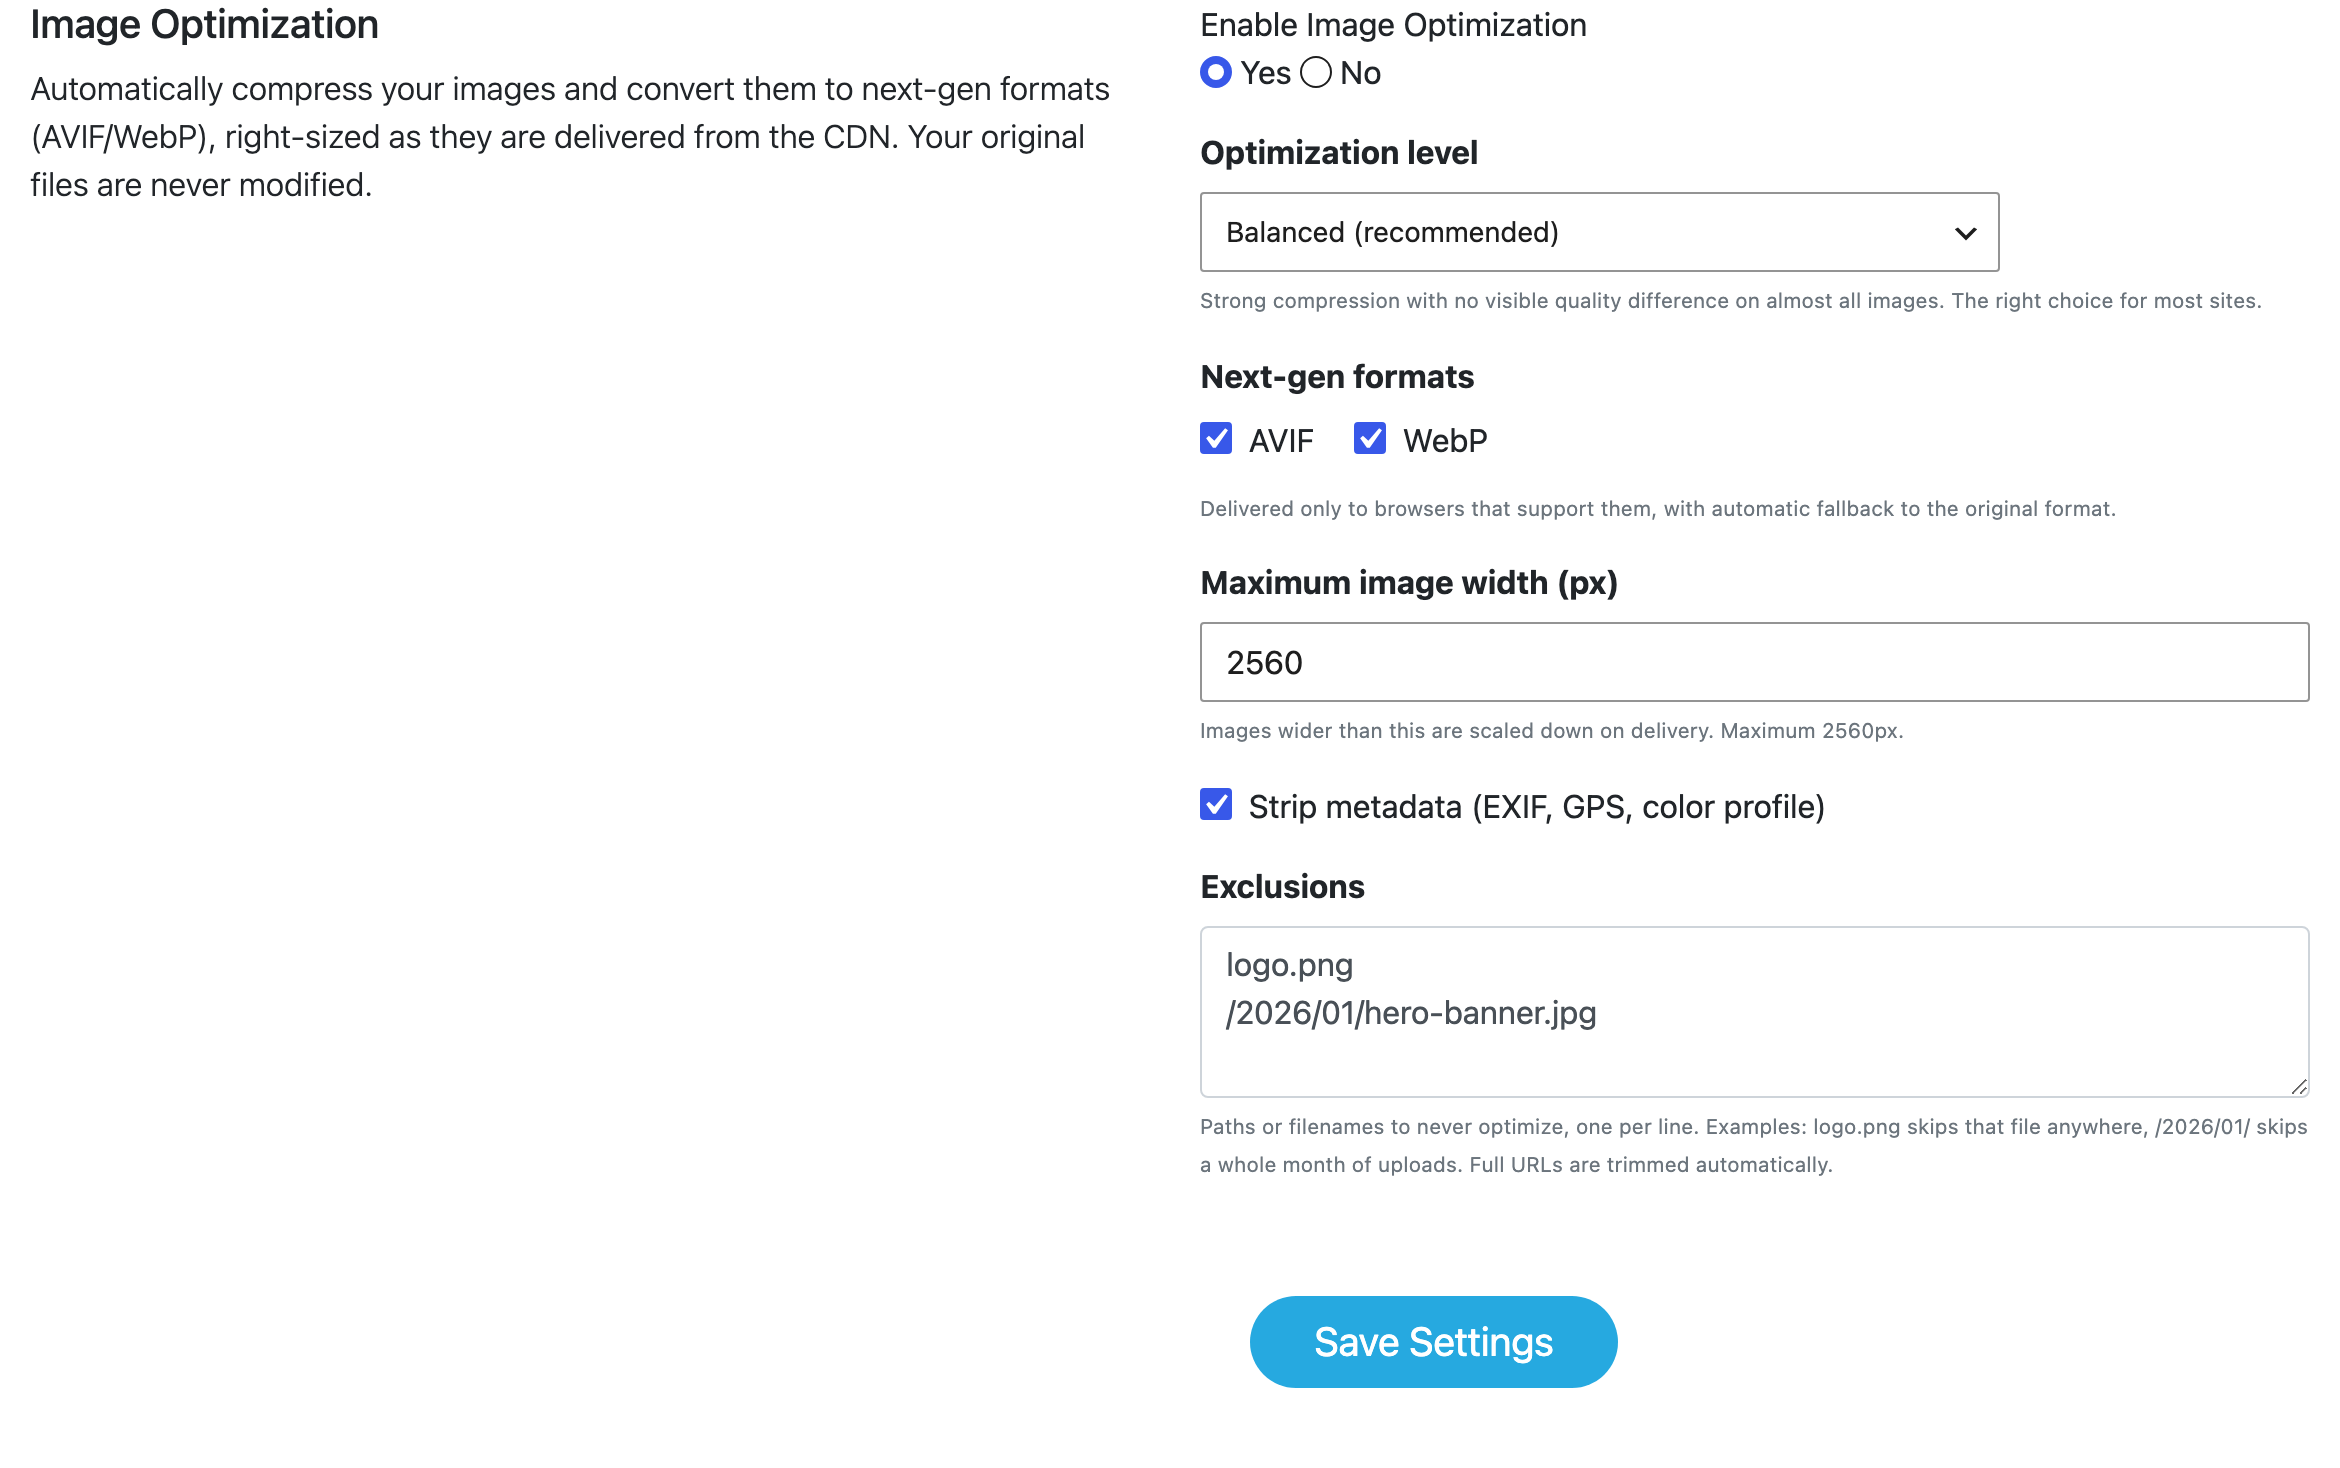
You can leave every option at its default and get an excellent result. The defaults are tuned for the best balance of quality and savings for most sites.
Review the options
- Optimization level: how aggressively images are compressed. Balanced (recommended) is the right choice for almost every site. See Choosing an optimization level for the differences.
- Next-gen formats: AVIF and WebP are both on by default. They are delivered only to browsers that support them, with automatic fallback to the original format. See AVIF and WebP explained.
- Maximum image width (px): the largest width we will deliver, capped at
2560. Anything wider is scaled down on the fly. See Setting a maximum image width. - Strip metadata: removes EXIF, GPS, and color-profile data from delivered images. On by default, and recommended.
- Exclusions: a list of files or paths to never optimize. Leave it blank unless you have a specific file that must be delivered untouched. See Excluding images from optimization.
Save
Click the Save Settings button. That's it. Optimization begins applying to your images as they are requested.
Note: Your existing images are delivered from the CDN and cached for performance, so newly changed settings apply to images the moment they are next requested and re-cached. If you want to apply new settings to already-cached images right away, use the Purge CDN Cache button. See Purging the CDN cache.
How can I verify it is working?
There are two ways to confirm your images are being optimized and delivered from Infinite Uploads.
From the WordPress Dashboard:
Go to Media > Library and click on an existing image to open the Attachment detail module. Check whether the File URL is using the Infinite Uploads url assigned to your media library. It should look something like https://efd3f.infiniteuploads.cloud/.
Using the browser's built-in developer inspect tools:
Visit the front end of your site, right-click one of your images, and select Inspect. In the Network panel, reload and click the image request. A modern browser will show the response Content-Type as image/avif or image/webp instead of the original image/jpeg or image/png, confirming the optimized version is being delivered.