You moved a site, pasted in a pile of posts, or inherited a client's old blog. The text came across fine. The images didn't. Every one of them is still loading from the old address, so the day that server changes, moves or goes dark, your posts turn into rows of broken image icons.
I've been there. Downloading hundreds of files just to upload them again is miserable, and the built-in WordPress importer timed out on me. There's a much shorter route: import the images straight from their URLs into your Media Library. Here's exactly how, what it can and can't do, and how to fix the old links afterward.
How to Import Images from a URL in WordPress (the Short Answer)
Use the free URL Image Importer plugin. It fetches images from public URLs and saves them as normal Media Library items.
- Install and activate URL Image Importer from Plugins > Add New.
- Go to Media > Import Images.
- On the URL Import tab, paste your image URLs, one per line or separated by commas.
- Click Import Images from URLs, check the Import Preview, then click Import Selected Items.
- When you see Import completed, click Download URL Mapping CSV. It lists every old URL next to its new Media Library URL, which is exactly what you need to fix the links in your posts.
Two things to know before you start. The URLs have to be publicly reachable, and the plugin imports images only: JPEG, PNG, GIF, ICO, WebP and SVG, no videos. It also adds the files to your Media Library without editing your posts, so the old links stay in place until you swap them. I cover that in the fixing-links section below.
Why Import Images from External URLs into WordPress?
Hotlinked images look free. They aren't. Here's what you're signing up for when a post leans on someone else's file:
- Broken images when the source changes. If the other site renames a file, rebuilds its URLs or shuts down, your post shows an empty box where the image used to be.
- Speed you don't control. A remote image loads at the speed of someone else's server, not yours.
- Blocked requests. Some sites refuse to serve their images to other websites, so an image that works today can stop loading tomorrow.
- Hours of busywork. Saving each file and uploading it again adds up fast on a migration.
Importing fixes all four, because you end up with your own copy in your own Media Library. One caution: only import images you have the right to use. A copy on your server is still a copy.
Using URL Image Importer to Import Images Automatically
What Is URL Image Importer?
URL Image Importer is a free WordPress plugin that pulls images from external links into your Media Library. You paste links, or hand it a spreadsheet or an export file, and it does the downloading and saving for you. Here's what it does, based on the plugin's own listing and the version I tested (1.2.4):
- Bulk import. Paste many URLs at once, upload a CSV, or use a WordPress XML export.
- Preview first. You see the list of URLs and can untick any you don't want before anything is saved.
- Checks each file. Every URL gets validated, and the results screen counts what succeeded, failed or was skipped.
- Normal Media Library items. The filename becomes the title and slug, just like a manual upload.
- A URL mapping CSV. After a batch, you can download a spreadsheet of old URLs and new URLs.
- Public Google Drive images. A share link to a single image file works if anyone can download it without signing in.
Step-by-Step Guide on Importing Images from External URLs
Hotlinking from another site can slow your page down, break your layout the moment the original disappears, and even cause copyright trouble. Importing means every file lives on your own site. Here's the whole process.
Install and Activate URL Image Importer

- Log into your WordPress dashboard.
- Go to Plugins > Add New.
- In the search bar, type “URL Image Importer”.
- Find the plugin and click Install Now.
- Once installed, click Activate.
After activation, a new Import Images item shows up under the Media menu.
Import Images Using External URLs
Now the part that saves you the afternoon. This is what the current version of the screen looks like.
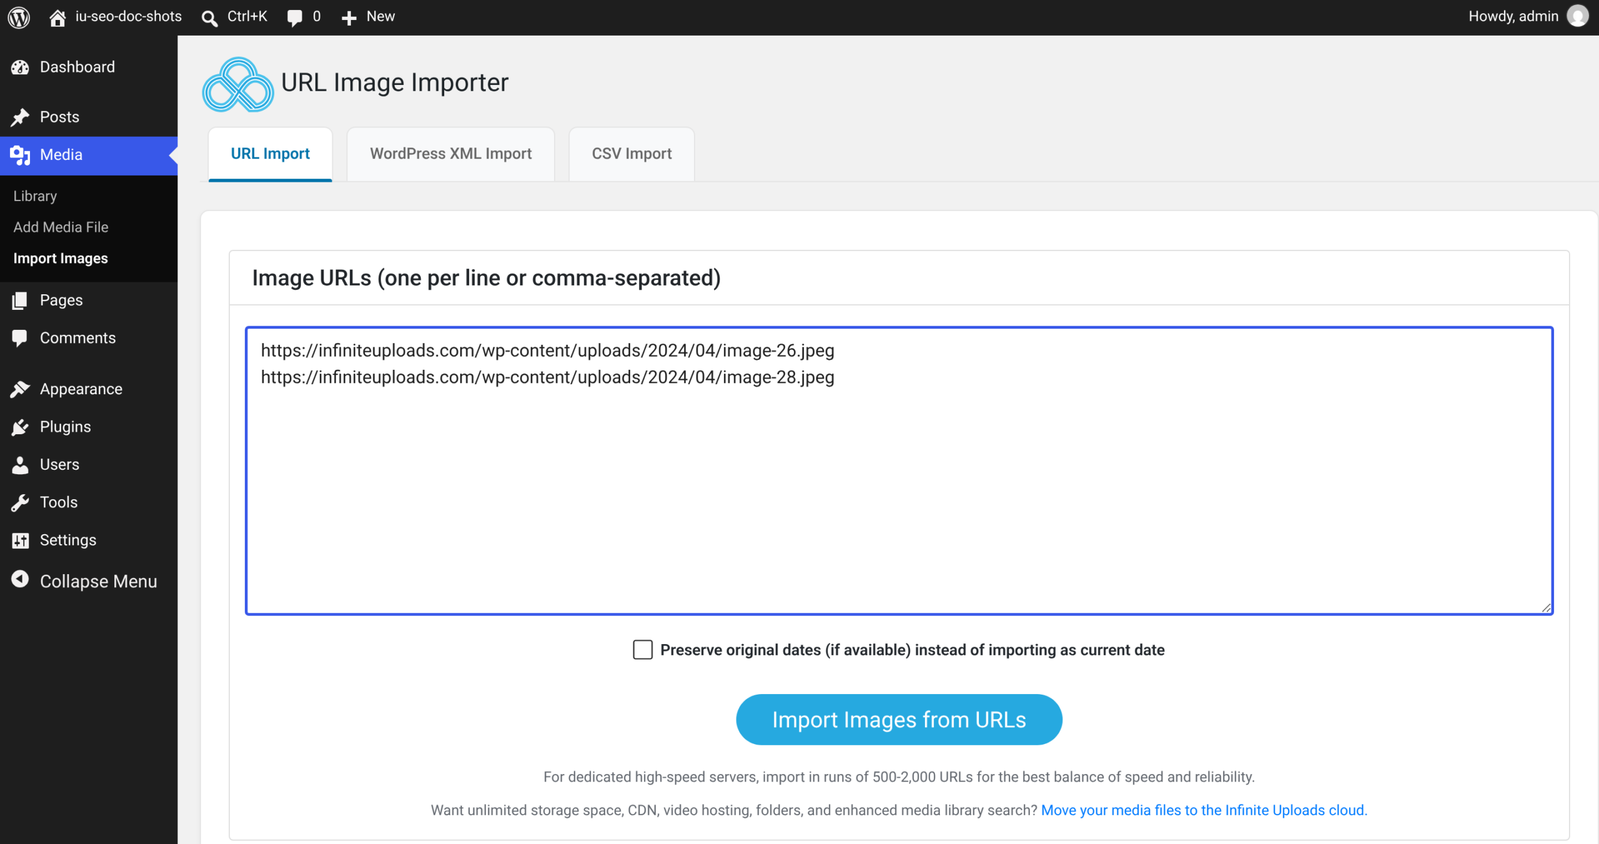
- Go to Media > Import Images.
- On the URL Import tab, paste the image URLs you want. One per line or comma-separated both work.
- Tick Preserve original dates (if available) instead of importing as current date if you want imported images to keep their original dates. Leave it off to date them today.
- Click Import Images from URLs.
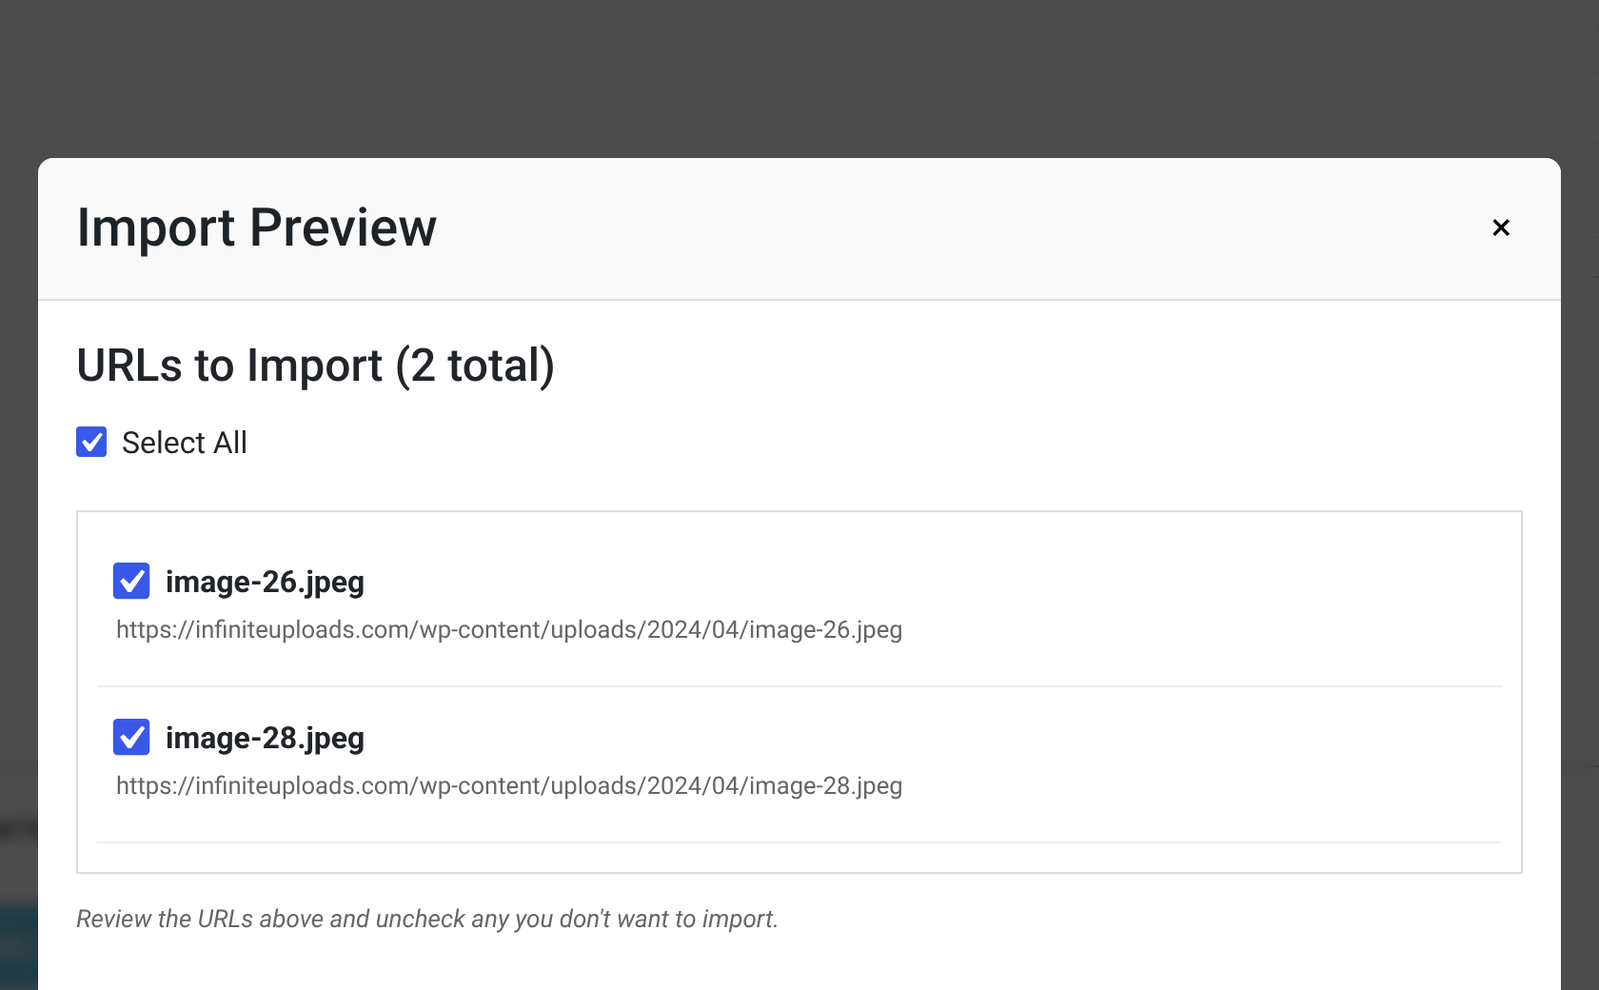
- Review the Import Preview, untick anything you don't want, and click Import Selected Items.
- Watch the progress bar. When it finishes, the results show how many images were a success, failed or skipped.
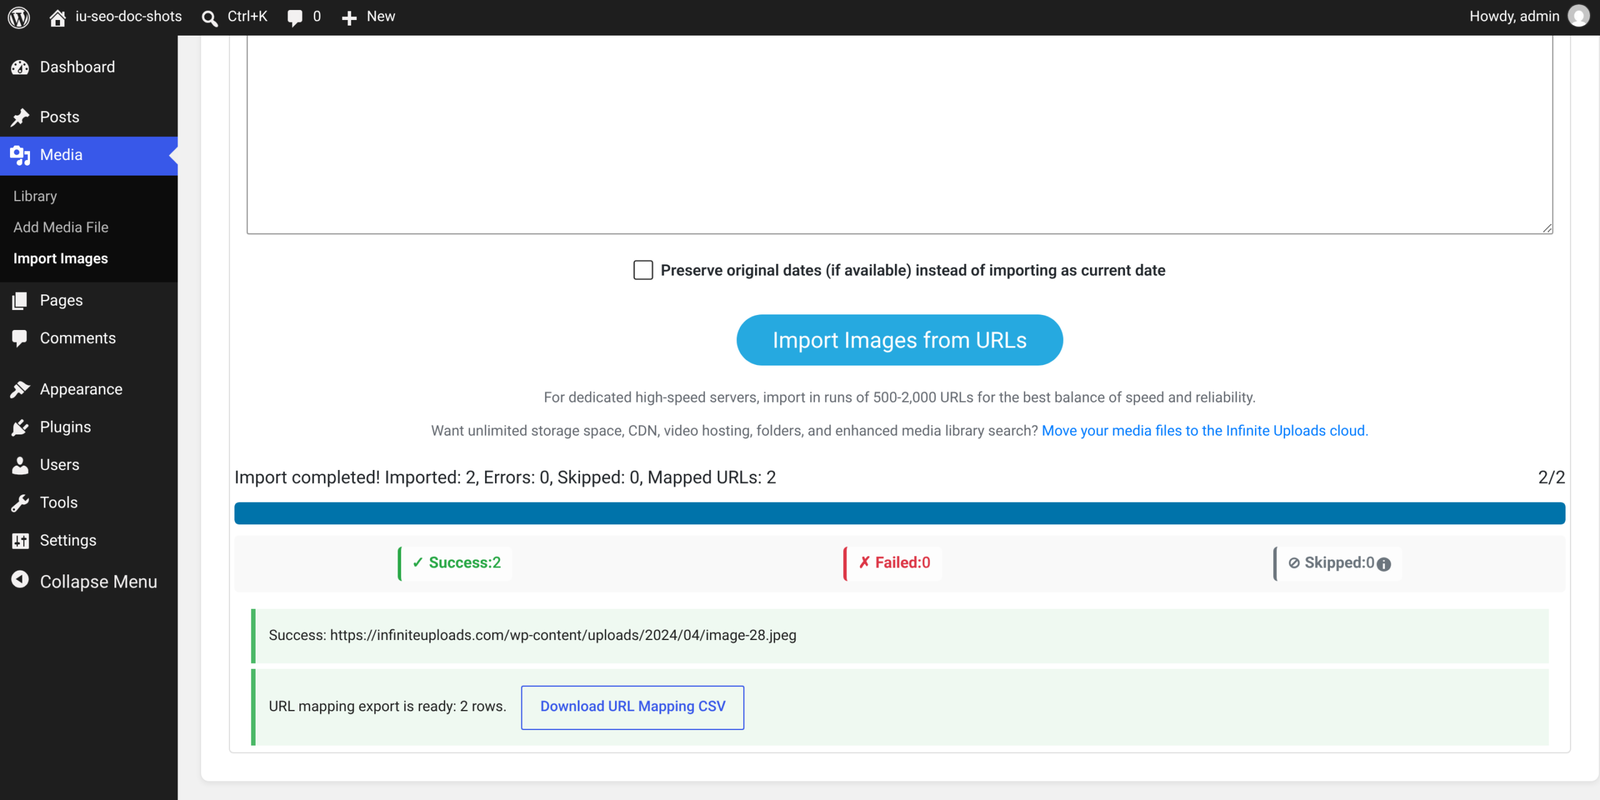
Skipped means the plugin passed on that item. The usual reasons are that a file with the same name is already in your Media Library, the URL was empty or invalid, or the file wasn't an image. Failed means the download or save didn't work. The results list shows which is which, so you can fix those and rerun. The import screen also has a Force re-import checkbox for when you really do want a second copy.

Import Images in Bulk from a CSV or a WordPress XML Export
Pasting works for a handful of links. For a real migration, use the other two tabs.
- CSV Import. Upload a .csv file with a
urlcolumn. The optional columns aretitle,description,alt_textanddate. Click Download Sample CSV on that tab to get a template. Filling inalt_texthere saves you from adding it image by image later. - WordPress XML Import. Upload a standard export file from Tools > Export on the old site. The plugin finds the image attachments in the file and downloads them into your Media Library.
For long lists, the plugin's listing suggests running 500 to 2,000 URLs per run on a dedicated high-speed server, which keeps speed and reliability balanced. File size is limited by your server's maximum upload size, and Big File Uploads can lift that limit. The full feature list lives on the plugin's WordPress.org page.
What It Can and Can't Import
- It can import JPEG, PNG, GIF, ICO, WebP and SVG files from public URLs, CSV rows, WordPress XML exports and public Google Drive image links.
- It can't import videos, private or login-protected files, Google Drive folders, or Docs, Sheets and Slides. Those get skipped.
Attaching Imported Images to Blog Posts
Here's the part people trip on. Importing puts the files in your Media Library. It doesn't edit your posts, so they keep pointing at the old addresses until you swap them.
For a few posts, do it by hand:
- Open the post.
- Find the externally hosted image and click it.
- In the block editor (Gutenberg), choose Replace and pick the imported file from your Media Library. In the Classic Editor, delete the old image and insert the new one with Add Media.
- Click Update.
For hundreds of posts, use the URL mapping CSV. Its two columns are Old URL (external) and New URL (local WP), which is exactly the find-and-replace list a database search and replace tool wants. Take a full backup first, and run a dry run if your tool offers one.
Manual Method: Importing Blog Posts with External Images
If you only have a few posts, you can skip the plugin. It takes extra effort, but every image ends up in your Media Library and shows correctly in your content. There are two parts: WordPress's built-in Import tool, and adding images by hand.
Importing Blog Posts Using the WordPress Import Tool
WordPress includes a built-in importer that brings in posts from an XML export file. It's handy when you're moving content from another WordPress site. Here's how:
- Go to your WordPress dashboard and open Tools > Import.
- Choose WordPress and install the importer if it isn't already active.
- Upload your XML file, which contains your blog posts.
- Assign authors so the imported content has the right owner.
- Tick Download and import file attachments and submit.

That last checkbox matters. WordPress's own documentation says you can import attachments by checking it, so the importer will download media attachments that are in the export file (see Importing Content on WordPress.org). What it won't do is grab images that were only hotlinked inside post content with no attachment in the export. Those stay on their old URLs.
Limitations of the WordPress Importer Tool
It does bring in your posts, but it has two problems:
- Slow imports and timeouts. You have to export an XML file and then import it, and a 6 MB XML file (large, to be fair) timed out for us. That was a clean WordPress install with plenty of processing power.
- No control. The only filter is the date range when you export. There's no granular control over what gets imported.

Adding Images Manually
When the importer leaves images behind, the fallback is downloading and uploading them yourself. It's the safest way to be sure every image is on your site. I've uploaded content in bulk this way before, and it can take forever and time out. Then I'm left wondering what actually uploaded, what didn't, and where to start again. Drag and drop into the Media Library is even worse.
Steps to Manually Add Images from External URLs
- Download the images from the original source by right-clicking each one and saving it.
- Re-upload them under Media > Add New.
- Update the image URLs in your posts by replacing each old external link with the new Media Library file.
Drawbacks of the Manual Image Upload Method
- It's extremely time-consuming for bulk imports, especially with hundreds of posts.
- It's easy to miss images, which leaves broken links.
- It doesn't scale to large migrations.
- Your server has to process every file as you upload it.
Is There an Easier Way?
If you're importing dozens or hundreds of images, yes. The short answer near the top of this page is the quick route. Read on for what to do once the images are in.
Advanced Tips for Optimizing Imported Images
Images pulled from other sites are often huge, and big files drag your pages down. The importer saves each file through WordPress's standard attachment process, and the auto-compress setting in Smush runs on that same process. Turn on Automatically compress my images on upload before you import and your new images get compressed as they arrive.

Importing lots of images?
Here's the quiet cost of a big import: every file lands on your host's disk. A few thousand images later, your hosting plan is full and the upgrade email arrives.
Infinite Uploads keeps those files off your server. It copies your Media Library to cloud storage, rewrites the URLs to point at the copies, and serves them through a CDN with 119+ locations. URL Image Importer can also import straight into a connected Infinite Uploads account. What you get:
- Your Media Library offloaded to the cloud, so imports don't fill your host's disk
- A built-in CDN across 119+ locations for faster image delivery
- Unlimited uploads and unlimited sites on every plan
- Fixed plan pricing instead of surprise hosting upgrades
- WordPress video hosting and a player through Infinite Uploads Video Cloud
Stop Importing Images onto Your Own Server
Plans start at $8.25/mo billed yearly ($99/yr) for 25 GB of storage and 50 GB of CDN bandwidth, and you can try any plan free for 7 days.