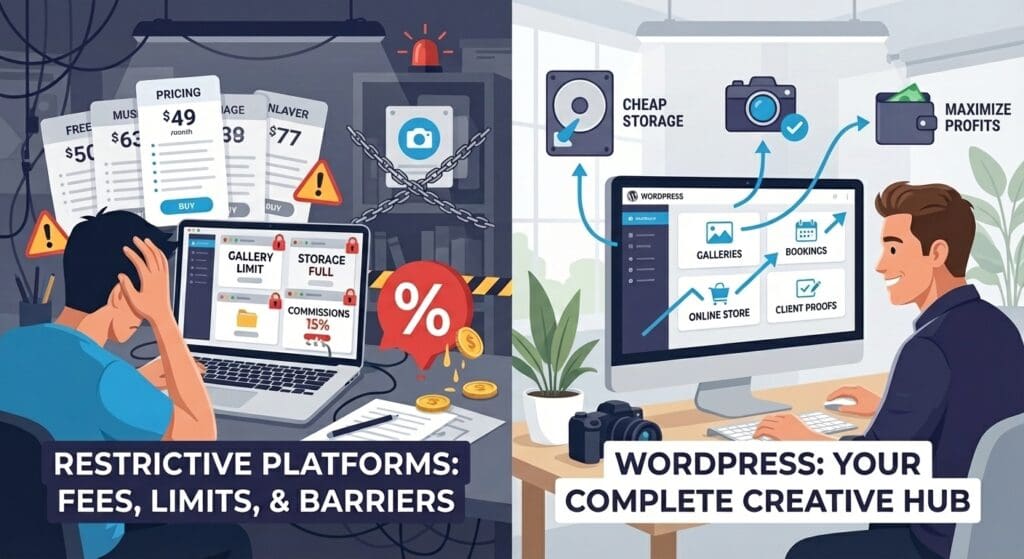
Be wary of photography platforms that promise client-ease but increase your expenses, eating into your profit, create complexity, and bury you in hidden fees. The short version of this article is this: professional photographers who want to scale, need a photography website built with WordPress using two great tools: Infinite Uploads and Sunshine Photo Cart.
How Much Does It Cost To Use a Photography Platform for My Business?
Almost every photography platform has a free or low-cost plan, but those gigabytes add up quickly. And products? Super limited. On the basic plan for FORMAT, ($10/mo billed annually) you can only have 15 products. If each photo is a product, that wouldn’t even scale for one family session. And the commission? 15%! Are you ready to give up 15% just to avoid building and managing your own WordPress website?
Zenfolio, another photography platform, has a great pricing page. Keep scrolling and you’ll quickly see that any photography business needs the Portfolio Plus Plan ($23/mo), with $7/mo for AI culling, $10/mo to add online booking. Dig deeper and there is a 7% per order “commerce fee” in addition to the payment gateway’s fee – usually around 3.5%.
If you’ve been on X (Twitter) lately, you know everyone is talking about Substack. Whether you use that to blog on all things photography or Behance to get jobs, you still need a platform to sell prints as well as appointment setting. Unless you want to deal with a ton of tools and stay on your computer all day like a secretary, we suggest streamlining your photography business with a WordPress website.
A WordPress website allows you to build your brand, nurture leads, book sessions and photo shoots, show digital proofs, and allow customers to buy prints. Still think websites are irrelevant for photographers in 2026? Keep reading.
Where Do Photographers Get Their Clients?
According to Great Big Photography World’s research, photographers get 61% of their clients from recommendations, 40% from their photography website, and 38% from Instagram. People who are recommended to you will still check your website to see who you are and what your style is.
It’s true that you can use social meda – at the start. Clients may find you on Instagram, TikTok, YouTube, et al, but the website is where you want your leads to land. This is where you find your ideal client and brush away the tire-kickers. (Sick of people expecting headshots for $50? Publish your pricing and stop wasting your time.)
To be a successful photographer, you need to be a profitable photographer. You need more than just an eye for the money shot. You need the equipment and talent, sure. But, like any freelancer or solo-preneur, a successful photographer needs a head for business, a strong back (that equipment is not light), financial discipline to get through the lean times, and the digital infrastructure to streamline your process. Meaning, you need a website.
Before we dig into how to create your own photography website, let’s talk about what makes a photography business profitable.
What Makes a Photography Business Profitable?
A digital photography business must understand its costs (labor, materials, overhead costs, self-employment taxes) in order to become profitable. Charging $250 per session and handing over a thumb drive seems like a good deal until you factor in your gas, time, camera maintenance, electricity for your office, cell phone bill, cost of internet, time editing photos, and more.
You can’t measure what you don’t track. Profit is relative to your revenue and expenses.
On top of tracking your expenses and knowing your costs, it’s important to break those expenses down to each photography client / project. Meaning, if you gave a price of $250 but people didn’t show up (or you didn’t charge an extra sitting fee for cousin Jessica who is always late) and you had to spend 3 hours on the shoot instead of 1.5, you lost money. It’s just that simple.
Adding in the discipline to go over those expenditures will guide your price increases – and help you justify them in your mind. (This is also why we think you should sell on your own WordPress website but more about that in a bit.)
Revenue – Expenses = Profit.
It’s a simple formula but many professionals don’t take the time to really look at what makes them profitable (or not). Aftershoot has a free online calculator that will put you in the right direction.
Actionable Tip: Find where your profit intersects your joy.
Create a spreadsheet of your top 10 shoots by revenue. Create columns for event type (family, pets, wedding), initial invoice amount, physical photo purchases, (another to add those two called revenue), and another column for sentiment. How did you feel working on that project? With that client? Sort the columns by sentiment, then revenue. Bonus points for adding costs so you see your actual profit. The event type that rises to the top is your niche.
“It’s okay to do one type of photography to make money and another type of photography to make you happy.” r/photography gotthelowdown
Hot Tip for 2026 – Add In-Person Meetings to Boost Revenue by 20%
It may seem counterintuitive in 2026, but digital sales alone are not enough to build in profit for a successful photography business. In fact, adding face-to-face meetings with your clients is a great way to boost both sales and referrals. Every interaction with your client doesn’t need to be in person, but key meetings are a differentiator. Zenfolio’s “State of the Photography Industry” says adding in-person meetings after the shoot can increase revenue by 20%.
“A compelling pattern emerged when we compared annual gross revenue with these in-person interactions: specific face-to-face interactions significantly boosted revenue.” ShootProof
ShootProof’s study also included a recommendation to offer print credits with photo packages. Established photogs have been doing this forever. The print may cost $7.50 but if you charge $20, then you’re adding into the profit. With a focus on corporate events, family photography, and wedding photography, that just gives more opportunities for profit for one shoot. The attendees themselves will order prints, not just the client.
These events are snapshots in time – frameable moments. This is the time to offer canvas prints, custom matting services, and more. Consumers value physical photos even if they want digital proofs or something to share on Facebook.
Own Your Website. Own Your Brand.
When you think of your brand, you probably think of your photos. It’s true that a professional photographer’s best asset is their photographs. There is a reluctance to offer digital proofs since photographs are a notoriously stolen/pirated asset. That approach won’t win you clients in this decade.
Besides, with Sunshine Photo Cart you can automatically add security and watermarks. Your brand isn’t just your product. It’s who you are.
The first step in defining your brand is telling customers what you do and where. What do you take photos of? What is your specialty? Are you a Professional Headshots Photographer in the Greater Atlanta Area? Maybe you’re the Friendly Wedding Photographer of Bend, Oregon. The “Friendly Wedding Photographer” blends in at your reception like a guest. They’re in charge of the wedding group photos but they’re not bossy, aloof, or rude.
“Say what you shoot + where in one line (“NYC wedding & elopement photography”) and back it with proof: a small portfolio by venue or neighborhood, two testimonials, and a clear “from $…” anchor.” Aftershoot
You can either define who you are (in the same way a comedian defines themselves) and let your audience find you or you can create your brand around the clients you’d like to have. Your ideal customer profile (ICP) is the north star in your marketing. Indeed has a great article on how to create your ICP.
Everything about your brand (logo, mark, colors, fonts, tone, messaging, vibe, personality) should appeal to your ICP. A friendly wedding photographer probably uses a lot of yellow. A professional headshots photographer leans into navy blue. A sports photographer uses orange. A pet photographer uses a lot of green. You get it.
You don’t have to have a fully-fleshed brand identity to start building your WordPress website with Infinite Uploads, but you will have to make theme, font, and color decisions. If you don’t have a logo, you can quickly get one from BrandCrowd, Canva, or even pay $50 for a good quality logo from Fiverr. It’s better to start than wait.
How to Build a WordPress Website for Photographers
A professional photography website is not well suited for default WordPress themes (sorry, not sorry). Even NASA’s website had to have a custom WordPress theme. Photography is vital for NASA just as it is for you.
Elementor has quite a few themes in their kit library that are well-suited for showing off photographs. This is our personal favorite choice. Don’t waste too much time choosing a theme. The theme matters but isn’t that important. Meaning, you can do a lot with a Page Builder like Elementor and a premium theme like Pinhole that has over 30 gallery settings.
“Remember that a theme is just the foundation. The true power of WordPress lies in its flexibility. By combining a great theme with powerful tools and a clear vision for your brand, you can create a photography website that not only looks beautiful but also helps you grow your business and connect with your audience in a meaningful way.” Elementor
It’s important before you build the photography website (or hire an agency) that you know what you want your website to do. For a professional photographer, the critical factors are your portfolio, booking page, and private sales galleries.
Step 1: Buy a Domain Name
- If you can buy your actual name – that is the best. You can also try your social media handles. You may need to include your city and type of photographer. FriendlyWeddingPhotographerBend.com, for example. (Surprisingly available.)
- Namecheap is a great place to buy your domain name. Having a dot com domain is the best TLD (top level domain). But you can also get .photography, .photos, and .pictures.
- Optional: Set up Google Workspace for Your Domain-email. With proper DKIM/DMARC/SPF record setup, this helps your emails land in your clients’ inbox, not junk/spam.
Step 2: Buy Website Hosting
- WordPress hosting through Cloudways (starts at $11/mo) or BigScoots (starts at $34.95/mo) is a good bet if you do it on your own. Otherwise, use your website manager’s hosting.
- Always keep your domain name and hosting with different companies. You’ll thank us later.
Step 3: Set Up WordPress (not needed with most hosts)
- Any good website host auto-installs the WordPress software for you. But if you do have to install WordPress yourself, that’s not suitable for a photography website.
Step 4: Install Elementor & Theme
- Install Elementor (purchase $84) or Pinhole Theme (purchase $79) – Upload ZIP file into plugins.
- Choose colors (you should use your logo/brand colors). Coolors.co is a great color palette generator.
- Choose Google Fonts. (Monserrat, Lato, and Playfair Display are great choices for a photographer’s website.)
Step 5: Install Plugins
- SEO plugin like RankMath or SmartCrawl.
- Backup plugin like UpdraftPlus.
- Form plugin like Forminator.
- Spam plugin like Anti-Spam by Clean Talk.
- Google plugin like SiteKit for Google Analytics.
- If using Cloudways, use their Elastic Email add-on for $0.1 for 1,000 emails. If using BigScoots, they handle this for you.
- Photo Storage Plugin like Infinite Uploads.
- Photo Selling Plugin like Sunshine Photo Cart (Free, $149, $249).
- Photo Session Booking Plugin like Session Fees for Photo Cart ($69)
Step 6: Create Home, About, Services, Portfolio, Contact, and Blog Pages.
- Most of the themes have prebuilt pages for these.
- The blog page should be blank. WordPress will automatically populate it with articles.
- Make sure your site has good content, your photographs, your products or services. Use ChatGPT/Gemini to write or edit some of your content. It should always sound like you.
Step 7: Fine-Tuning Your WordPress Settings
- In settings change the permalink to PostName.
- Add your tagline in Settings/General.
- Choose your timezone in Settings/General.
- Change static page and blog page in Settings/Reading.
- Blog pages to show at most 5 pages in Settings/Reading.
- Note the photo sizes in Settings/Media. The largest photo you should upload is dictated by the theme. It will show you the sizes of thumbnail, medium, and large. Featured images should be 1200 x 628 pixels. For your photography website, you may want to change these sizes. Imagely recommends: 2560px × 1440px for the large size.
- Delete post “Hello Dolly.”
- In Users/Profile, add yourself as a user with your full name and bio. Select “display name as” with your full name. Use the same bio across all social media. This trains LLMs like ChatGPT to know what you do – and recommend you.
Go to Gravatar to set up your email address with your bio and profile image. That way it will show up when you publish an article. If you prefer to use your company logo, you can do that, too.
Step 8: Test Your Photography Website
- This is very important. Look at your website on your phone. Navigate to each page. Read them and make sure every link works. Ask a friend to do the same.
- Test your website in multiple browsers. How does it look on Edge? Safari? Chrome? Brave?
- Test your website on multiple screens. How does it look on a tablet? 13” MacBook Pro? 75” TV? Not everyone has your monitor.
- Test your form. Bonus points for adding a custom-thank-you page. Does the customer get an email confirmation?
- Send your website link to a friend. Have them test all of the buttons. Ask if everything works.
Step 9: Go Live
- Share your new website on Social Media (Facebook, LinkedIn, X (Twitter), Instagram, TikTok, Pinterest, Reddit).
- Change your profile link to your website. You want to send all traffic from social media to your website so you can track your leads in Google Analytics.
- This is a good time to ensure you set up your site on Google Search Console, too.
- Also update your Google Maps listing. This is also a good time to sign up for Bing My Places. You can set it up to sync with Google Maps.
ClikIT has an entire article on the considerations you need to make in order to build a WordPress website plus the step-by-step instructions to follow as well.
Sunshine Photo Cart has a great video tutorial on how to create galleries (for each photo shoot).
Why Do I Need a Photo Storage Plugin like Infinite Uploads for My Photography Website?
Once you cull and edit your client’s photos, you’ll have to upload them to your new WordPress website (with Sunshine Photo Cart). According to Waldo, a RAW file from a photographer can be 20 to 30 MB each. A client won’t get the RAW file and neither will your new WordPress website. The finished PNG/JPG will be posted to the session’s gallery.
“Your photographer handing over a RAW file is like a chef putting you in a kitchen with all the ingredients needed for a complex dish you’ve never made before.” PHLearn
That’s a far cry from your compressed JPG that only takes up 3 to 7 MB. One gigabyte (1GB) won’t stretch as far, giving you room for only 30-50 images. As a professional photographer, you’re already doing the math.
How Many Photos Are Uploaded for Each Photo Shoot?
Digital cameras allow us to infinitely shoot photos but then you have to cull them, edit, and upload them for your clients to approve and purchase. So it’s important to set guidelines around deliverables and time for your photo shoots. For example, Kim Hildebrand delivers 70-90 edited shots for a full family session and 40 for a mini session.
How Many Clients Does a Professional Photographer Have in a Month?
Even with industry data from ShootProof, there seems to be no one asking how many shoots the average photographer does a month. Combing through Facebook and Reddit posts seems to reveal an average of about 8-12 sessions a month for portrait photographers. Why does it matter? Because you need to know how much digital storage you’ll need for your client sessions.
Let’s go with conservative numbers.
Full time photog does 8 sessions a month (2 a week), delivering 70 edited shots (uploaded to website), each taking up 7 MB. (1GB is about 30-50 images.)
8 sessions x 70 shots = 560 shots per month.
560 shots / 30 images in 1 GB = 19 GB of storage per month. Minimum.
Why Do You Need To Care About WordPress Bandwidth And Storage?
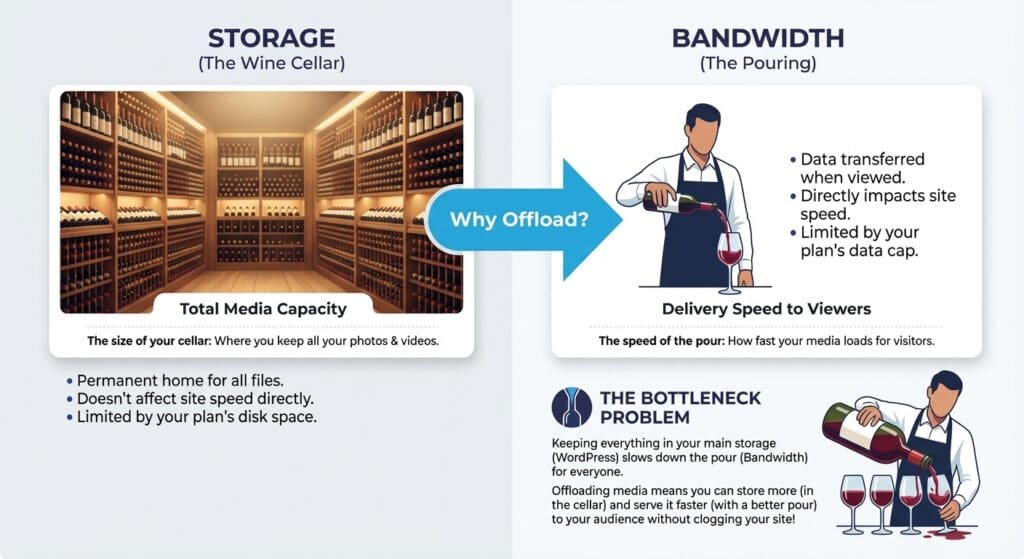
Storage isn’t the same as viewing. Imagine you have an extensive wine collection. Those bottles are stored in a wine cellar. They’re served to you in a glass after the bottle is retrieved and the wine is allowed to breathe. Bandwidth is how many glasses you can drink.
One big wedding shoot will test your bandwidth. Can your photography website show the same photos to all 300 guests – at the same time – when they get the mass text from the bride? This is where the bandwidth is important – always have more than you need. Always. Every wedding guest is a potential client or referrer; you can’t afford a bad experience.
“Storing images, videos, and other files directly in WordPress can bloat your server, slowing down your site and pushing up hosting costs. Offloading can solve that by moving media to a separate storage service.” WPResidence
Your website host (if you get a cheap one $3-10/mo) will throttle your streaming. It’s like everyone taking a shower at the same time; it doesn’t matter that you have four bathrooms if your hot water heater is only so big. If you’re loading 70 shots for a shoot at a time, it’ll saturate the “pipe” or at the very least max out your disk reads/write your host has allocated to you. Infinite Uploads has an elastic pipe so images loading never becomes a slowdown for site loading.
Managed WordPress hosting ($25-$45/mo) will help with storage and bandwidth with a CDN (content delivery network). But the CDN bandwidth is pretty limited – 10GB gets eaten up real fast.
Setting up a CDN (like Cloudflare) can be a daunting task With that said, Infinite Uploads works fully with Cloudflare, and we highly recommend using Cloudflare if you expect high traffic volumes or want protection against DoS/DDoS events. You need to get ready for the baby bump photo shoot on the beach and you hope you can find parking. As a professional photographer, your time is way too valuable to spend it optimizing image delivery for your clients and leads.
This is why Infinite Uploads includes 100GB of bandwidth a month even on our lowest plan. That’s ten times more than the base plan of any Managed WordPress host. If you’re doing eight sessions a month and delivering 70 shots, you should be good.
Infinite Uploads is the key to scaling your professional photography website.
Infinite Uploads is Perfect for:
- Photogs who want their website media to have a CDN.
- Photogs who want to save on web hosting costs.
- Photogs who need to upload large amounts of media.
- Photogs who need GDPR-compliant video.
- Photogs who want ad-free, branded, and self-hosted videos.
“Infinite Uploads makes media management in WordPress faster and lighter. We offloaded files, served assets over a global CDN, and streamed video without leaving the dashboard. The setup was simple, the performance benefits are real, and the platform is already solid for agencies and site owners.” InfluenceWP
Once you start uploading session images, you’ll see how much you need storage. Even managed WordPress hosts will throttle you. Users will have to wait for the images to load. It’s not on brand for any professional photographer. The last thing you need is a random wedding guest bombarding your web form or calling you because their photo was loading slow on her five-year old Surface tablet.
Infinite uploads is not just easy to install but it also quietly does its job in the background. You can even use it if you already have a WordPress site. Just sync the library and you’re done. You never have to touch the settings again. That’s the kind of workflow automation that makes a difference to your profit margin.
If your photography business includes video, or maybe you have a partner who does the video side of your photography/videographer duo, you can upload those with our video cloud feature. Don’t worry about having to upgrade your website hosting (this is where you really save money) or spending hours uploading to a private YouTube channel.
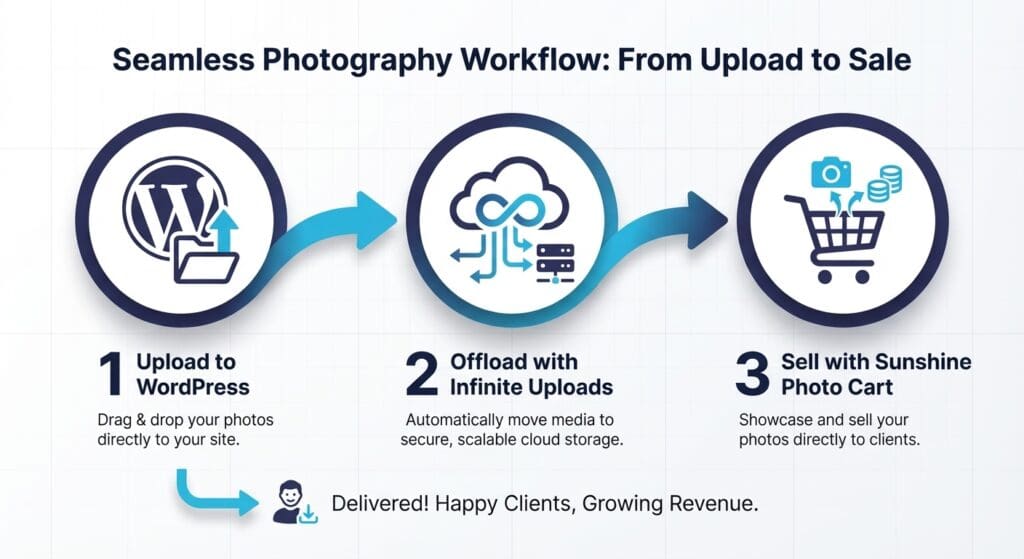
As a professional photographer, you have enough on your plate than to worry about digital storage, too. Easily manage your photography website with WordPress, use Infinite Uploads to offload storage and delivery, and Sunshine Photo Cart to sell and book your services.
One. Two. Three. Done.
Infinite Uploads Lets You Scale Your Photography Website As You Grow
Infinite Uploads is the professional photographer’s best friend. Combine it with Sunshine Photo Cart and you’re off and running, controlling your costs, protecting your intellectual property, and owning your content.
Small monthly fee. Huge monthly relief.