The WordPress Media Library is the screen under Media > Library in your dashboard where every image, video, audio file, and document you upload is stored, searched, edited, and inserted into content. The files themselves live in the wp-content/uploads folder on your server; the library is the index WordPress keeps of them.
This guide covers how the library works, where files are stored, how to organize and clean it up, how to fix upload errors and missing images, and when to move a growing library to cloud storage.
What Is the WordPress Media Library?
The WordPress media library serves as the central hub for managing all media files on a website, including images, videos, audio files, PDFs, and other documents. It provides a streamlined way to upload, organize, and retrieve media, allowing users to insert files into posts and pages without needing to re-upload them.
Beyond simple storage, the media library includes built-in tools for editing images, such as cropping, rotating, and resizing, ensuring quick adjustments without external software. It also allows users to add metadata like titles, descriptions, and alt text, improving both SEO and accessibility. Multiple image sizes are automatically generated upon upload, optimizing performance across different display needs.
Seamlessly integrated with the WordPress editor, the media library makes it easy to access and insert media into content. Search and filtering by media type and date help you manage large collections of files. WordPress added the Media Library in version 2.5 in March 2008; before that, files went up by FTP with no central index.
Where WordPress Stores Media Files
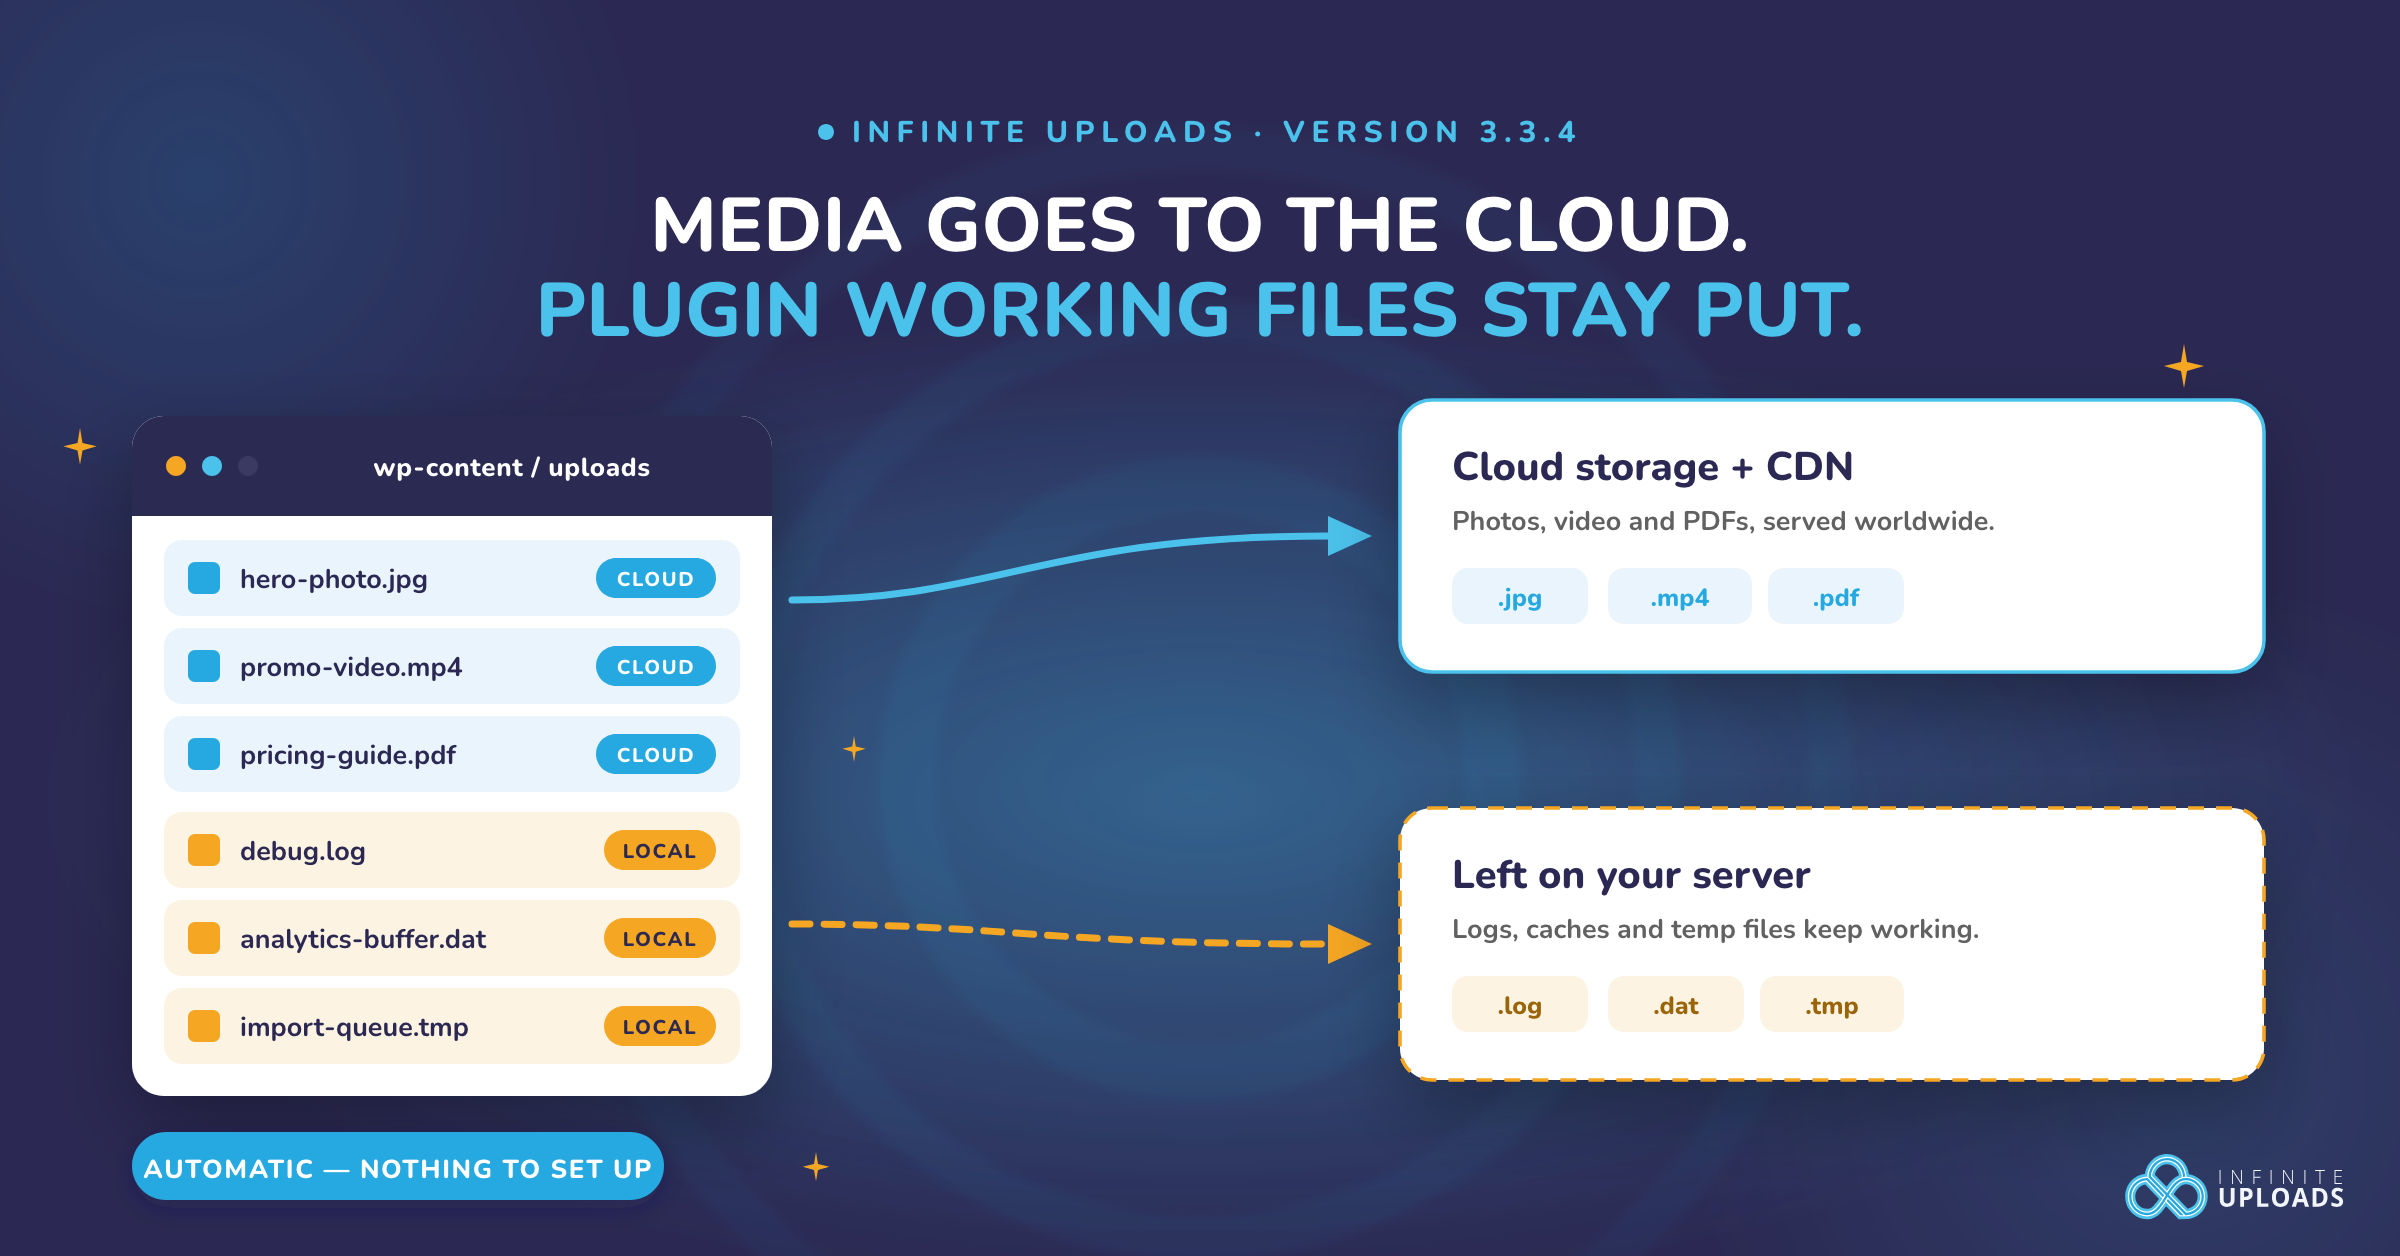
Every upload goes into wp-content/uploads, sorted into year and month folders by default (for example /wp-content/uploads/2026/09/). WordPress also creates several resized copies of each image (thumbnail, medium, large, and any sizes your theme registers), so one upload often means five or more files on disk.
The Media Library screen does not show that folder structure. It lists attachment records from the database, and each record points at the original file. Files copied into the uploads folder by FTP will not appear in the library until they are imported. For the folder’s settings, how to move it, and how it grows, see the guide to wp-content/uploads.
Why an Organized Media Library Matters
Organization saves editor time and prevents mistakes. It does not, by itself, make pages load faster.
- Improved Searchability: With a well-organized media library, you can quickly find the files you need, saving you time and reducing frustration. By using media library folders and tags, you can streamline your search process and enhance your productivity.
- Enhanced Collaboration: When multiple users have access to your website, an organized media library makes it easier for them to find and use the files they need. Media library folders and categories ensure that everyone on your team can locate the necessary media files without confusion.
- Faster Editorial Workflows: Folder organization can reduce duplicate uploads and time spent searching, but it does not improve front-end page speed by itself. Compression, responsive images, lazy loading, offload, and CDN delivery address performance.
- Reduced Errors: When files are organized, you’re less likely to accidentally delete or overwrite important files. Using a structured folder system helps prevent these costly mistakes and ensures that your media files remain intact.
- Better Metadata and Accessibility: Descriptive filenames, alt text, captions, and attachment details can improve accessibility and content understanding. Private organizational folders are not an SEO signal by themselves.
How to Access the WordPress Media Library
1. From the WordPress Dashboard
- Log in to your WordPress admin panel (yourdomain.com/wp-admin).
- Click on “Media” in the left-hand menu.
- Select “Library” to view, search, and manage all uploaded media files.
2. When Editing a Post or Page
- Open Posts or Pages from the dashboard.
- Click “Add New” or edit an existing post/page.
- In the block editor (Gutenberg):
- Click the “+” button to add a new block.
- Select the Image, Gallery, or Video block.
- Click “Media Library” to select or upload a file.
- In the Classic Editor:
- Click the “Add Media” button above the text editor.
- The Media Library will open for selecting or uploading files.
3. When Uploading Media Directly
- Navigate to Media > Add New in the dashboard.
- Click “Select Files” or drag and drop media files to upload.
- After uploading, files will be stored in the Media Library.
4. Through the Customizer (for Themes and Widgets)
- Go to Appearance > Customize in the dashboard.
- Open sections like Site Identity, Header, or Background.
- Click “Select Image” to access the Media Library.
5. Using a Page Builder (Like Elementor, Divi, or WPBakery)
- When adding an image, background, or media file in a page builder, you can access the Media Library through the builder’s interface.
6. Through the WordPress REST API or FTP (Advanced Users)
- Developers can fetch media items via the WordPress REST API (/wp-json/wp/v2/media).
- You can also access media files via FTP or File Manager (/wp-content/uploads/), but this won’t display them in the Media Library.
Best Practices for Uploading Files
Uploading files to the WordPress Media Library might seem straightforward, but adopting specific best practices ensures your site remains optimized and user-friendly. First, whenever you upload images, videos, or any media content, it's essential to consider file sizes. Large files can slow down your site, negatively affecting user experience and SEO rankings. Tools and plugins are available that automatically compress files without sacrificing quality, maintaining fast loading times.
Moreover, proper naming conventions for your media files play a critical role in SEO and usability. Descriptive, keyword-rich file names improve your site's search engine visibility and make it easier to locate specific files within the Media Library. For videos and large documents, considering using cloud storage as an offsite repository can enhance your site's performance. Cloud storage integration not only secures your files but also streamlines backups and accessibility across devices.
Organizing Your Media Effectively

Using Folders and Categories
Optimizing your WordPress Media Library involves more than just uploading files; it includes effectively organizing your media for easy access and management using a media library folder. Utilizing folders is a fundamental step towards efficiency. By creating folders, you can categorize media files such as images, videos, and documents, keeping your library structured. Using a media library folders plugin can further improve organization within the WordPress Media Library by allowing you to create and manage folders for better categorization and tagging of media files. Plugins for WordPress allow you to manage these folders with a drag-and-drop interface, simplifying the process. Some even allow you to categorize folders, enhancing your ability to find specific files rapidly.
In parallel, implementing categories provides another layer of organization. While WordPress doesn’t inherently support media file categories, plugins like WP Media Category Management introduce this functionality. Categories permit a broad classification of media, enabling you to group files according to type, project, or any other parameter relevant to your website’s content strategy.
The Role of Tags in Media Organization
Tags in WordPress act as flexible identifiers that complement folders and categories. They allow you to assign multiple descriptive keywords to files, improving searchability within your Media Library. For instance, a single image could be tagged with “summer,” “beach,” and “vacation,” making it retrievable by any of these terms. This flexibility is invaluable for websites with extensive media libraries, offering a nuanced method of organization beyond the binary confinement of folders.
While WordPress core doesn't directly offer tagging capabilities for media, many WordPress media plugins do. They not only enable tagging but also can enhance the display of media on your site with aesthetically pleasing gallery layouts. Incorporating tags along with categories and folders ensures a robust, multi-dimensional approach to media organization, streamlining the process of managing and locating files within your WordPress Media Library.
Organizing Media Library Folders Without a Plugin
WordPress has no built-in folders in the library. Without a plugin you have three options: rely on the automatic year and month folders and the date filter, use the search box and the media-type filter, or set a custom upload path so new files land in a folder you name. None of these let you move an existing file between folders from the dashboard, and files moved by FTP break their URLs.
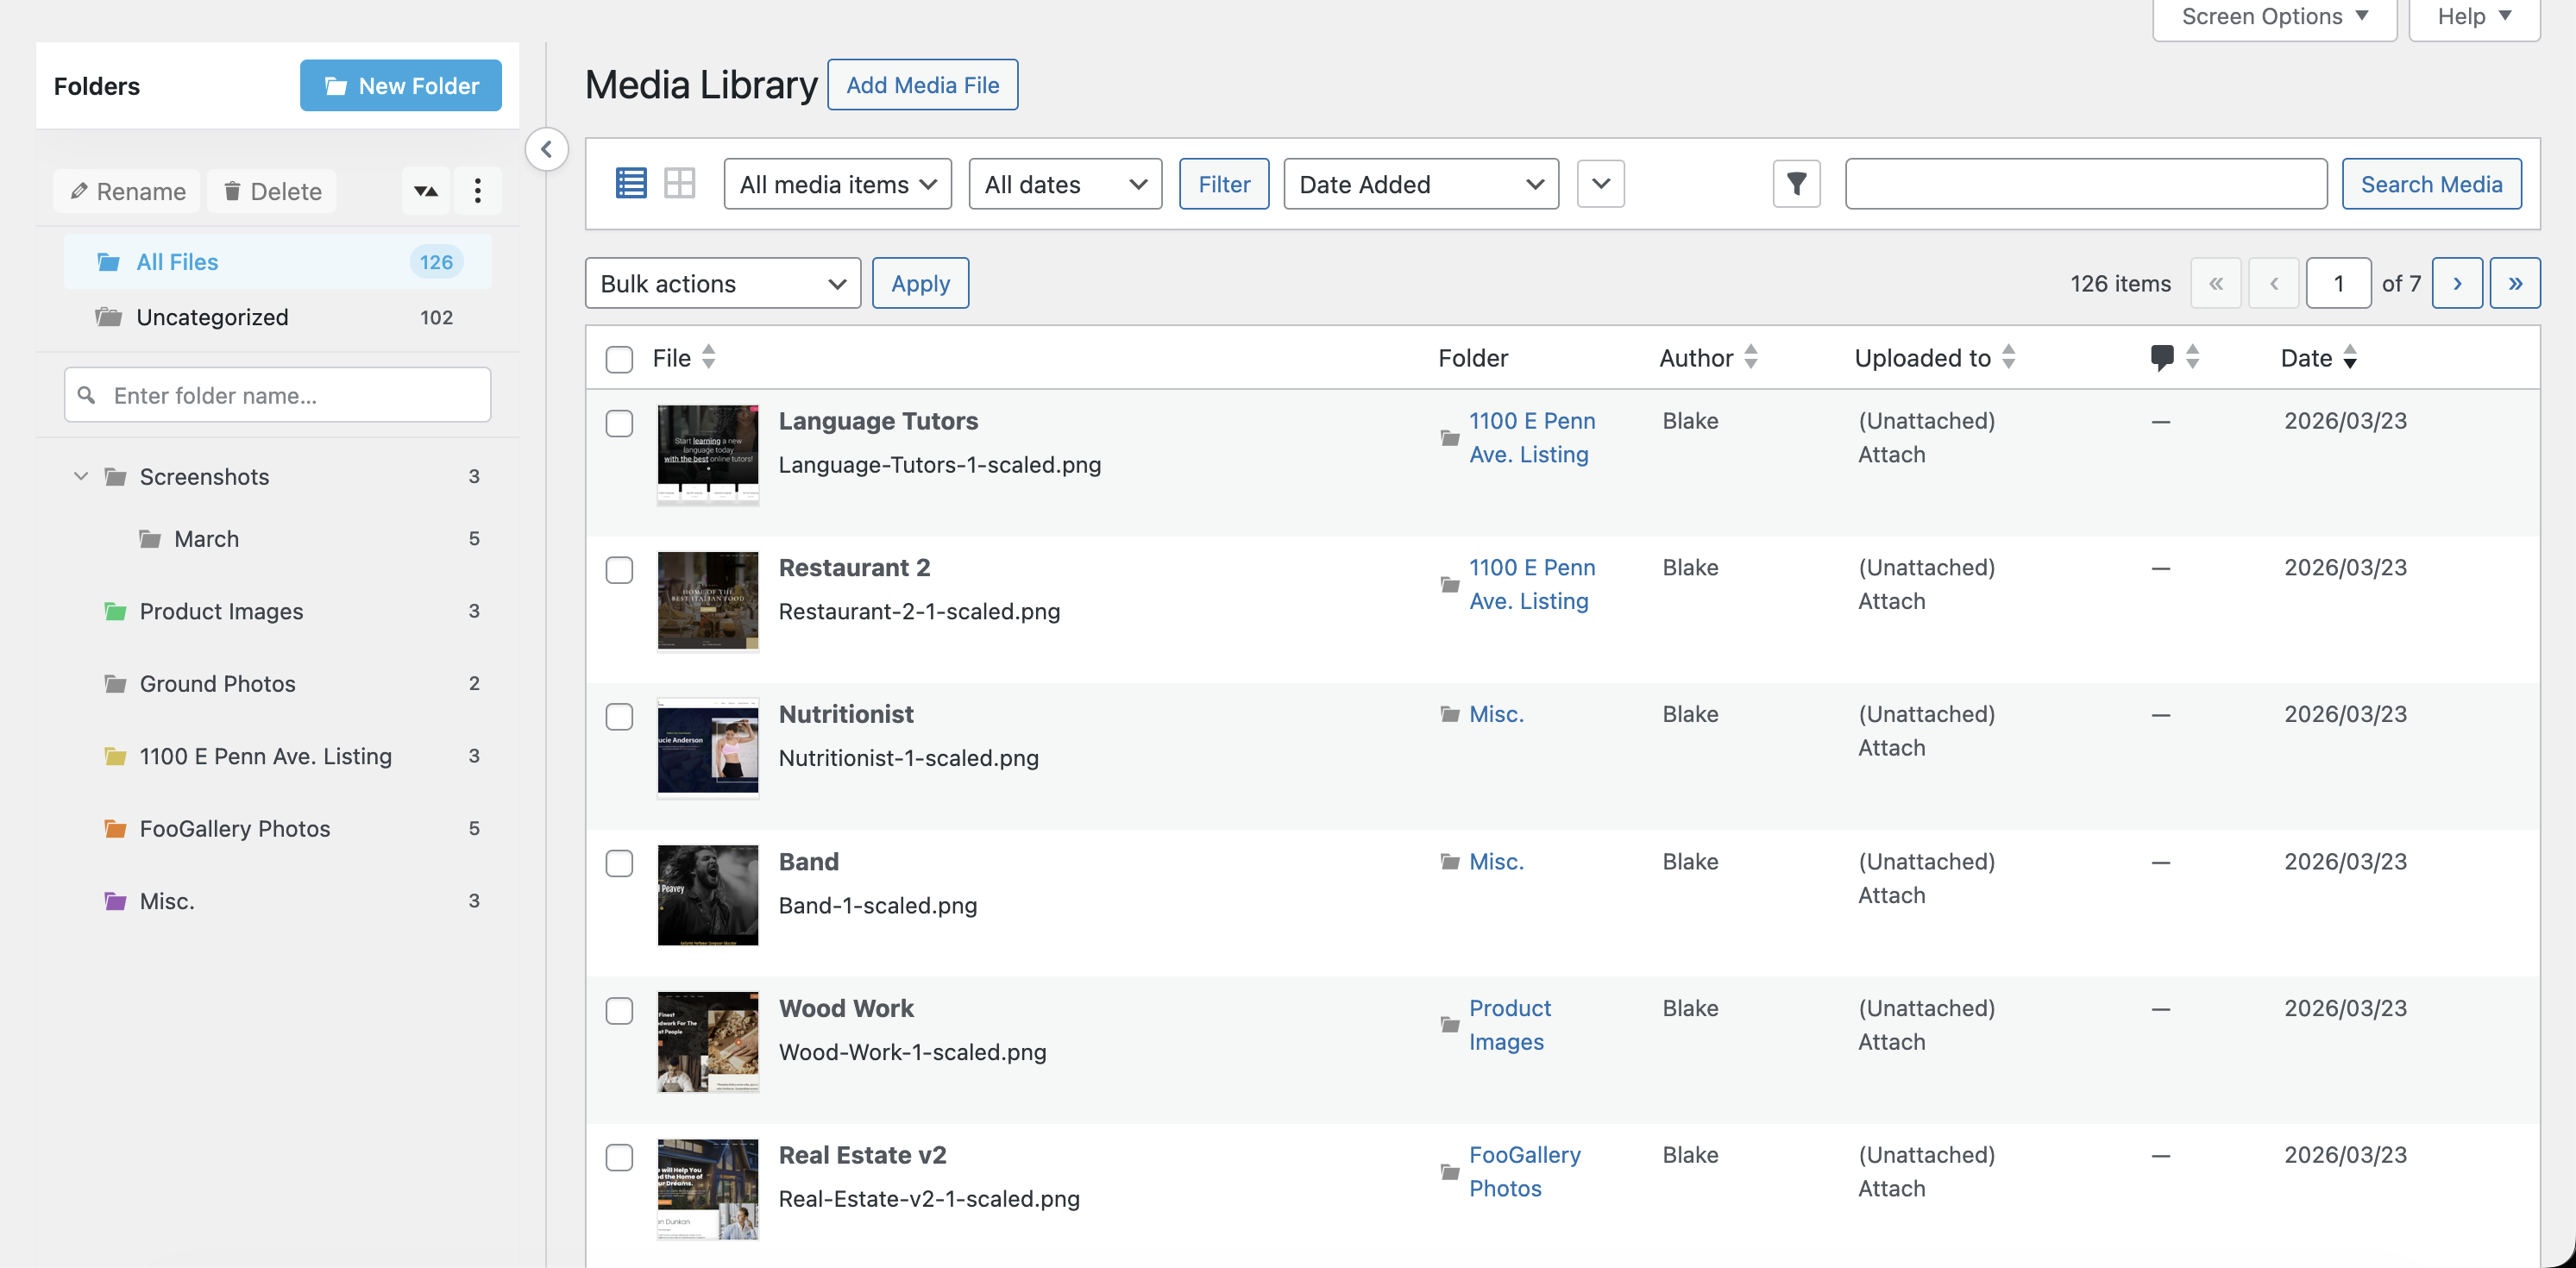
Every folder plugin in the list below, and the folders built into Infinite Uploads, creates virtual folders. They group attachment records without moving files, so URLs never change. That is the safe way to organize an established library.
Top WordPress Media Library Organization Plugins
1. Infinite Uploads – WordPress Media Library Folders
Infinite Uploads adds folder management, sorting, and search directly into your WordPress media library, so you don't need a separate plugin just to stay organized. Create folders and subfolders, drag and drop files between them, and sort by name, date, size, or file type to find what you need fast. The built-in search works across your entire library (local and cloud), making it easy to track down an image you uploaded six months ago without scrolling through hundreds of thumbnails. For agencies running dozens of client sites, this all comes included with every Infinite Uploads plan. No per-site folder plugin licenses, no extra costs, and no plugin conflicts to debug.
2. FileBird – WordPress Media Library Folders
FileBird transforms your WordPress media library management with its intuitive interface. By adding native icons, smooth drag & drop capabilities, dynamic galleries, and advanced sorting options, it significantly enhances file organization. This plugin makes it much easier to manage multiple media files, insert images into Gutenberg blocks, swiftly locate older files, and eliminate unnecessary media, ensuring a clutter-free library that supports efficient uploads and easy access to videos and images.
3. CatFolders – WP Media Folders
CatFolders allows for the effortless organization and management of your WordPress files. This plugin stands out for its speed, flexibility, and professional-grade features, making managing uploads, including videos and images, seamless. With CatFolders, you gain the capability to structure your media in folders, enhancing the speed and efficiency of navigating through your content, which is crucial for maintaining a high-performing WordPress site.
4. Real Media Library
Real Media Library offers an impressive solution for managing vast amounts of media files within WordPress. It features a virtual folder structure that helps in managing media without physically moving files. It supports the creation of folders, collections, and galleries, enabling you to organize thousands of items such as pictures, videos, or documents efficiently. The plugin’s standout feature is the ability to create an unlimited number of main folders in the free version, making it an excellent tool for websites with extensive media libraries.
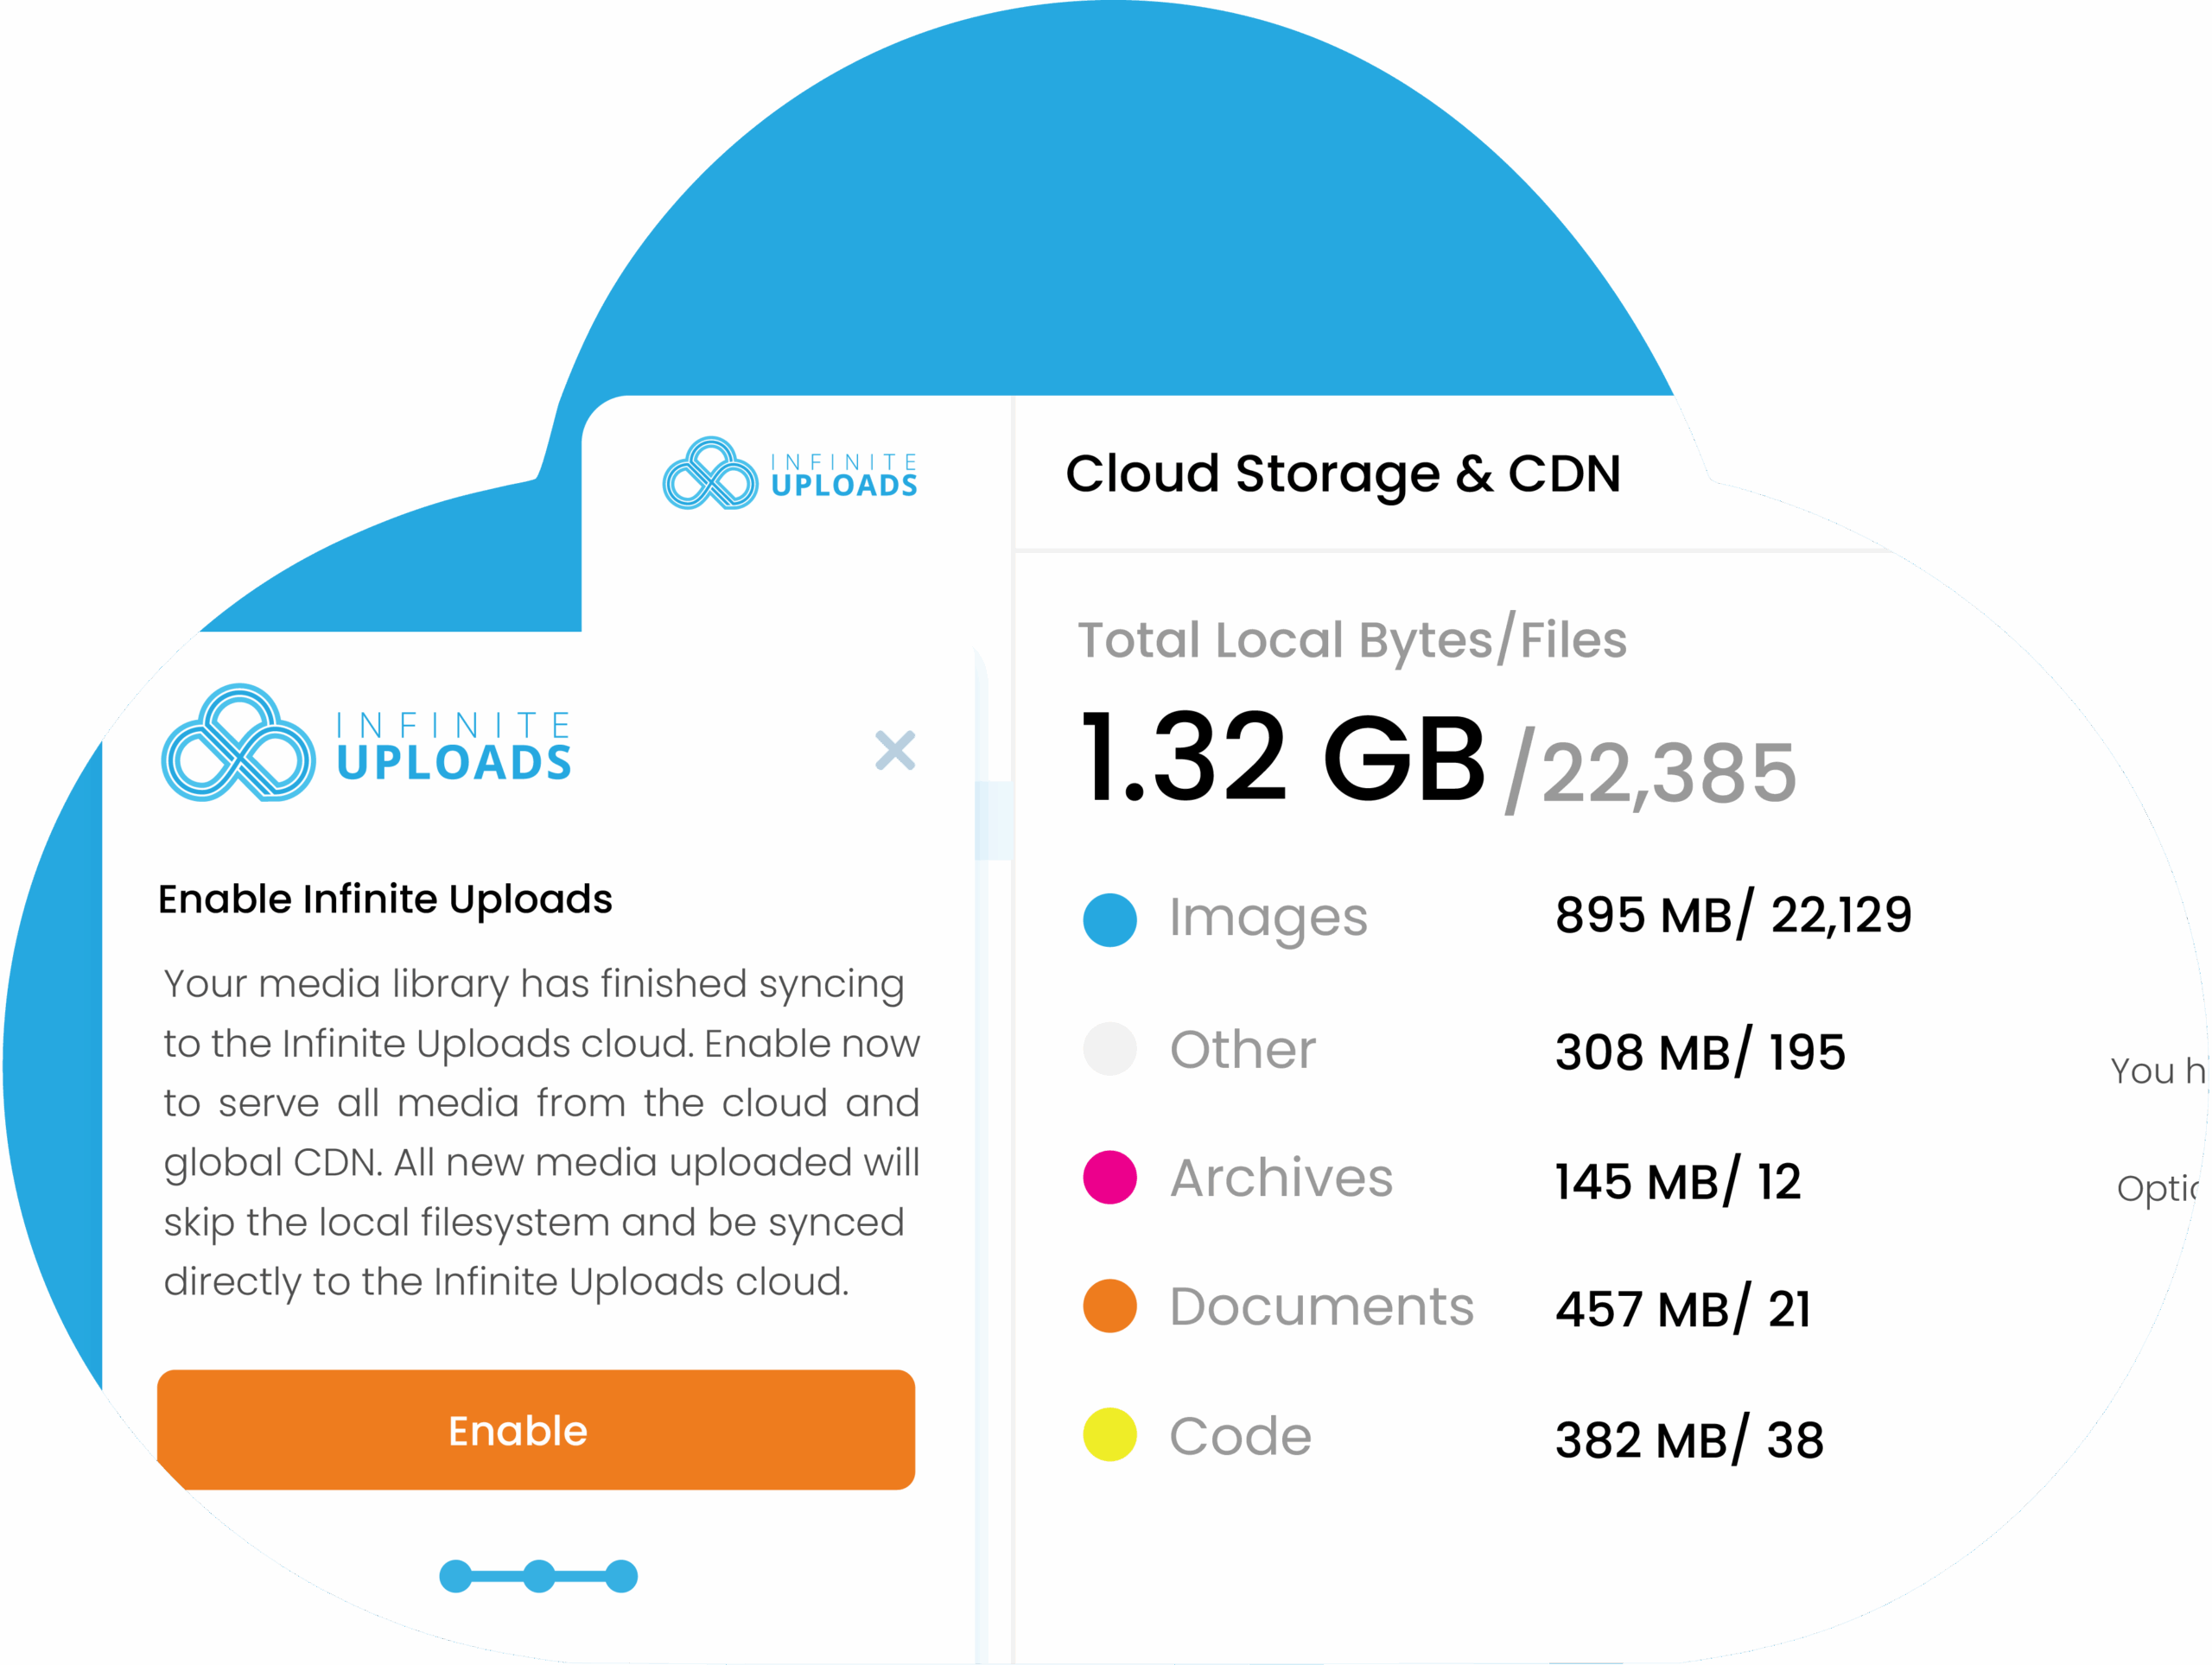
Offload, organize, and deliver your WordPress media from one plugin: cloud storage, video streaming, image optimization, and a global CDN, with no per-site limits.
See Pricing5. Media Library Assistant
Media Library Assistant plugin significantly expands the functionality of the WordPress Media Library. It introduces powerful shortcodes for galleries and lists, full support for taxonomies, and extensive processing options for IPTC/EXIF/XMP/PDF files. This plugin enhances the user interface by making it easier to search, sort, and manage media files, facilitating bulk and quick editing, and ensuring that your media library is as organized and accessible as possible.
6. Media Library Organizer
Media Library Organizer is a comprehensive solution to organize media library files, categorizing and managing them in your WordPress library. It supports an unlimited number of categories and subcategories for images, videos, and other media types. Unique features include the ability to search and filter attachments by category across various Media Library Views and the capability to bulk categorize multiple attachments. This plugin ensures that managing and uploading videos and other media to your WordPress site is more structured and streamlined.
7. Folders
Folders plugin offers an innovative way to organize and manage your Media Library files, Pages, and Posts within WordPress. The plugin utilizes virtual folders to help users manage media files without creating physical folders on the server, simplifying the process of maintaining a structured media library and enhancing accessibility. With this tool, you can create unlimited folders, making it simpler to sort through and access various files. Whether you’re dealing with video uploads, images, or documents, Folders help you maintain a tidy and efficient workspace within your WordPress dashboard.
8. Enable Media Replace
Enable Media Replace simplifies the process of updating media files in your WordPress site. Instead of going through the usual steps of deleting an old file and uploading a new one, this plugin allows you to directly replace any media file from the edit view in the Media Library. It saves time and streamlines the management of images and videos, ensuring that your website's media is always up to date with minimal effort.
Optimizing Media for Faster Loading

Resizing and Compressing Images
Optimizing your images is crucial for speeding up your WordPress site. One effective tool for this task is Smush, a plugin that allows you to compress and optimize images with ease. Smush provides built-in lossless compression, ensuring your images lose no quality while reducing their file size significantly. Additionally, it offers features like lazy load, WebP conversion, and automatically detects and resizes large images to fit the dimensions of your theme. With Smush, optimizing every image on your site becomes a seamless process, enhancing your site's loading speed and improving user experience without the need for manual adjustments.
Lazy Loading Media
Implementing lazy loading is another strategy to enhance your site's performance. WordPress now includes native support for lazy loading, meaning images and iframes only load when they're about to enter the viewport. This approach significantly reduces initial page load time, lowers data use for visitors, and improves the overall browsing experience on your site. By only loading the media that the user is likely to see, your pages become quicker and more responsive. Integrating lazy loading into your media management practices ensures that your site remains fast and efficient, even as you add more content and media files over time.
Managing Media Files Efficiently

Bulk Editing and Deletion
Efficient management of your media library often requires bulk editing and deletion functionalities. Utilizing plugins like Admin Columns, you can select multiple media items from your WordPress backend and apply changes across them simultaneously. This not only streamlines the process of editing attributes such as alt text and titles but also allows for the mass deletion of unnecessary files. Admin Columns extends beyond the default WordPress functionality by enabling you to select all items in your library, not just those visible on the current page. These capabilities ensure your media library remains organized and up-to-date, all while saving you considerable time.
Finding and Replacing Media
When you need to update an image or file across multiple posts or pages, plugins like Enable Media Replace simplify the process. By navigating to the Media Library's edit view for an attached file, uploading a new file automatically replaces the old one. This method eliminates the need to manually update each instance where the file appears, making it a real-time saver. Enable Media Replace ensures all instances of the replaced image or file reflect the new version without changing its URL, maintaining consistency throughout your site.
How to Clean Up the WordPress Media Library
Cleaning up means removing files nothing on the site uses: abandoned uploads, duplicates, and resized copies left behind by old themes. Work in this order:
- Back up files and the database. Deleting an attachment removes every resized copy with it, and there is no undo.
- Filter the library by Unattached and review the list. Unattached is not the same as unused; a file inserted by URL, used in a widget, or set in a theme option shows as unattached.
- Run a usage scan. Plugins such as Media Cleaner and Media Deduper check posts, pages, builder layouts, and custom fields for references and list files that appear unused, plus exact duplicates.
- Delete in small batches and spot-check key pages after each batch, especially pages built with Elementor, Divi, or Bricks, which store image references in their own data.
- Regenerate thumbnails if you changed image sizes, then remove the orphaned sizes the old settings left on disk.
On a library that has been offloaded to cloud storage, cleanup also frees paid storage, so it pays to run before an upgrade rather than after.
How to Download Your Entire Media Library
WordPress has no export button for media, so the download happens at the file level. Connect over SFTP or your host’s file manager and download the whole wp-content/uploads folder; that includes every resized copy. If you prefer the dashboard, the free Export Media Library plugin zips the folder for you, though large libraries can exceed the server’s memory or time limits. On a server with shell access, zip or rsync the folder from the command line instead.
If your media has been offloaded, the files are no longer on the server. Download them from the storage provider’s console, or use the offload plugin’s own sync tool. Infinite Uploads can pull the cloud library back to the server from the plugin settings before you disconnect.
Advanced WordPress Media Management Techniques
Enhancing your WordPress media management goes beyond simple uploads and deletions. By implementing advanced techniques, you can significantly improve the organization, accessibility, and performance of your media library. Let's explore how adding custom metadata and utilizing plugins can optimize your media management.
Adding Custom Metadata
Custom metadata adds significant flexibility and power to your media library, enabling you to categorize, sort, and filter media files with precision. By attaching specific details like copyright information, photographer credits, or custom tags to your media files, navigating and organizing your library becomes a streamlined process.
For instance, using the add_filter function allows you to introduce new fields into your media items. By tapping into the attachment_fields_to_edit filter, you can add custom fields such as “Author” or “Copyright Date” directly within your WordPress dashboard. This not only enriches the data associated with each file but also aids in precise media management tasks.
When you access the “Edit Media” page of a file, you'll see these new custom metadata fields at the bottom, ready for you to fill out. This detailed level of management ensures that every piece of media in your library is not only well-organized but also fully documented.
Access Control and Security
Access control and security are crucial aspects of managing your WordPress media library. Here are some ways to ensure that your media library is secure and only accessible to authorized users:
- Use Strong Passwords: Make sure that all users with access to your media library have strong, unique passwords. This simple step can significantly reduce the risk of unauthorized access.
- Limit User Roles: Assign user roles that limit access to the media library, such as contributor or editor, to prevent unauthorized users from accessing or modifying files. This ensures that only trusted individuals can make changes to your media files.
- Use Access Control Plugins: Plugins like Password Protected Categories or WP Media Folder can help you control access to your media library and restrict access to specific files or folders. These tools provide an additional layer of security, ensuring that sensitive media files are protected.
- Regularly Update Plugins and Themes: Keep your plugins and themes up to date to ensure that you have the latest security patches and features. Regular updates help protect your site from vulnerabilities that could be exploited by malicious actors.
- Monitor File Uploads: Regularly monitor file uploads to prevent unauthorized files from being uploaded to your media library. Implementing a review process for new uploads can help maintain the integrity and security of your media files.
By following these best practices, you can ensure that your WordPress media library remains secure and accessible only to authorized users, protecting your valuable media assets and maintaining the integrity of your website.
Troubleshooting Common Media Management Issues
Managing your WordPress Media Library can occasionally present challenges that may disrupt your workflow or the frontend user experience. Among these, file upload errors and broken media links are prevalent issues. Understanding how to address these efficiently ensures your site remains professional and functional.
When attempting to upload images, videos, or any media files to your WordPress site, you might encounter errors. These can range from “file size exceeds the maximum limit” to “HTTP error” during uploads. To resolve these:
- Check File Sizes: Ensure the media files do not exceed the maximum upload limit set by your host. You can raise it in php.ini, ask your host, or use a plugin that uploads large files in chunks; see how to fix the upload_max_filesize error.
- File Type Permissions: Verify the WordPress settings to ensure your upload file type is permitted. WordPress allows specific file types for security reasons. If you're trying to upload a non-permitted file type, consider converting it to an acceptable format.
- Increase Memory Limit: Sometimes, especially with large video uploads, increasing the memory limit allocated by your hosting environment can resolve the issue. This adjustment can also be made in the php.ini file, through the .htaccess file, or by reaching out to your hosting support.
- Troubleshoot Plugins and Themes: Deactivate all plugins and switch to a default WordPress theme to see if a plugin or theme conflict is causing the issue. If the problem resolves, reactivate each one by one to identify the culprit.
Media Library Not Showing Images
When the library loads but thumbnails are blank or broken, the files usually exist and WordPress cannot reach them. For the full diagnosis with screenshots, see WordPress Media Library not showing images. Check these in order:
- File permissions: the uploads folder should be 755 and files 644. A host migration or a security plugin can tighten these until images fail to load.
- Old domain in the URLs: after a move or a switch to HTTPS, attachment URLs still point at the old address. Run a database search and replace on the old domain.
- Offload or CDN mismatch: URLs are rewritten to a bucket or CDN that no longer has the file, or the CDN cached a 404. Re-sync the offload plugin and purge the CDN.
- Missing thumbnails: resized copies were never generated, which is common after an import. Regenerate thumbnails.
- A plugin blocking the admin: a security or optimization plugin is interfering with the admin requests the library makes. Disable plugins one at a time.
- The library never finishes loading: that is a different fault, usually a JavaScript error from a plugin conflict. Open the browser console for the error.
Resolving Broken Media Links
Broken media links can occur due to various reasons, such as incorrect file paths, migration issues, or accidental deletion of media files. To fix broken media links:
- Check Media File Paths: Confirm that the file paths in your WordPress Media Library are correct. If you've recently moved your site or changed domains, you may need to update paths using a plugin or SQL query in your site's database.
- Use Redirects for Moved Files: If media files were moved to a new location, set up 301 redirects from the old paths to the new ones to preserve SEO and user access.
- Restore Deleted Files: If media links are broken because files were mistakenly deleted, check if your hosting provides backups to restore those files. Alternatively, re-upload the missing files to their original locations.
- Link to Cloud Storage: For large media files, such as videos, consider hosting them on a cloud storage service and linking to them from your WordPress site. This approach not only resolves broken links but also optimizes loading times and saves server resources.
By systematically addressing file upload errors and broken media links, you maintain the integrity and performance of your WordPress site, ensuring a smooth experience for your users and visitors. Implementing these troubleshooting steps helps keep your Media Library organized and functional, contributing to the overall success of your website.
The Complete WordPress Media Lifecycle
Media management is more than finding files. A stable workflow follows each asset from upload through organization, optimization, delivery, replacement, and eventual cleanup.
1. Upload and Identify
Use descriptive filenames before upload, record useful alt text and captions, and avoid uploading the same asset repeatedly. Remember that WordPress creates an attachment record and may generate several responsive image sizes from one original.
2. Organize Without Breaking URLs
Most WordPress media-library folders are virtual, so they group attachment records without moving the underlying files. Compare that behavior with the current media-library folder feature before changing an established library.
3. Optimize and Deliver
Generate appropriate responsive sizes, compress originals, and use modern formats where they help. Edge image optimization changes payloads, while a WordPress CDN shortens delivery distance. They solve related but different problems.
4. Replace, Offload, and Automate
When an asset changes, follow a media replacement workflow that preserves the required URL or attachment ID and clears every cache layer. For a growing library, compare media offload with the cloud-storage roundup. Large sites can use the WP-CLI media workflows for repeatable inspection and batching.
5. Treat Video as Its Own Workflow
Video adds transcoding, adaptive streaming, poster images, privacy, and player decisions that ordinary image storage does not. Review WordPress video hosting and the video plugin comparison separately.
6. Clean Up With a Rollback Plan
Do not delete an “unused” attachment merely because one database query cannot find a reference. Page builders, custom fields, CSS, templates, metadata, downloads, and external systems can all use a file. Back up the database and files, test on staging, delete in small batches, and verify front-end pages before removing the backup.
Infinite Media Cloud Storage
Following the systematic management of your WordPress Media Library, integrating with Infinite Uploads cloud storage represents a transformative approach to handling your website's media files. This section explores how Infinite Uploads stands out as an all-in-one media solution, notably for video streaming, cloud storage, and CDN delivery, specifically designed for WordPress websites
When you connect your website to an Infinite Uploads cloud account, you instantaneously benefit from the ability to offload your files. This feature is pivotal, especially if your site handles large volumes of media uploads. By transferring your files to the cloud, you not only free up server space but also significantly reduce hosting costs. Given the high costs associated with upgrading hosting plans for additional storage, Infinite Uploads offers a cost-efficient alternative.
Video content creators, in particular, will find the service invaluable. The platform seamlessly handles and encodes massive video uploads. This capability ensures your content is always in the right format for optimal online streaming, enhancing the viewer's experience.
Moreover, leveraging cloud storage improves your site's performance. With Infinite Uploads, files are served faster to your visitors. This speed boost is thanks to the CDN (Content Delivery Network) delivery aspect of the service. A CDN minimizes the distance between your website's server and your visitors, further accelerating the loading time of your media files.
To summarize, Infinite Uploads acts as a comprehensive media management tool, enabling you to connect an unlimited number of sites to your cloud account. This scalability ensures that no matter how your online presence grows, your media management needs are covered. By lowering hosting costs, improving site performance, and ensuring faster delivery of content to your audience, Infinite Uploads cloud storage emerges as an essential component of effective WordPress media management.
Conclusion
Keep the library organized with virtual folders so URLs never change, clean it up on a schedule with a backup in place, fix upload limits and missing images at the cause rather than the symptom, and move a large library to cloud storage before hosting limits force the decision.