
Pages with embedded video hold visitors 2.6x longer on average. They convert better too. If you're running a WordPress site and you're not using video yet, you're leaving engagement on the table.
The good news is WordPress makes embedding video easy. The less good news is that there are at least six different ways to do it, and each one has tradeoffs for speed, control, and compatibility. I've spent over a decade building and managing WordPress sites, and I've watched plenty of people pick the wrong method for their situation. Self-hosted 4K files crashing shared hosting accounts, broken embeds from copy-paste errors, YouTube players pushing visitors to competitor videos.
This guide walks through every method to embed video in WordPress. Where self-hosted video is involved, you'll also see where Infinite Uploads fits in — it's the fastest way to get heavy media files off your server without changing how your media library works. You'll know exactly which approach fits your site by the end.
Platform-Hosted vs. Self-Hosted vs. Cloud-Offloaded Video
Before picking a method, it helps to understand the three ways video can live on a WordPress site. They're not equally good, and the right one depends on your situation.
Platform-hosted video means YouTube, Vimeo, Wistia, or any service where you upload the video to someone else's platform and embed it on your site. WordPress handles this natively. Paste a YouTube URL into the block editor, and it embeds automatically. Zero server load on your end, global CDN included, no encoding work. The tradeoffs are real though: YouTube shows competitor videos in the player at the end, Vimeo limits uploads on free plans, and you're handing your content over to a third party with its own privacy practices and terms. GDPR gets complicated when a YouTube embed fires tracking cookies on page load.
Self-hosted video means uploading the MP4 directly to your WordPress media library and playing it from your own server. You get full control, no third-party dependency, no competitor ads. But your server is now streaming video files every time someone presses play. A 200MB video getting 500 views a day will eat through bandwidth fast, slow your hosting account for everyone else on the server, and hit file size limits that most shared hosts set well below what video actually needs. I've watched sites crater after a post went semi-viral with a self-hosted video. The server couldn't handle it.
Cloud-offloaded video is what most WordPress sites running serious video should be doing. You upload to WordPress normally, the file moves to cloud storage (like with Infinite Uploads), and delivery happens through a CDN instead of your server. You keep the familiar media library workflow. Your server never touches the video again after upload. For sites that want to self-host without the server penalty, this is how you do it.
The rest of this guide walks through all three approaches in detail.
Built-in Video Embedding Options in WordPress
Embedding Videos from Popular Platforms
WordPress simplifies your life by allowing you to embed videos from popular platforms like YouTube and Vimeo directly into your posts. All you need to do is paste the URL of the video into your editor, and WordPress handles the rest, creating a responsive embed code that ensures your video looks great on any device.
This includes sites like YouTube, Vimeo, and more. Unfortunately this requires uploading and managing video in a 3rd party platform, which introduces complexity, hassle, and privacy and GDRP issues. Because of this many choose to host their own videos in WordPress.
The Video Block
If you're running Gutenberg (and you are, unless you've specifically replaced it), the Video Block is the native block-editor way to add self-hosted or cloud-stored video to your content. Find it by typing /video in the editor or searching the block inserter.
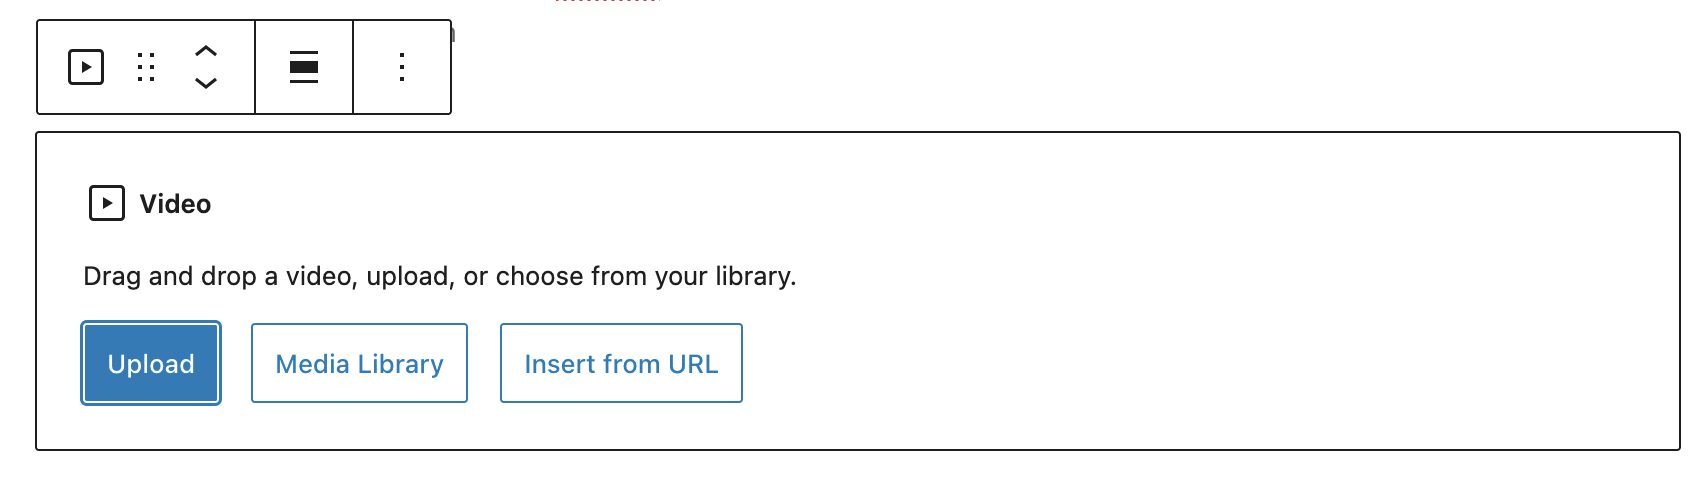
The Video Block lets you upload a file directly from your machine, pick from your media library, or insert via URL. It also gives you basic playback controls right in the editor: autoplay, loop, mute, poster image. The poster image setting is worth using. It replaces the default blank player with a custom thumbnail, which improves click rates and prevents the browser from loading the first video frame as a preview.
One thing to know: the Video Block has a lazy loading option. Turn it on. It tells the browser not to load the video until it's actually in the user's viewport, which noticeably improves page speed scores for video-heavy posts.
Using the Media Uploader (Classic Editor)
If you're still on the Classic Editor, the media uploader is your route. Click Add Media in the post editor, upload your file, and insert it. WordPress generates a basic HTML5 player. It works, but you get fewer controls than the Video Block offers, and responsive behavior isn't guaranteed without CSS help. If you're on Classic Editor specifically to avoid Gutenberg, switching just the video workflow to a block isn't worth the context switch. Use a plugin instead.
WordPress Video Embedding Limitations
All three built-in methods share the same ceiling. File size limits imposed by your host stop large uploads before they start. Server timeouts kill uploads mid-transfer for anything over a few hundred megabytes. And none of the native options encode your video for adaptive streaming. That means one file, one quality level, delivered at the same bitrate whether your viewer is on fiber or 4G. For serious video content, that's where you need to go beyond what WordPress ships with.
WordPress Media Uploader Limitations
For videos hosted on cloud storage or your own server, WordPress’s media uploader is your go-to tool. Navigate to your post, click on Add Media, and upload your video files directly. This method gives you more control over video placement and how it displays on your site.
Despite its convenience, embedding videos in WordPress isn't without faults. Common issues include:
- File Size Too Big: Videos can quickly eat up your hosting storage and hit server max filesize limits, making cloud storage an attractive alternative.
- Timeouts on Upload: Larger files often fail to upload due to server timeouts.
- Video Not Optimized: Without proper optimization, videos can hinder your site's performance across different devices.
- No Optimization Per-Device: The lack of automatic adjustment for various devices can affect user experience.
- Bandwidth Expensive: Hosting videos directly impacts your site’s bandwidth, potentially slowing down your website for visitors.
WordPress Video Block Limitations
The Video Block is genuinely useful, but it has a hard ceiling. Here's where you hit it.
- No adaptive bitrate streaming: This is the big one. The Video Block serves a single MP4 file at a fixed quality. If someone's on a slow connection, they get the same file as someone on fiber, which means buffering. Platforms like YouTube and Infinite Uploads encode video into multiple quality tiers and switch automatically based on the viewer's connection speed. The Video Block can't do that.
- No video encoding: Whatever you upload is what gets played. If you upload a 1080p MP4 at 50Mbps because that's what your camera exported, that's what visitors download. There's no automatic transcoding to a web-optimized format or bitrate.
- File size limits still apply: The block itself doesn't bypass your host's upload limit. You can drop a Video Block into your post all day, but if your host caps uploads at 64MB, files larger than that still fail. Big File Uploads can fix that part, but it's a separate step.
- No analytics or engagement tracking: You don't know if people watched 10 seconds or the whole thing. No play rate, no drop-off data, nothing. Platform-hosted video gives you that. The Video Block gives you nothing.
- No chapter markers, captions UI, or player customization: The native player is bare. You get play/pause, a scrubber, and volume. That's it. For anything that needs a branded experience or accessibility-compliant captions, you'd need to layer something else on top.
By being aware of these weaknesses, you can make more informed decisions about how to best incorporate video content into your WordPress site.
WordPress Video Plugins Worth Knowing
The native WordPress options get you pretty far, but they stop short of anything that requires a real player experience, adaptive streaming, or a setup that scales. When you need more, here's how to think about your options.
Best WordPress Video Player Plugins
Presto Player is the plugin most worth knowing about here. It's a premium video player that works with any video source: YouTube, Vimeo, Bunny.net, and direct MP4 links. You get chapter markers, email capture gates, call-to-action overlays, resume playback, and detailed analytics on viewer behavior. It's genuinely well-built and popular for good reason.
Where it gets interesting with Infinite Uploads: if you're offloading your video library through Infinite Uploads, you can grab the HLS .m3u8 link from any video in your library, paste it into Presto Player as a video URL, and it detects the stream automatically. You get Presto Player's full feature set on top of Infinite Uploads' adaptive HLS streaming and global CDN delivery. The two work well together. We've written about how to set that up here.
All-in-One WordPress Video Hosting
Infinite Uploads handles video hosting, encoding, CDN delivery, and embedding without requiring a separate player plugin. When you upload a video, it encodes automatically for HLS streaming and gives you five ways to put it on your site: an iframe embed code, a direct play URL, an HLS URL for use with any external player, a shortcode, and a native Gutenberg block with its own built-in player.
The built-in player is clean and functional. If you need more control over the playback experience, that's where pairing it with Presto Player makes sense. If you just need video on a page that loads fast and doesn't touch your server, the built-in options cover it.
How to Choose
If you're already paying for Presto Player and you want the best possible player experience, use it with Infinite Uploads' HLS URL. If you're starting fresh and just need self-hosted video that works fast without managing multiple plugins, Infinite Uploads alone gets you there.
Best Practices for Embedding Video in WordPress
Good video embedding comes down to a handful of specific decisions. Most sites get this wrong not because they chose the wrong plugin, but because they skipped the details. Here's what actually matters.
- Set a poster image on every video: The poster image is the thumbnail that shows before a user hits play. Without one, most browsers either show a blank black player or pull the first frame of your video, which is often mid-transition or worse. In the Video Block, you'll find the poster image setting in the block sidebar under "Poster." In Infinite Uploads, you can set it directly from your video library. A good poster image also doubles as a visual cue that video is available, which improves play rates.
- Enable lazy loading: By default, browsers will start fetching video data as soon as the page loads, even if the video is below the fold. For the Video Block, turn on the "Preload" setting and set it to "None." That tells the browser to wait until the user actually interacts with the video before loading anything. For platform embeds like YouTube, use a facade approach: a plugin like WP YouTube Lyte or Façade replace the iframe with a static thumbnail and only load the actual embed on click. The page speed difference is significant, especially on mobile.
- Use the right format for your situation: If you're serving video directly from WordPress or a cloud URL, MP4 (H.264) is the safest choice for broad compatibility. If you're using Infinite Uploads with HLS streaming, the player handles format automatically and switches quality tiers based on the viewer's connection. You don't manage that manually. HLS is the right call for anything longer than a minute or serving a large audience.
- Add a
<VideoObject>schema markup block: Video embeds don't benefit from alt text the way images do. What they do benefit from is structured data. Google uses VideoObject schema to understand what your video is about and can surface it in video rich results in search. Most SEO plugins (Yoast, Rank Math) have a video schema field. Fill in the name, description, thumbnail URL, upload date, and duration. For self-hosted video this is entirely manual. For YouTube embeds, Google often picks it up automatically, but adding it explicitly doesn't hurt. - Match your video dimensions to your layout: A 16:9 video crammed into a sidebar or mismatched with a full-width section looks broken on certain screen sizes. The Video Block handles responsive scaling automatically, but if you're using a raw iframe embed (from Infinite Uploads' embed code or a third-party player), wrap it in a CSS aspect-ratio container to keep it from breaking on mobile. The standard approach is
aspect-ratio: 16/9on the wrapper div withwidth: 100%. - Keep file sizes honest before upload: If you're uploading directly to WordPress rather than cloud-offloading, run your video through HandBrake first. A 1080p video exported from Premiere at a high bitrate can easily be 2-3GB. HandBrake can get the same video down to 200-400MB at H.264 with no visible quality loss for web playback. Your server will thank you, and your upload won't time out halfway through.
Infinite Uploads Video Hosting for WordPress
Here's the situation most people end up in. They upload a video directly to WordPress, it works fine for a week, and then the post gets shared. Suddenly the server is grinding through hundreds of video requests it was never meant to handle. Hosting throttles bandwidth. Page load times tank. Some visitors get a spinning buffer instead of a video. The fix most people reach for is YouTube, which solves the server problem but hands control to a platform that will show your audience competitor videos the second yours ends.
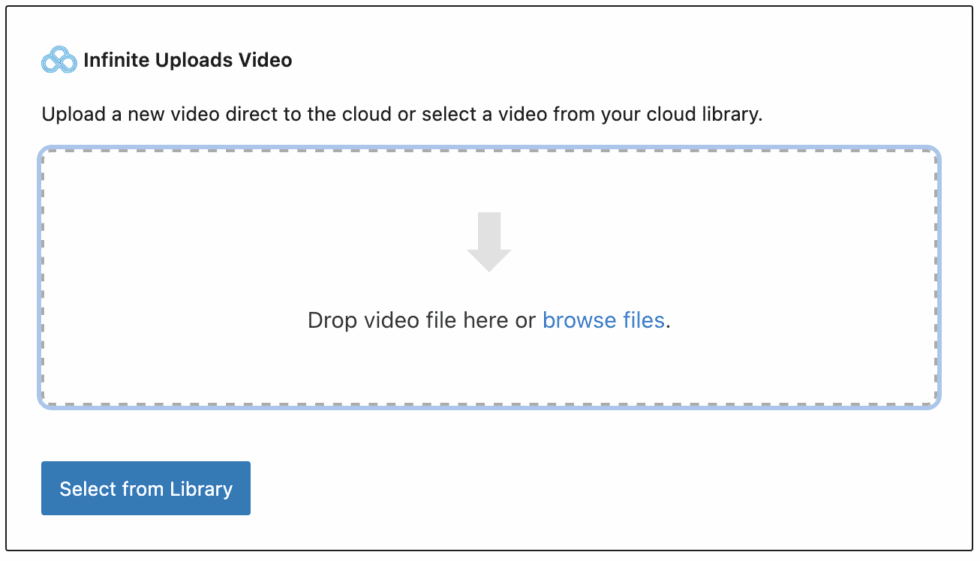
Infinite Uploads is built for the situation between those two options. You upload inside WordPress using your normal media library workflow. The file moves to cloud storage automatically. From that point on, your server is out of the equation entirely. Delivery happens through a global CDN, streamed to each viewer from the nearest edge location.
The streaming itself uses HLS (HTTP Live Streaming), which means the video isn't served as a single fixed file. It's split into segments and delivered at the quality tier that matches the viewer's connection speed. Someone on fiber gets full 1080p. Someone on a weak mobile connection gets a lower bitrate that still plays without buffering. That automatic adjustment happens in the background. You don't configure it. It just works.
Every video in your Infinite Uploads library gives you five ways to put it on your site:
- Embed code — a responsive iframe that adapts to any layout and supports fullscreen playback
- Direct play URL — a clean shareable link for client previews, internal teams, or anyone who needs to watch without logging in
- HLS URL — the raw
.m3u8stream link for use with Presto Player or any external player that supports adaptive streaming - Shortcode — paste it anywhere on your site that renders shortcodes
- Gutenberg block — upload, encode, and display video without leaving the editor, with a built-in player that supports autoplay, loop, mute, preload, and custom brand colors
A few things worth knowing that don't show up in the obvious feature list: video delivery is fully GDPR-compliant, there are no third-party tracking scripts fired on playback, no ads, and Infinite Uploads does not use your content to train AI models. For anyone running a site that serves European visitors or handles client content, that's not a minor detail.
If you want to go further with the player experience, pairing Infinite Uploads with Presto Player is the move. Copy the HLS URL from your video library, paste it into Presto Player as a video source, and you get chapter markers, email capture, engagement analytics, and call-to-action overlays on top of Infinite Uploads' streaming infrastructure. The two are designed to work together.


