
Replacing media files in WordPress – whether it’s an image, PDF, or any uploaded file is a common task for site owners. Perhaps you need to replace media files like an outdated logo, fix a typo in a PDF, or swap out a large image for an optimized one.
However, doing this incorrectly can lead to broken links or lost SEO value. You must be very cautious about replacing WordPress media files to prevent SEO impact, caching, link preservation, database consistency, CDN integration, and offloading.
As a WordPress user for 10 years, I’ve learned that replacing WordPress media is easy with the right approach. You can replace each piece of WordPress media manually or use WordPress plugins to help you.
In this guide, we’ll explore best practices to replace media uploads in WordPress without breaking links, hurting SEO, or causing other issues.
Why Replace Media Files?

IThere are many reasons to replace media files on a WordPress site. You might rebrand your site and need to replace logos and images across all pages, update a product image with a new version, or replace a downloadable PDF with an updated file.
Forbes says that high-quality images are critical for your website’s user experience, customer satisfaction and SEO. Many times, I was in a rush to publish an article and uploaded subpar images, but later, I needed to upload high-quality images.
Replacing files without deleting and re-uploading saves time and preserves any existing links to those files (for example, links in blog posts or references from external sites). The goal is to update media without deleting and re-inserting it everywhere.
Challenges of Replacing Media Files in WordPress
Replacing your WordPress media is harmless if done properly. But you may struggle with system limitations or post replacement issues. Below is a heads-up on the issues you may face while replacing your media files.
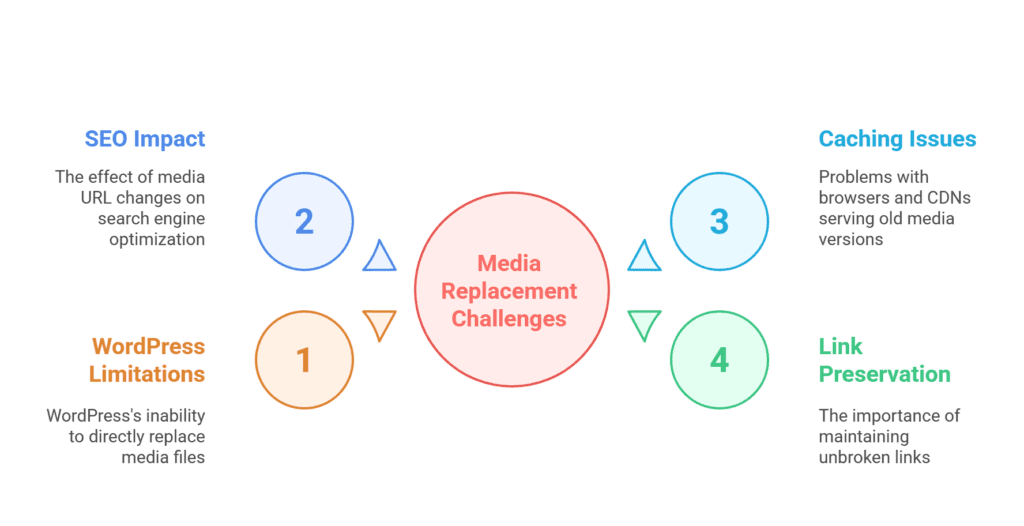
WordPress Doesn’t Allow Direct Media Files Replacement
There are no replacement buttons for WordPress media files. It might sound weird, but WordPress doesn’t let you change the names of its files.
You can’t replace a WordPress file with the same name as another already uploaded file. If you upload “photo.jpg” and then try to upload another file with the same name, WordPress will save the first one as “photo-1.jpg.”
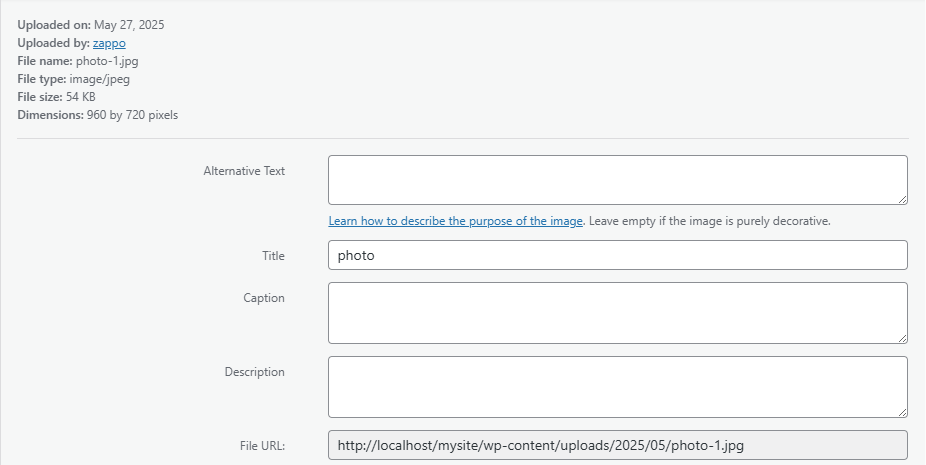
Though it prevents you from accidentally overwriting files and assigns the new file a new URL, you must update each post or page that uses the file.
Creates SEO Impact
Changing a media URL can have SEO implications. If an image has been indexed by Google or shared on other sites, a new URL means that old references could lead to,
- A 404 error (if you delete the old file), or
- Still show the outdated image.
It’s usually best to keep the same URL when updating a media file so that you replace WordPress images without breaking links in WordPress and maintain any SEO “juice” associated with that image.
In cases where a filename must change (say, for better SEO keywords in the filename or due to a format change), you’ll need to update all references and possibly add redirects. We’ll address this later.
Creates Caching Issues
Caching can also complicate media replacement. Browsers and Content Delivery Networks (CDNs) might continue to serve the old version of a file if it has the same URL. If you replace a file but its URL stays the same, you may not see the new version immediately due to cached content.
Conversely, if you change the URL, you must ensure all instances are updated. We’ll discuss strategies to handle caching (like purging caches or using versioned filenames) in a dedicated section below.
Link Preservation
The overriding principle is to avoid broken links. If a media file is embedded in multiple places (posts, pages, products, etc.), replacing it should not require editing each location.
The best practice is to use WordPress’s attachment system so that the attachment ID remains the same and the file path/URL remains the same when possible.
Use WordPress Plugins to Easily Replace Media Files
The easiest and most beginner-friendly way to replace uploaded media in WordPress is by using a plugin designed for the job. Only a few WordPress plugins handle media replacement and update database references.
We’ll start by highlighting two powerful WordPress plugins: Enable Media Replace and Media File Versioning. Both powerful plugins help with WordPress media replacement.
Replace Media Files Using the Enable Media Replace Plugin
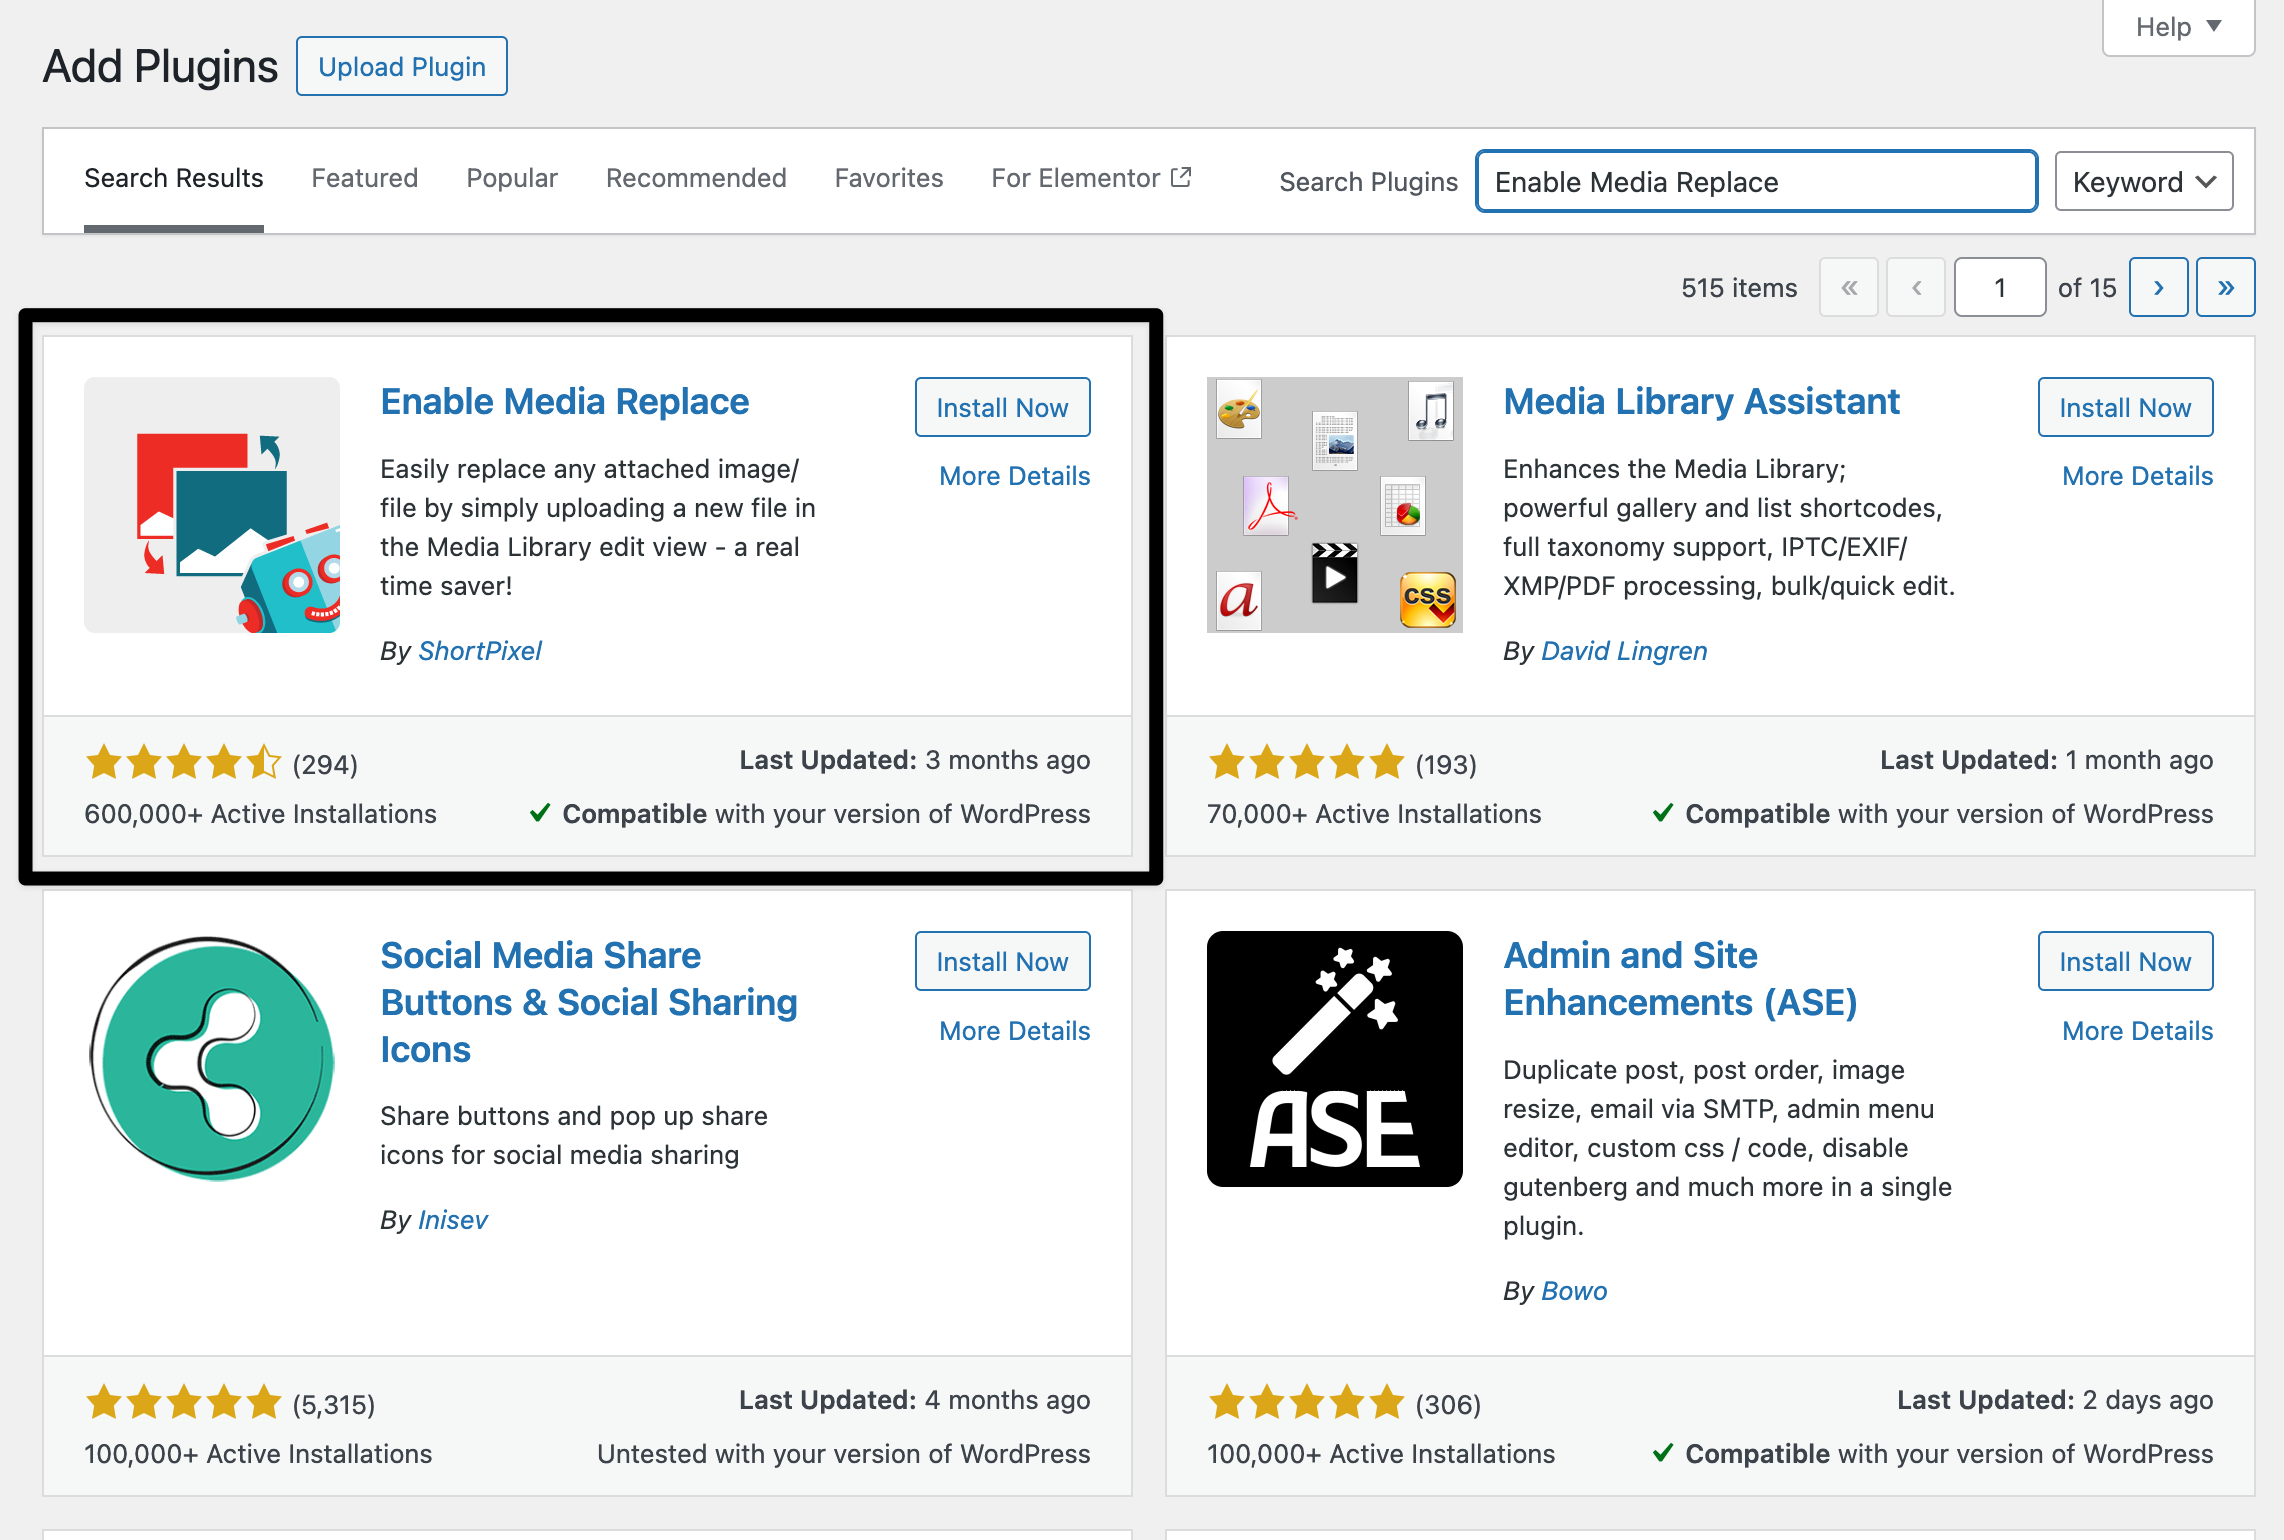
Enable Media Replace is the most popular WordPress plugin for replacing media files directly. ShortPixel developed it, and more than 600k users use it daily. It provides a simple way to replace an existing file in your WordPress Media Library with a new one in the exact location.
To replace media files using the Enable Media Replace plugin, follow these steps:
Step 1: Install and activate the plugin
Get to your WordPress dashboard. Search for the plugin, install it, and then activate it. This is the common process for installing every WordPress plugin.
Step 2: Locate media files
To replace the media file in the WordPress media library, you need to identify and access it. So, please navigate to your WordPress Media Library from the dashboard and find the particular file.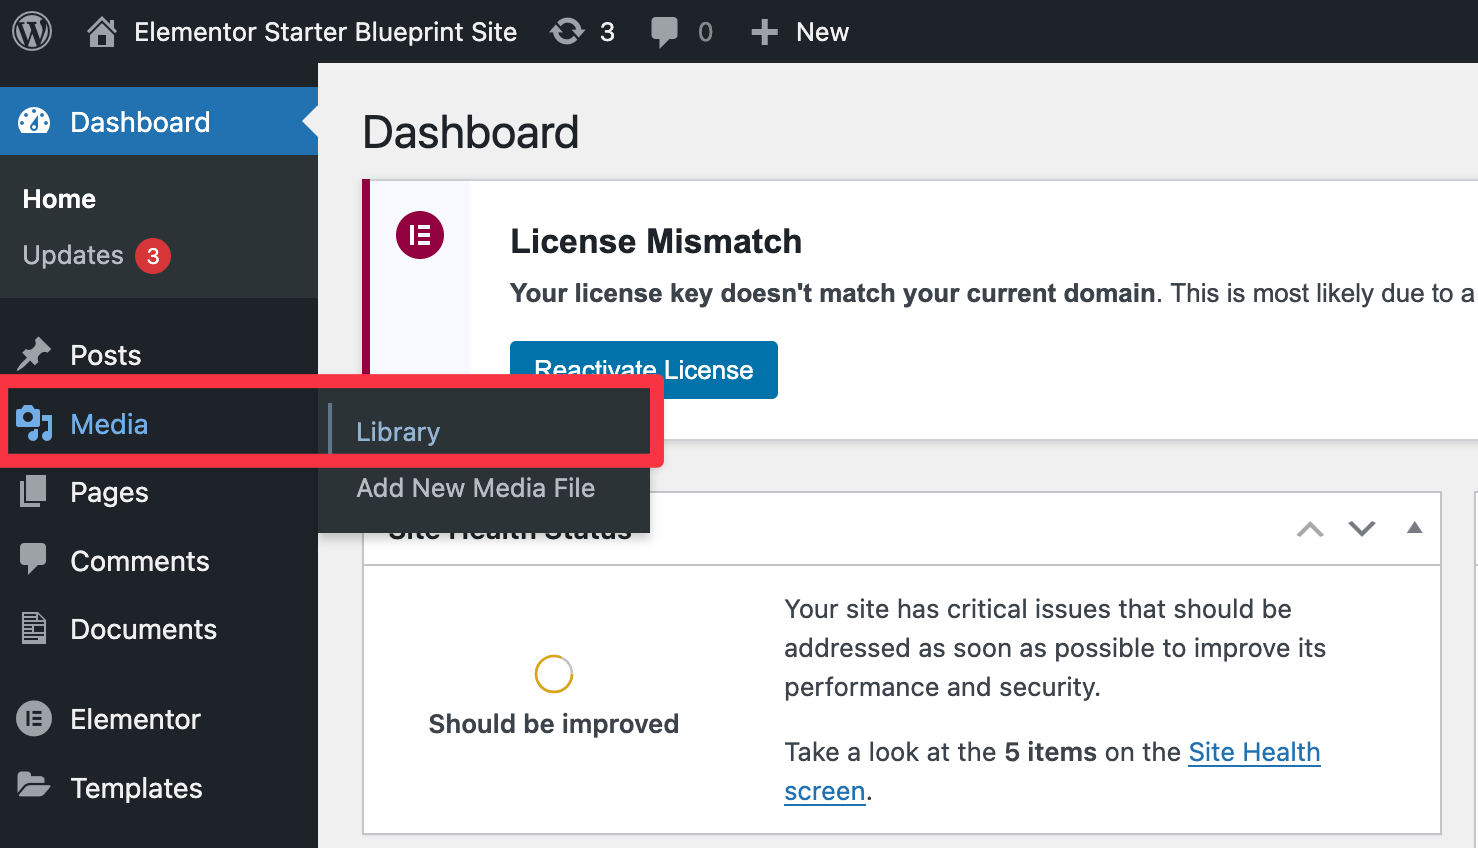
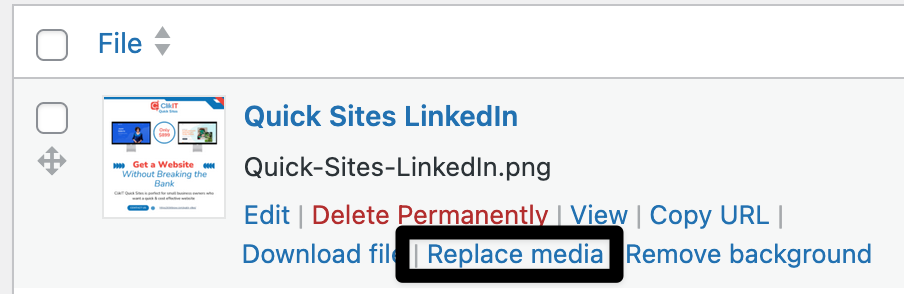
Step 3: Find the Replace Media Button
Locate the media file, hover over the file name, and click the Replace Media button to initiate the media replacement process.
Step 4: Upload the new file
Upload the new file and choose one of your replacement options: Just replace the file (same link) or Replace the file. Both options are pretty cool, and you can see the description of what each does. Pick whichever you need.
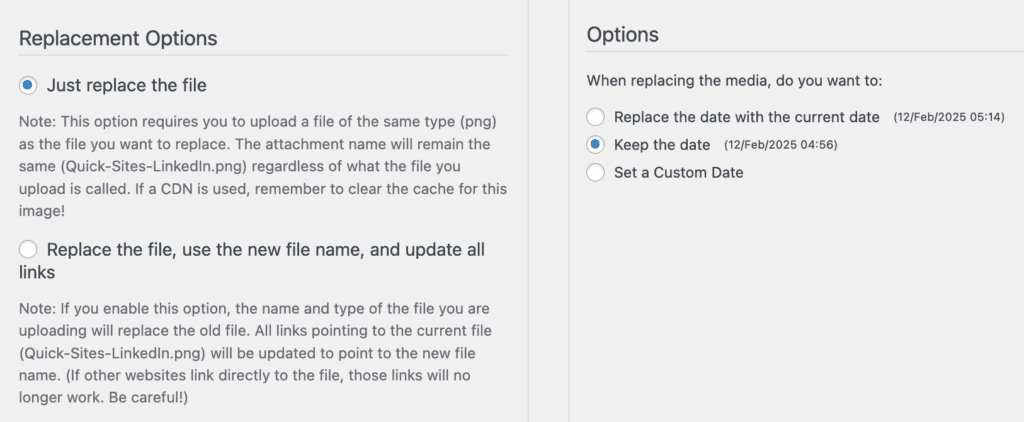
Pro Tip: The Replace the file option would be helpful if you are rebranding your company and need to update an old logo on the website while changing the filename to reflect the new brand.
Use Media File Versioning WordPress Plugin
Media File Versioning is a super interesting new plugin that functions similarly to the Enable Media Replace plugin but versions the file. It keeps both files with the same file name, but it allows you to view previous versions and even display them on your site.
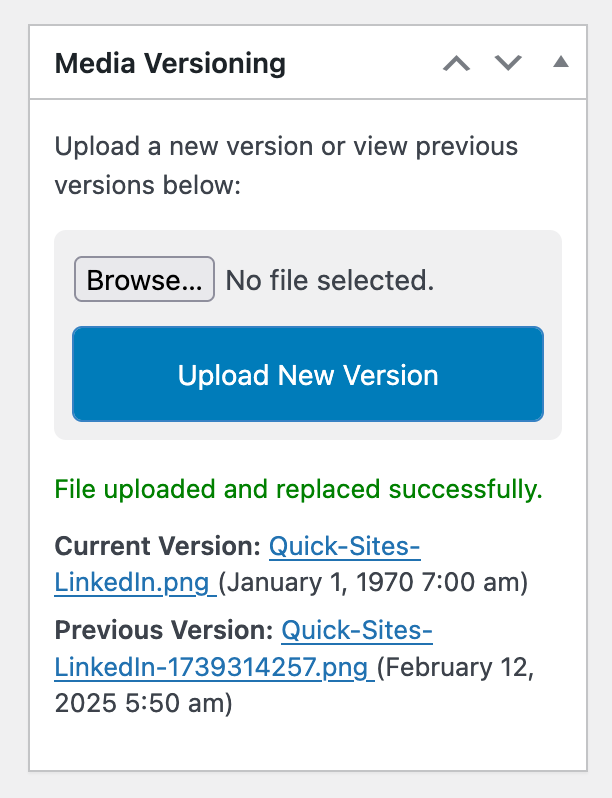
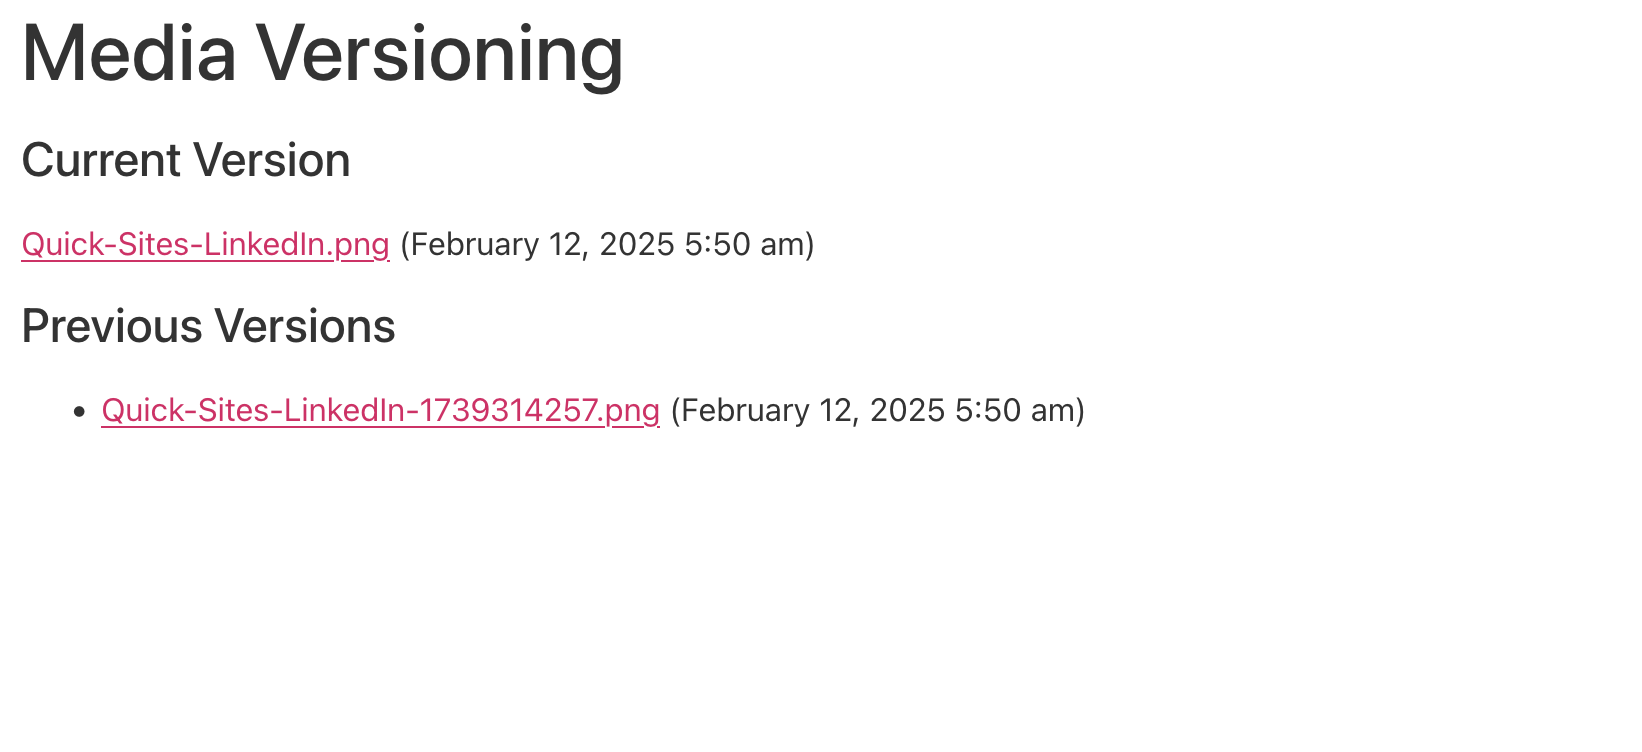
Using the Media File Versioning, you can upload as many versions as you like and display them on your site using a shortcode. To display the versioned files on your site, the shortcode is [mfv id=”114″], where 114 is the media item number.
The developer of Media File Versioning, Robert DeVore, says that he is working on some more useful features, such as bulk version management, advanced filtering and version search. These features will significantly improve your WordPress media library management.
Manually Replace WordPress Media Files Using FTP/SFTP
Manually replacing WordPress media files requires maintaining some common scenarios and actions. You must be careful since it goes step by step inside your server.
Step 1: Find the Existing File
Utilize an FTP client like FileZilla or cPanel File Manager to access your server files directly, making media file management easier outside the WordPress dashboard.
Navigate to wp-content/uploads/ and find the correct year/month folder where the file is stored. This structure organizes media files by upload date, helping you quickly locate the file you want to replace.
Step 2: Prepare the New File
Ensure the new file has the same name and type as the old one (e.g., image.png must remain image.png). This is crucial to keep all links pointing to the old file intact and prevent them from breaking after the replacement.
If needed, resize or optimize the new file before uploading. Optimizing images reduces file size, improving loading times and overall website performance.
Step 3: Upload & Overwrite
You can drag and drop the new file into the same directory. This action prompts the system to recognize the new file as a replacement for the old version.
If prompted, choose to overwrite the existing file. Overwriting ensures that the new file replaces the old file in the media library, retaining all existing file references and links across your site.
Why Manually Replace WordPress Media Files?
Manually replacing files can be straightforward and very helpful. It doesn’t need to get you through another WordPress plugin, but you may need advanced technical know-how.
Reduce WordPress plugins
The more plugins you use, the more security vulnerabilities and site performance issues your WordPress may suffer. You also lower the chance of plugin conflicts that could stop your website from working properly without adding another plugin.
Keeps the URL the Same
If you replace media files directly on the server, it prevents broken links in posts or pages. It will ensure a flawless user experience and maintain SEO rankings. Keeping the URL the same is helpful for long-established websites with many internal and external links to the file.
Works for All Media Types
In manual mode, you can replace any media files, including images, PDFs, videos, or any other files. This lets you manage media across content types and update your website’s visual and informational elements.
It’s handy for your site if you have a blog, news outlet, e-commerce platform, or educational resource where you frequently upload content.
Replace Media Files via WP-CLI
If you are an advanced user comfortable with the command line, you can use the WP-CLI command line interface to replace your WordPress media files. WP-CLI offers powerful tools to manage media replacements and update databases.
Replace Media Without Creating New Attachments
Step 1: Upload the New Media File
Upload the new file to your server using your preferred method (e.g., FTP, scp).
scp ~/Desktop/new-logo.png user@yourserver.com:/var/www/html/
Step 2: Identify the Attachment ID
Get the ID of the media file you want to replace.
wp media list –format=table
Step 3: Replace the File Using WP Media Import
Now, attach the new file to the existing media ID.
wp media import /var/www/html/new-logo.png –post_id=123 –skip-copy
Replace 123 with the actual attachment ID. Use –skip-copy to avoid duplicating the file into the uploads folder.
Search & Replace URLs or Filenames
This is useful if references to the old filename are hardcoded in content.
Step 1: Run a Safe Dry Run First
Always dry-run a search-replace to check what will be changed.
wp search-replace ‘old-logo.png’ ‘new-logo.png’ –skip-columns=guid –dry-run
Step 2: Execute the Search & Replace
If the dry run looks good, run the actual replacement:
wp search-replace ‘old-logo.png’ ‘new-logo.png’ –skip-columns=guid
This updates all content references throughout the entire website.
Troubleshoot Common WordPress Media File Replace Issues
Using the methods described will keep your database consistent. The wp_posts table entry for the attachment continues to point to the correct file, and any content referring to that attachment ID or URL is updated if needed.
Even with all the precautions, if you encounter issues, here are some troubleshooting tips:
Fix Broken Links or Missing Media AfterMedia Replacement
The reference update fails if image icons or 404 errors appear where the media should be. The file name may have been changed, but not all instances were updated.
In this case, use a search/replace tool to find references to the old filename in the database. You can use the Better Search Replace WordPress plugin from WP Engine in situations like this. It searches all tables for the old URL or file name and replaces it.
Run a Search & Replace
- Go to Tools > Better Search Replace
- In Search For, enter the incorrect/broken URL (e.g., http://oldsite.com/broken-link)
- In Replace With, enter the correct URL (e.g., https://newsite.com/fixed-link)
- Select tables:
- wp_posts (for content links)
- wp_postmeta (for custom fields)
- wp_comments (if links appear in comments)
- wp_options (for site-wide settings)
- Check Run as dry run? to preview changes before applying them.
- Click Run Search/Replace to see how many instances will be updated.
- If everything looks good, uncheck the dry run and run the replacement.
Media Still Showing Old Version
If you still see the old image or media file, caching is likely the culprit. Please clear caches and ensure your new file overwrites the old one. If you manually clear the cache, confirm via FTP that the file’s timestamp or size has changed.
Fix Thumbnails Look Wrong
If you replace an image but the thumbnails (like smaller sizes) are either missing or still the old image, you likely need to regenerate the thumbnails. Use the Regenerate Thumbnails Advanced WordPress plugin or similar.
Regenerate Thumbnails will use the new original image to create all the registered sizes. If you replaced via Enable Media Replace, it should have handled this, but this step is often needed for manual replacements.
Fix File Type Issues
WordPress allows certain file types by default. If you try to replace an image with an SVG and the WordPress media library doesn’t allow SVG, it might not accept it.
Ensure the media replacement file type is permitted (plugins allow additional MIME types, or you can add code). Generally, stick to the same media file type to avoid this complication.
Database Backup and Restore
Always make a backup before doing bulk replacements or running search/replace. If something goes awry (say you replaced all references of a too-general string), you want to revert quickly.
Testing After Media Replacement
It’s wise to test after replacing media, especially on a live site. Check the pages where the media appears, maybe in an incognito window (to avoid cache issues).
If your site has an image gallery or featured image, ensure the new image displays correctly there. If you replace a downloadable file, try downloading it from the front end to confirm the link is working.
Catching any issue early allows you to address it (for instance, if you see the old file still downloading, you know something wasn’t replaced properly).
Will My Disk Space Become Full If I Replace or Version My Images?
It could be very likely! Depending on the image sizes, your disk space with your web host could become full.
When you replace or version your images, it doesn’t delete them from your server, so you are doubling them. However, you can connect your website to an external storage bucket and CDN like the Infinite Uploads. So, your media library has become virtually unlimited in size.

Infinite Uploads moves your WordPress media library to the cloud and serves the images through a global CDN. Beyond just freeing up space, Infinite Uploads also optimizes your media files for faster delivery so that the site loads quickly and efficiently.
You won’t have to worry about slow-loading pages or exceeding hosting limits thanks to built-in intelligent media caching, a network of 119+ edge locations, and triple-redundant cloud storage.
Besides, Infinite Uploads works directly with WordPress to manage all your media from the dashboard. So, you don’t need to deal with complex FTP settings or set up separate cloud storage accounts.
It’s a simple way to scale your site without the hassle of upgrading your hosting plan every time you run out of space.


0 Comments