
Self-hosting your videos and other media files gives you ownership of your content without relying on a 3rd-party platform like YouTube for delivery. If you want to serve up your own video files it is important to properly transcode and compress your videos for web delivery.
It is not difficult to manually optimize your videos for web delivery, but there are a few things to consider when serving videos from your website. In this article, you will learn how to properly encode videos with HandBrake (a handy free tool for video transcoding) and how to manage bandwidth limitations by creating 3 presets.
You will also learn to make the necessary changes to your host to upload big video files to WordPress. Check out our other blog post regarding this here.
What is Video Transcoding?
Transcoding (the act of decoding and encoding a video from one format to another) is an important step if you want to self-host your videos. Normally, recording apps will encode videos at the highest quality possible without any restrictions, this is to make sure that you have the best possible source material.
Of course, that source material is completely unpractical if it's going to be uploaded to your WordPress site. Without compression, your video will likely have a bitrate of 50MB or higher. That kind of bitrate will make it near impossible for visitors to play your videos and it will be very expensive to deliver.
4K quality looks great but requires a powerful internet compression to play it back smoothly. Most hosting services will have issues streaming video files higher than 20MB. A normal 4K video will play fine at bitrates on average 25 up to 50MB which makes the hosting requirements extremely high, unless you're on a dedicated CDN service with almost unlimited bandwidth you will run into issues.
We recommend 1080p and 720p formats for most scenarios the best performance with less bandwidth usage.
HandBrake
The first thing you need to do is to download HandBrake. HandBreak is powerful (even compared to paid tools) and is available on most platforms for free.
HandBrake includes support for formats like NVIDIA H264/265. This will make life a lot easier when you have to encode really big files as it will be done through your GPU+CPU instead of the traditional CPU, which takes more time to finish.
Go ahead and download Handbreak from here: HandBrake: Downloads
We are using Windows 11 in this illustration but Handbrake is available for Mac and Linux as well.

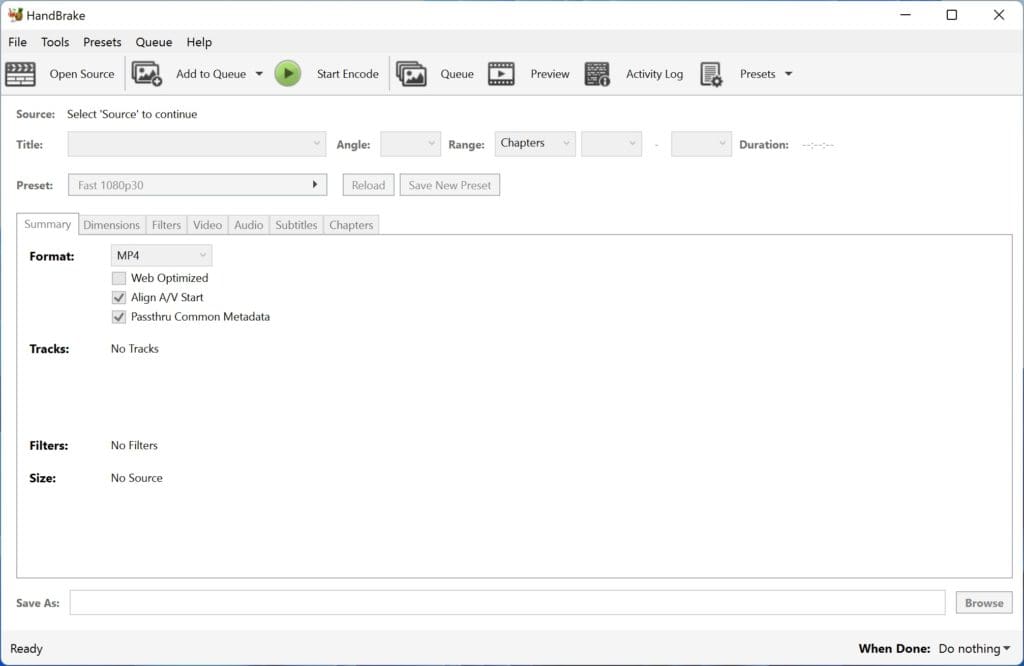
Handbrake Main Window
After HandBrake is installed, let's check the main window.
HandBreak is incredibly powerful so follow closely for the best streaming results.
Capture & Presets
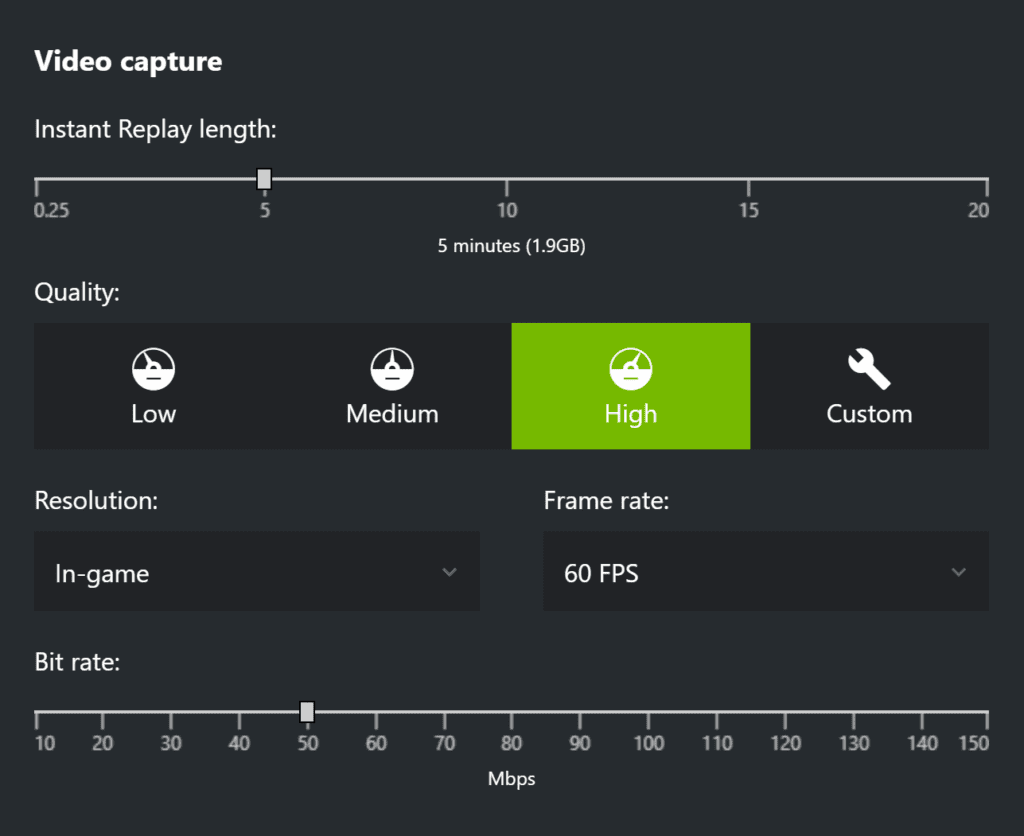
For this example let's assume you have a Gaming Blog and want to post a gameplay video of your match. For most gamers using NVIDIA, the Geforce Experience Video Capture is the best method to get pristine video source material for you to work with.
For this article, I captured a short clip of an in-game match (53 seconds) on the game Dead or Alive 6 on Steam (PC) played on Legend Difficulty (hardest AI setting) with Hayabusa. I'm the white ninja on the video 🙂
Since this is a very fast-moving game, it's the perfect example for you to check the differences in the encoding bitrate for each preset and what to expect visually.
For this article, I will use 3 presets. Of course, you can create more if you like. The idea behind this is for you to understand the process for when you want to encode your own material.
- Quality Preset: Transcoding 4K-60FPS source into 1080p30 on H264 encoder with Quality baseline 22 (Fast)
- Balanced Preset: 4K-60FPS source into 720p30 on H264 encoder with Quality baseline 30 (Medium)
- Bandwidth Saver Preset: 4K-60FPS source into 720p30 on H264 encoder with Quality baseline 40 (Slow)
Notice the Fast, Medium, and Slow parameters at the end of the preset. That is the Encoder Preset Speed. For this parameter, the slower it is set, the more work the encoder will do to optimize the output. This will take more time to encode. The lower the bitrate and resolution, the more time it will take to optimize the video.
Remember: The slower the Encoder Preset Speed, the better the quality of the output file.
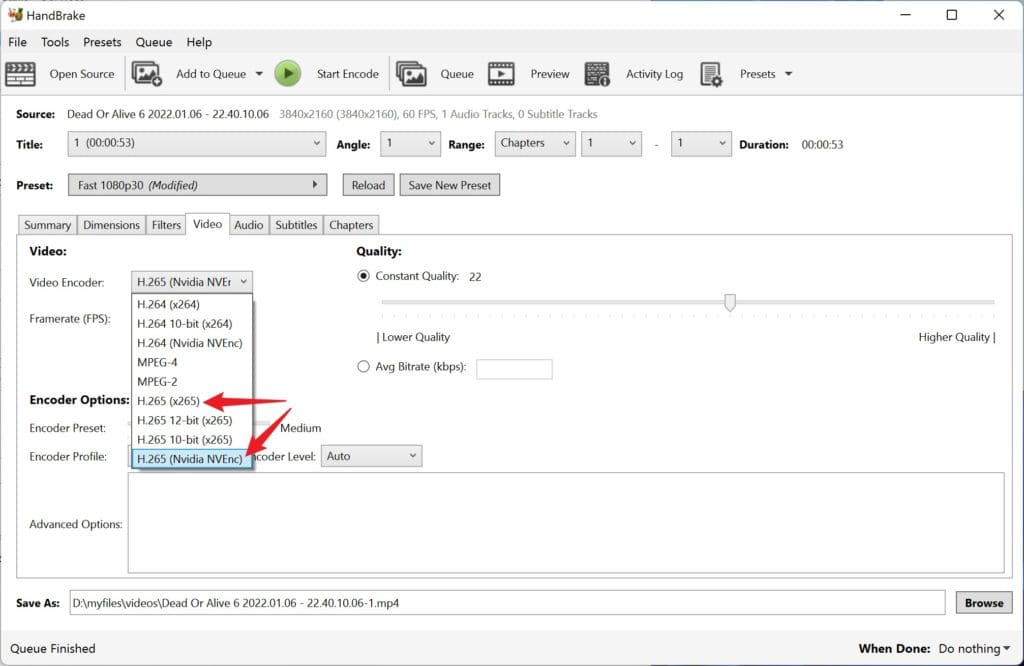
It is important to note, although there are other encoding formats such as H265 inside HandBrake, the most widely available on web browsers is H264. Some browsers will not playback H265 content inside WordPress, so it is not recommended to use.
Follow the settings below to get started.
Quality Preset
The Quality preset is designed to optimize all the parameters to be safe for streaming on the web while retaining as much detail as possible. This preset is ideal if you want to share videos on your website at a higher quality.
This preset will need on average, about 16MB bandwidth of steady internet connection to be played smoothly.
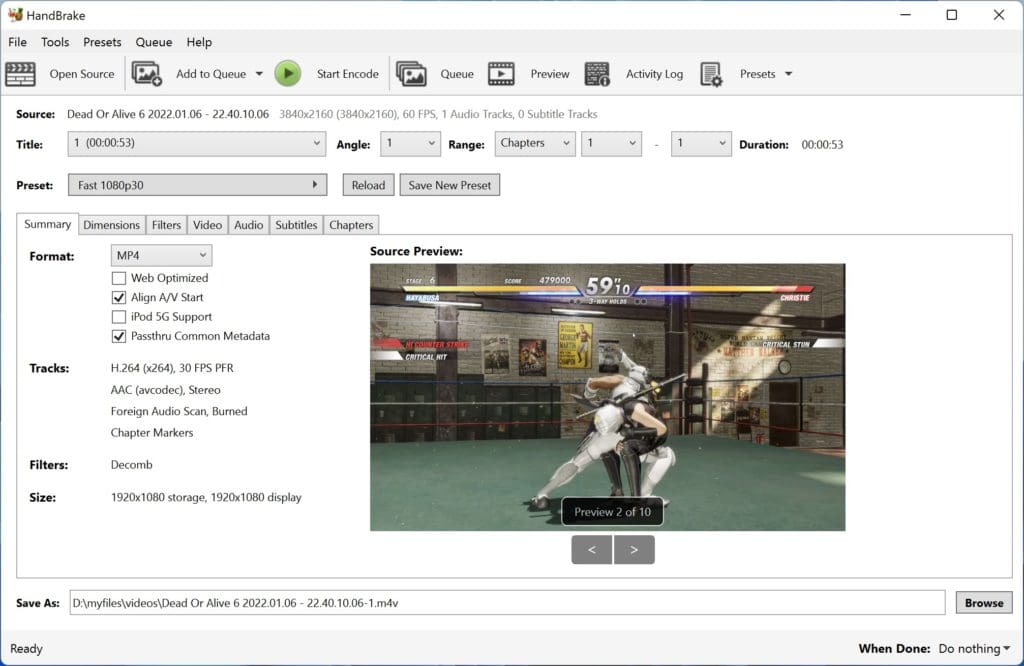
On the Summary tab, select Fast 1080p30 as baseline preset, then set to activate the following options:
- Web Optimized
- Align A/V Start
- Passthru Common Metadata
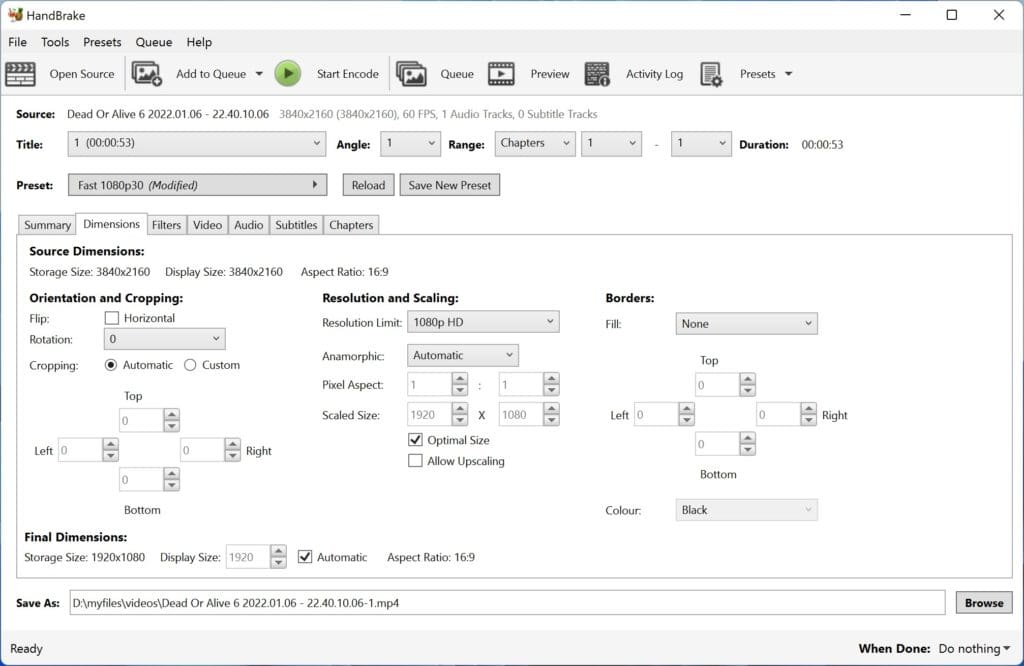
You can tweak your dimensions here in case you need to crop your video before doing the transcoding. If your source is already correct, you can just skip this menu altogether.
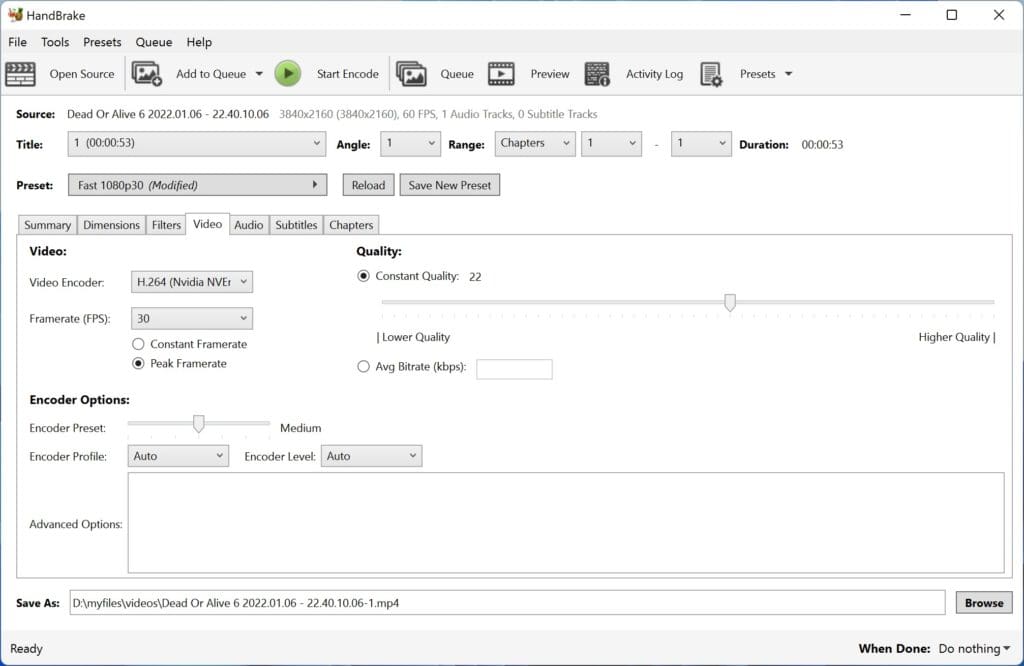
On the Video tab, you need to set the following:
- Framerate 30 at Peak Framerate
- Constant Quality at 22
- Encoder Preset either Fast or Medium
It is important to not touch the Encoder Profile or the Encoder Level which should always be set on Auto as this could break compatibility with some web browsers. We suggest you use the H264 encoder provided by NVIDIA (NVEnc) instead of the normal H264 process faster because it uses the internal NVEnc hardware in the GPU. This will only be available if you use an NVIDIA video card, otherwise, just use the standard H264 encoder. They will both do a similar job.
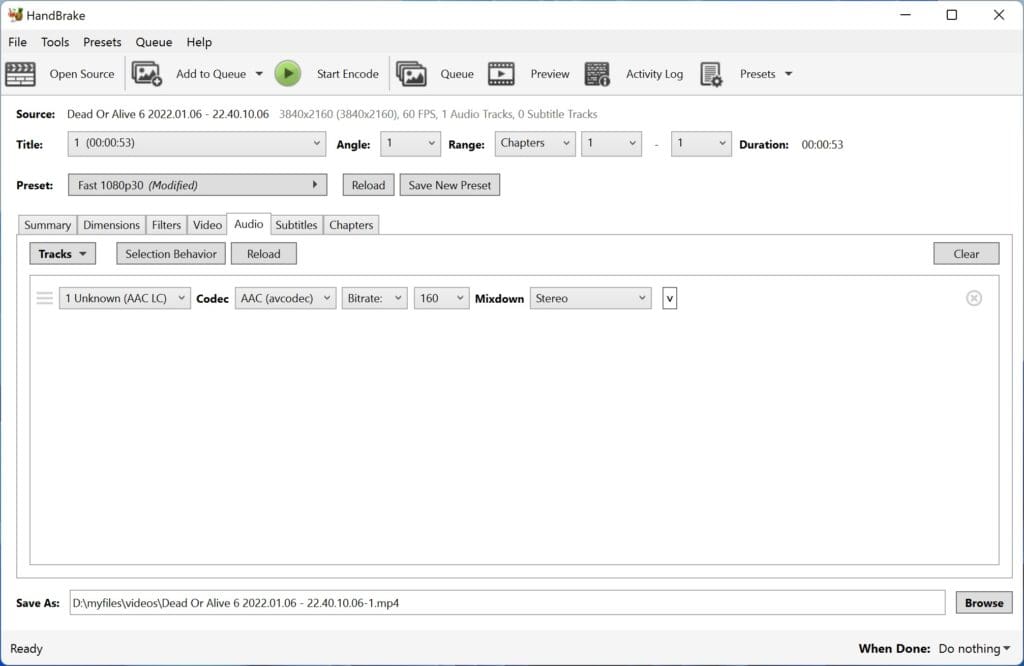
In most circumstances, you won't need to adjust the audio tab. MP4 standard will transcode audio into AAC. Bitrate at 160 is ideal for web content, but you can go even lower if you like. Do not go lower than 96kbits as the benefits in compression will also translate into degraded sound quality.
Balanced Preset
The Balanced preset is designed to optimize all the parameters to consume less bandwidth without making the video look low-quality. If you are in a tight spot and absolutely want all readers to be able to play your videos without cuts, this preset is for you.
This preset will need on average 3 to 5MB of steady internet connection to be played smoothly.
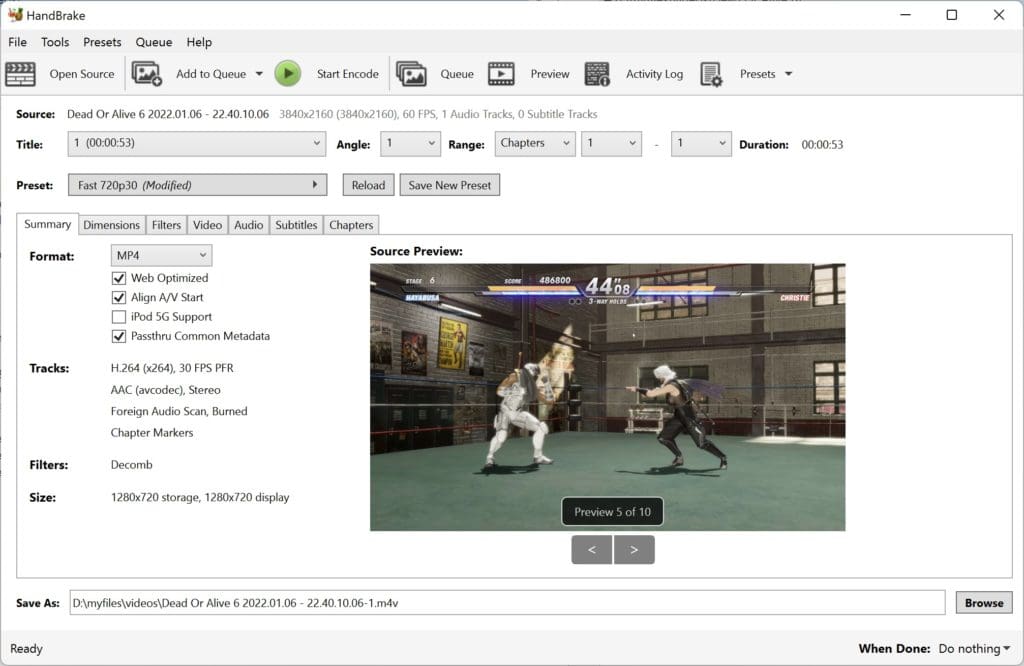
On the Summary tab, select Fast 720p30 as baseline preset, then toggle the following options on:
- Web Optimized
- Align A/V Start
- Passthru Common Metadata
For the Video tab, set the following:
- Framerate 30 at Peak Framerate
- Constant Quality at 32
- Encoder Preset either Medium or Slow
Remember that Encoder Profile and Encoder Level must be set to Auto.
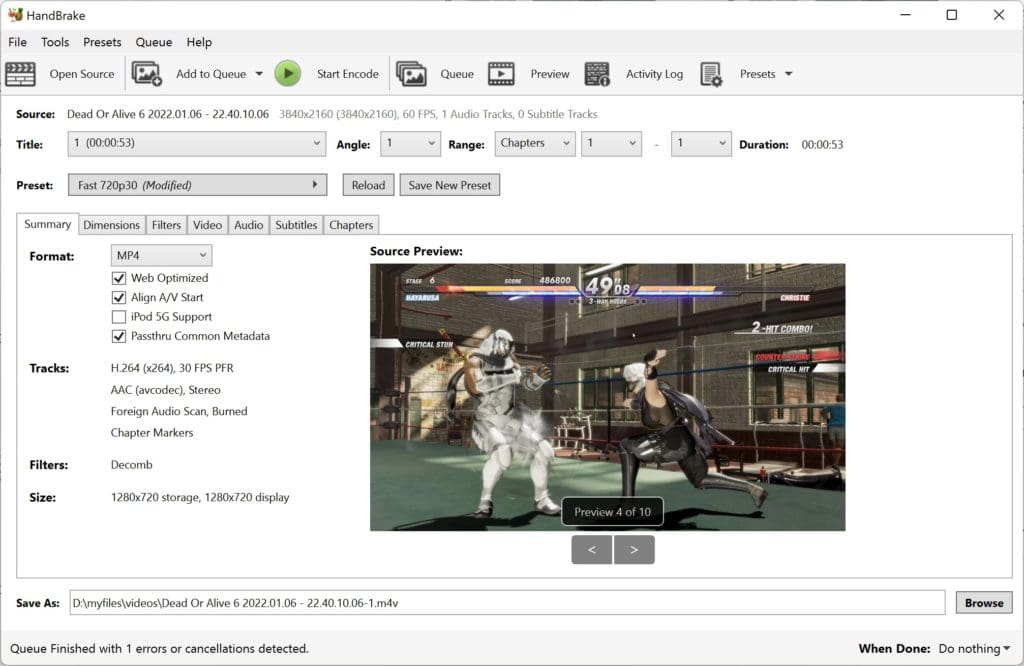
Bandwidth Saver Preset
This preset will minimize bandwidth consumption so everyone can see your videos but will have a noticeable drop in quality. Use this preset when Quality is not a consideration as you will see graphical glitches.
This preset will only need an average of 1.5 to 3MB of steady internet bandwidth to play smoothly.
Summary Tab 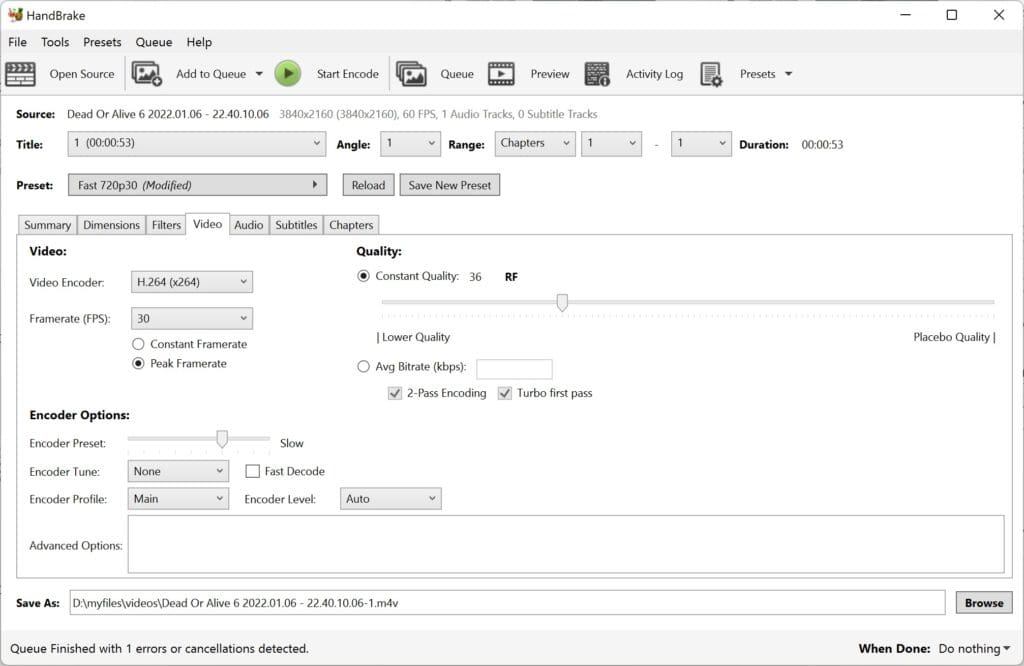
Video Tab
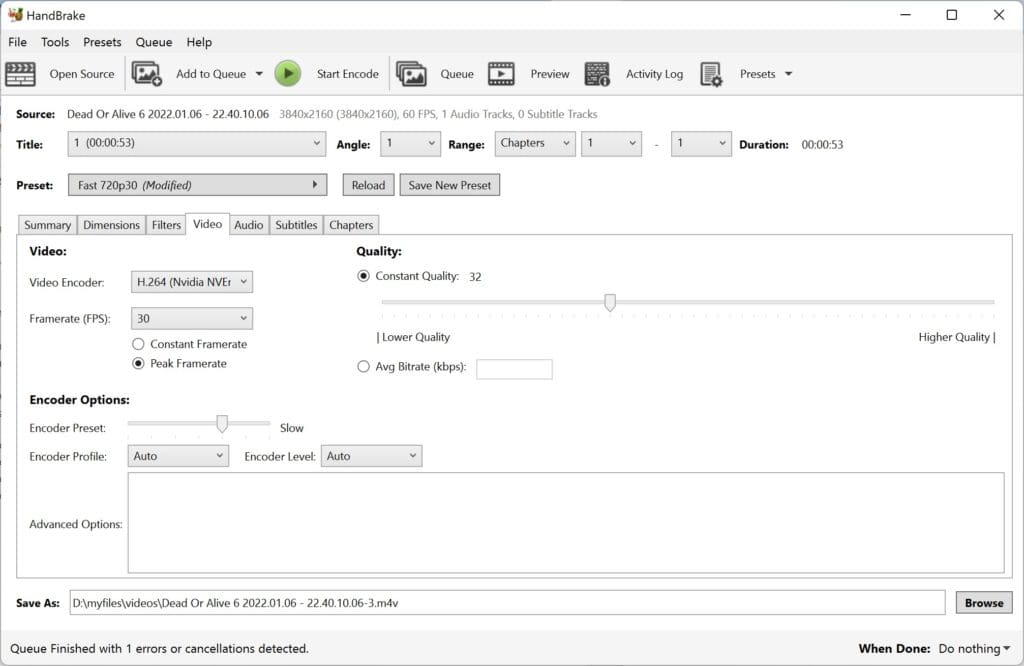
On the Summary tab, select Fast 720p30 as baseline preset, then toggle the following options on:
- Web Optimized
- Align A/V Start
- Passthru Common Metadata
For the Video tab, set the following:
- Framerate 30 at Peak Framerate
- Constant Quality at 36
- Encoder Preset either Slow or Slower
For this preset, you don't want to go past 36. In this case the higher the number, the more compression applied, hence the worse it will look. Lower than 36 will give you better quality, but anything past 36 (example 38) will give you a very garbled low-quality video.
Encoding
Once you have your presets ready to go, click on Start Encoding
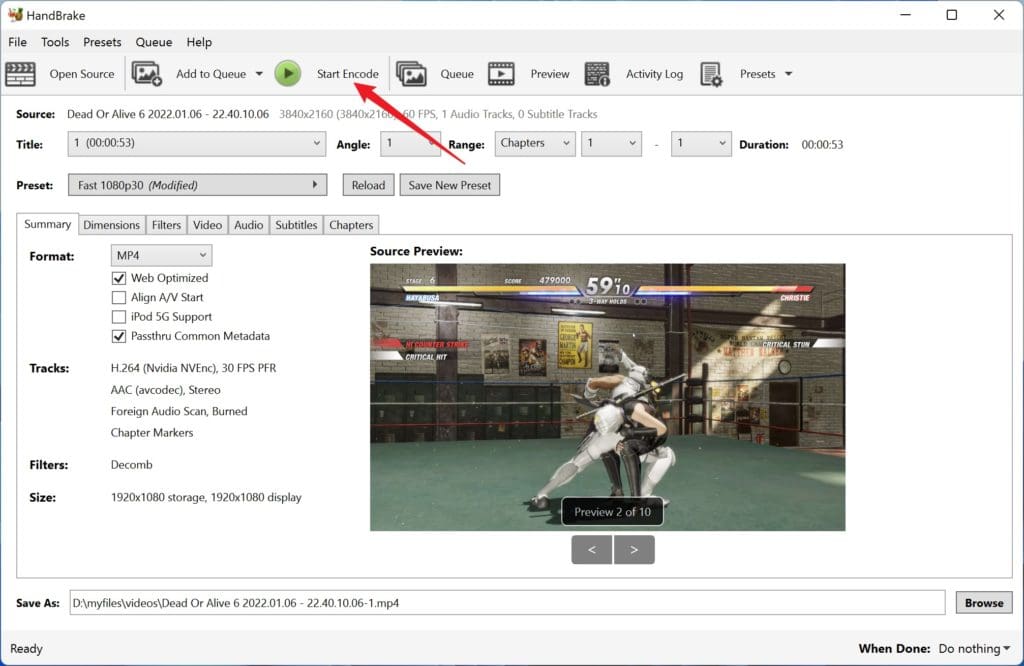
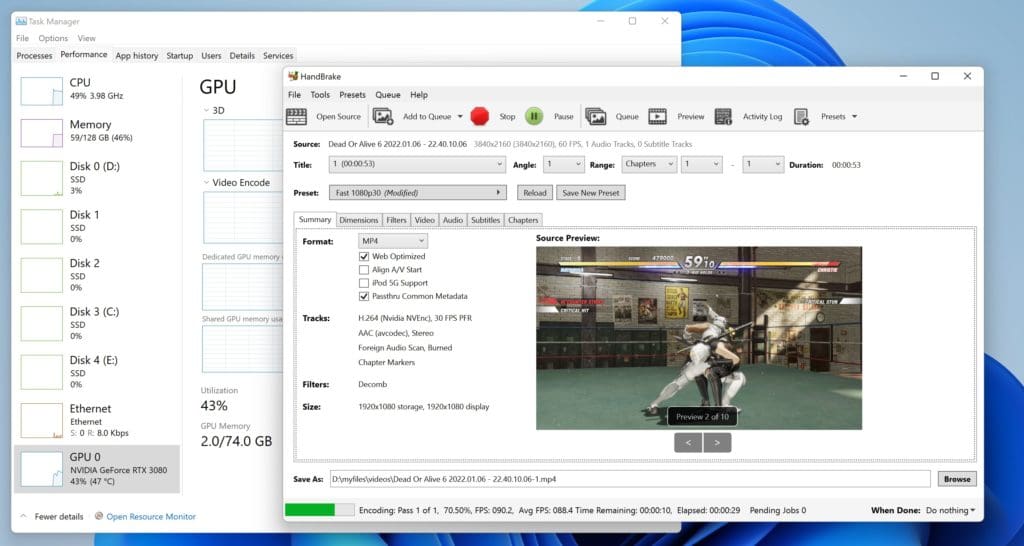
Remember that this is a very resource-intensive process. Try not to do anything with the PC while the process is running. If you choose the standard H264 encoder you will see a big spike in the CPU usage on your computer. On my desktop PC, it used up to 63% out of the 16 CPUs I have on the system! Using the H264 from NVIDIA will render the faster, but it will still use half of your entire CPUs with half of your GPU (depending on your configuration), which is extremely resource-intensive for any PC.
Other Experiments
Feel free to experiment with H265 if you like. You can use both H265 and H265 (NVIDIA NVEnc version). They will create smaller files at a higher quality than H264, but they will be less compatible with current browsers. This is not recommended for most blogs. All the presets shown here will work exactly the same in H265 with the added feature that they are going to be even smaller files sizes.
Results
Here are the results of our test. The one without any additional text is the source file, encoded at 4K-60FPS and 50MB encoding bitrate.

The following are the detailed file specs for each preset with the final average encoding bitrate

Quality Preset 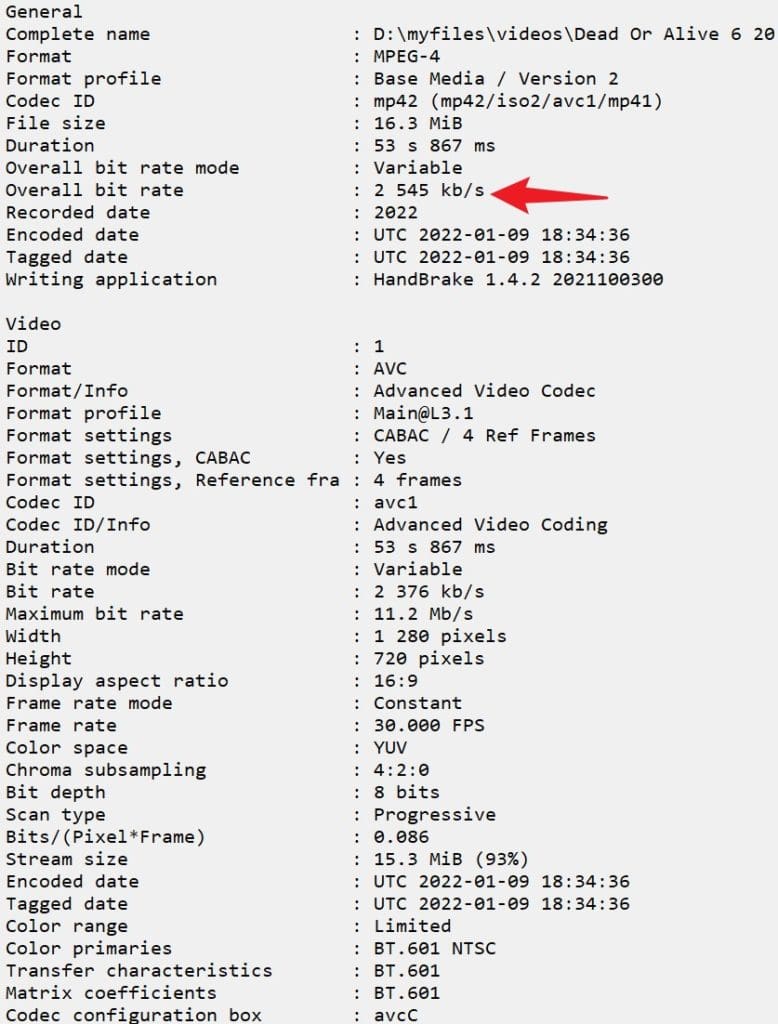
Balanced Preset 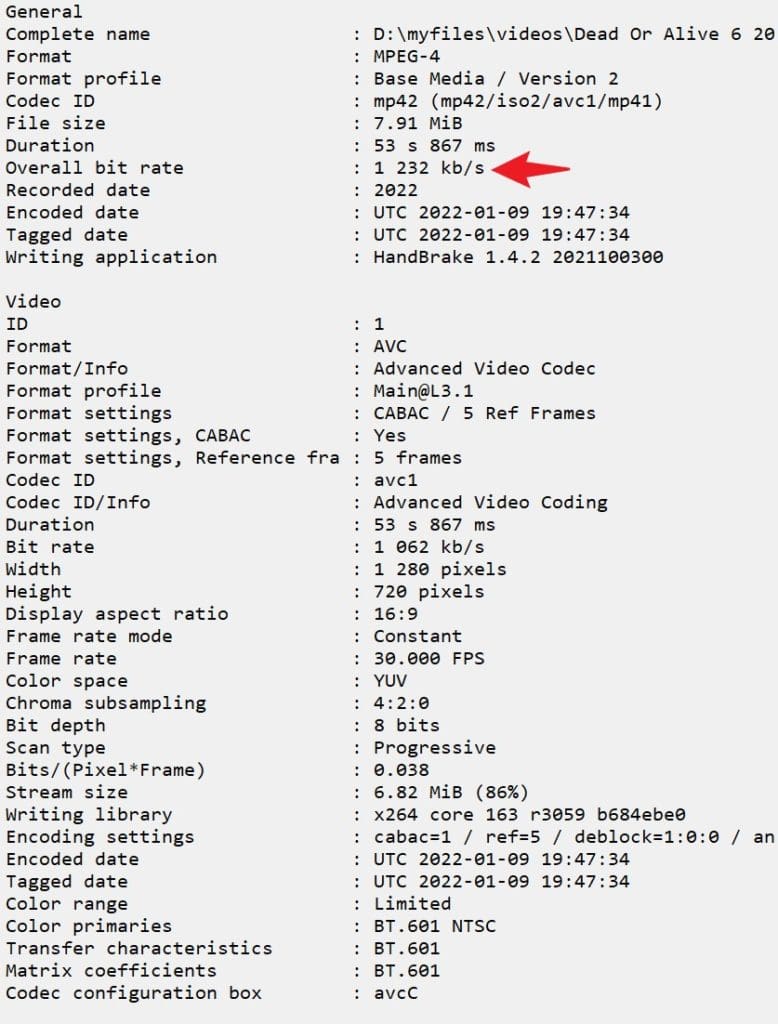
Bandwidth Saver Preset
Online Test
Now that you have all the settings in place, let's see how this all works. I've uploaded an example of each encoding based on the presets given in this article.
PS: I am the white ninja 🙂
Quality Preset Playback - 1080p / H264 / Quality 22
Balanced Preset Playback - 720p / H264 / Quality 32
Bandwith Saver Playback - 720p / H264 / Quality 36
Wrapping Up
You have learned how to transcode all your videos into a standard format that will work on most WordPress installations and with most browsers. Feel free to experiment with those parameters. As long as you do not alter the basic parameters or don't go past certain limits (such as the Constant Quality Preset of 36) you should be fine.
As a last consideration, always remember to use a preset that is closest in resolution from your source material. If you are already on lower resolutions than 720p, feel free to use lower presets as a starting point.
Since all presets are based on the Constant Quality Preset of the encoder, there is no need to tweak for a specific bitrate, even if you change the final encoding resolution.
Now, go ahead and start creating your video blog!


