
WordPress image optimization is neither rocket science nor child's play. It feels like something super simple until you start doing it.
I've worked in this space for two years, researching everything from compression tools and file formats to lazy loading and CDNs and writing over 25 tutorials.
That said, I've made many mistakes, like uploading oversized PNGs, skipping compression because "the site looked fine," or forgetting how much images impact mobile performance.
But over time, I've learned what works, what's worth skipping and how to optimize images for WordPress without making it overly complicated.
This guide pulls together everything I've practiced and includes the best tips for optimizing WordPress images for better speed, cleaner SEO, and a smoother experience for your visitors.
Let's get started.
Why Optimize Images for WordPress?
Image optimization makes your website and its pages load faster. Faster pages result in a better user experience, lower bounce rates, and higher conversion rates. Google also favors fast sites.
Images are often the heaviest content on a page. According to Pingdom, they account for around 61.3% of the total page size. So, optimizing image sizes can significantly improve Core Web Vitals and search ranking.
The WordPress team notes that lazy loading and other image optimizations "drastically save bandwidth" and improve website performance.
Delivering the correct image format and size saves data and speeds up page load time, leading to better SEO performance and happier visitors.
Increase Speed & Performance
Smaller images load faster. Yes, you can upload a raw image from 1MB to over 10MB.. But this size will take up more space and loading time. Compressing the image in next-gen formats (WebP/AVIF) can cut file sizes by 25–80% with no visible quality loss.
Save Bandwidth & Storage
Optimizing images reduces your hosting bandwidth and disk usage. Techniques like image compression and deleting unused thumbnail sizes save storage space. For example, reducing the size of a 1MB image to 200KB can save 80% of your image storage cost.
Improve SEO
Properly optimized images (with descriptive filenames and alt text) assist Google in indexing your content and increasing visibility. Optimized images also enhance the user experience for visually impaired visitors by loading faster and containing alt descriptions.
Improve Responsiveness
If you serve images the right size and use lazy loading, mobile users only download what they need, which is very important for slow networks. When responsive images (srcset) are used, browsers can choose the best resolution for each device.
In short, image optimization has a "domino effect": faster-loading images keep visitors engaged and improve search rankings.
9 Simple Ways to Optimize Images for WordPress
Since we upload images one by one, the first line of defense is preparing them before you upload them to WordPress. It's easier and won’t stress you out for a long time.
You should choose the right format, size them correctly, and compress them as much as possible without noticeable quality loss.
1. Choose the Right Image File Format
Different image types work best in different formats. So, you need to determine which image format best suits each type of content.
JPEG: Best for photos and complex images with many colors. JPEG uses lossy compression, which gives small file sizes with minimal quality loss. Use JPEG for most photographs.
PNG: Ideal for graphics, screenshots, or images with transparency (logos, icons, charts). PNG uses lossless compression, preserving sharp edges and transparency. However, PNGs can be large, so optimize PNGs as much as possible.
GIF/Animated: GIF is used for simple animations or small graphics. Note that animated GIFs are much larger than modern formats. GIF images can also be optimized, though they are generally larger than modern formats.
WebP/AVIF: Next-generation formats supported by most modern browsers. WebP and AVIF typically yield 25–80% smaller files than JPEG/PNG at similar quality. Use WebP/AVIF for both photos and graphics when supported.
| Format | Best For | Compression | Notes |
| JPEG | Photos | Lossy (30–90%) | Small size, acceptable loss |
| PNG | Graphics | Lossless (10–60%) | Sharp, supports transparency |
| WebP | Both | 25–90% smaller | Next-gen, widely supported |
| AVIF | Both | 30–90% smaller | Better than WebP, but less supported |
2. Resize Images to Correct WordPress Image Dimensions
While you optimize images for WordPress, you should avoid uploading larger (in pixel dimensions) images than your design needs.
Check your WordPress theme or page builder for the maximum width of content areas, banners, etc. If your content area is 800px wide, resize images to match that width or slightly larger for high-DPI screens.
Here are the default WordPress image sizes used in various parts of your WordPress web site:
- WordPress thumbnail image size: 150x150 px, 1:1 aspect ratio
- WordPress hero image: 1200x720 px, 16:9 aspect ratio
- WordPress Full-Width Background: 1920x1080 px, 16:9 aspect ratio
- WordPress Featured Image: 1200x628 px, ~16:8.4 aspect ratio
- WordPress Post Image (Flexible): 800–1200 px wide, with height variable
- WordPress medium: 300x300 px, 1:1 aspect ratio
- WordPress medium large: 768x768 px, 1:1 aspect ratio
- WordPress large: 1024x1024 px, 1:1 aspect ratio
- WordPress full size: Original size, variable ratio
- WordPress scaled (5.3+): Max 2560x2560 px
By default, WordPress creates several sizes for each upload (thumbnail, medium, large, full). For example, if you upload a 1500×1000 image, WP might generate a 150x150 thumbnail, 300x200 medium, and 1024x683 large. Use these smaller sizes in your posts when the larger version is unnecessary.
For full-width banners and hero images, 1920×1080 is often sufficient. For blog post images or featured images, widths between 800–1200 px often work well. Be sure to maintain the aspect ratio to avoid stretching or distortion.
3. Compress Images
Large image files slow down your WordPress site. Compression is key to reducing file size without noticeable quality loss. Even if you've chosen the right format and resized it, compression is still necessary.
There are multiple tools and plugins available for image compression; choose one that best fits your needs. However, I would also recommend the best WordPress image optimization, ShortPixel image optimizer, which is one of the pioneers of image optimization.
Compress Images with ShortPixel Image Optimizer
You can use the ShortPixel Online Image Compressor before uploading your images to the WordPress media library or compress your photos directly from the ShortPixel online tool.
You can pick from 3 different image compression levels,
- Lossy: Best size reduction, minimal quality loss. Ideal for web use.
- Glossy: Balance between quality and size. Great for photographers.
- Lossless: No quality loss, but larger image file size.
Once you upload your images (JPG, PNG, WebP, GIF) and hit Compress, it will compress the images and make them ready for you to download.
Compress WordPress Images with the ShortPixel Plugin
To compress your WordPress media library images using the Shortpixel image optimizer plugin, follow a few simple steps.
Step 1: Install and activate the plugin
You can install the plugin from your WordPress plugin directory and activate it directly.
Step 2: Get a free API Key using an email
Please sign into the system using your email and register for free to get the free API version. This version allows you to compress 100 images each month for free. You can also purchase any suitable package.
Step 3: Configure ShortPixel settings
Once you verify your account and connect the API, you should navigate to Settings > ShortPixel and configure your options:
- Compression Type: Choose Lossy, Glossy, or Lossless.
- Automatically optimize images on upload (Recommended)
- Compress thumbnails, retina images, and WebP versions.
Step 4: Activate bulk compression
Once you configure ShortPixel, you should navigate to Media > Bulk ShortPixel, and it will start compressing all the images in your WordPress media library.
Pro Tip: You can enable WebP image generation from the ShortPixel plugin settings. This helps you serve next-gen images automatically if your theme and CDN support it.
4. Use Lazy Loading
The idea of lazy loading isn't obvious to users, and they might get confused. Let me share an example that helped me understand it quite well.
Imagine you're serving soup. You don't drink directly from the pot; just put enough in a bowl. Lazy loading works similarly by only loading the visible portion of the page. It treats the page like a serving bowl and only loads what’s currently visible — like filling your bowl with just enough soup.
Lazy loading defers offscreen images from loading until the user scrolls to them. It reduces initial page weight and speeds up the visible content. This approach loads the visible content immediately and defers loading images further down the page until the user scrolls to them.
Since WordPress 5.5, lazy loading is built-in by default: WP automatically adds a loading= "lazy" attribute to most <img> tags. This native lazy-loading significantly cuts unnecessary loading.
Pro Tip: WordPress 5.5+ adds loading="lazy" to images with width and height set. Always define these to prevent layout shifts. Use plugins or filters to disable or customize lazy loading if needed.
Here are some of the best WordPress plugins for lazy loading images:
LazyLoad Plugin

LazyLoad plugin is one of the best free lazy load plugins for WordPress users to lazy load their images, videos, and iframes. It solves everything you need to optimize images for WordPress using the lazy load method. It's from the company that built WP Rocket, the most popular WordPress speed optimization plugin.
Smush
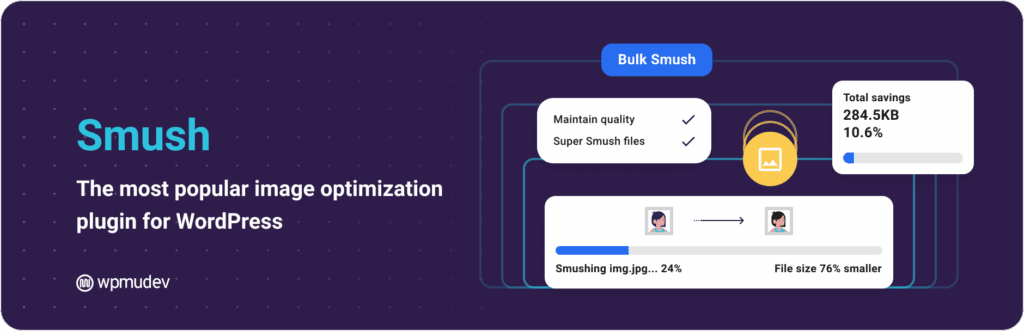
Smush is the most popular WordPress lazy load plugin, serving over 1 million active users. It lazy loads your offscreen images and iframes to the back of the queue. It further improves image delivery with features like lossless compression, bulk "Smush" cleanup, WebP/AVIF conversion, and an optional 123-point global CDN.
Optimole
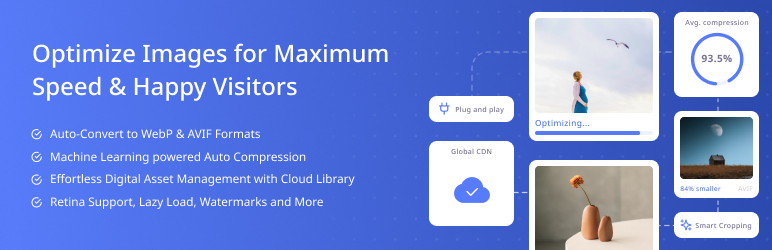
Optimole automatically resizes, compresses, and lazy loads every image in real time without you needing any setup. It adapts images to each visitor's screen and converts to WebP/AVIF.
A3 Lazy Load
A3 Lazy Load lets you load images, videos, iframes, avatars and even scrolling galleries. It usually offers fade-in or spinner effects and can override the WordPress core lazy loading if you need more control.
Disabling Lazy Load
Disabling Lazy Load helps you disable the WordPress 5.5+ native lazy loading feature. If you add a lazy load plugin for more features, it may conflict with the native. So, before installing a new plugin, you must disable the default one.
If you need more control (e.g., excluding specific images, lazy-loading background images, videos, iframes, etc.), you can use plugins like Smush or A3 Lazy Load.
5. Caching & Browser Hints
You should configure browser caching for your images and static files to reduce server load and speed up repeat visits. This way, visitors only need to download the file once whenever they come to the website. There are two main ways to do this:
Use browser cache-control setting
You can configure your server to instruct browsers to cache static files like images locally once downloaded so that the next visit doesn't require downloading the same image again.
To do this, locate the .htaccess file by logging through your cPanel or file manager and adding a custom caching rule at the end of the .htaccess file like the one below,
<IfModule mod_expires.c>
  ExpiresActive On
  ExpiresByType image/jpg "access plus 1 year"
  ExpiresByType image/jpeg "access plus 1 year"
  ExpiresByType image/png "access plus 1 year"
  ExpiresByType image/gif "access plus 1 year"
  ExpiresByType image/webp "access plus 1 year"
</IfModule>

<IfModule mod_headers.c>
  <FilesMatch "\.(jpg|jpeg|png|gif|webp)$">
    Header set Cache-Control "max-age=31536000, public"
  </FilesMatch>
</IfModule>
Here, the max-age=31536000 refers to how long the browser will cache it in seconds. 31,536,000 seconds equals one year.
Use WordPress Cache Plugins
Using WordPress caching plugins to set browser cache headers and improve performance for your visitors. They help store static assets like images, CSS, and JS on visitors'’ browsers, reducing repeat load times.
You can use WordPress cache plugins such as,
- WP Fastest Cache: Adds browser caching, minifies files and sets headers automatically
- W3 Total Cache: Features advanced caching with cache header control and performance tuning.
- WP Rocket: Advanced page and browser caching, lazy loading, and asset optimization plugin.
6. Use a CDN
Use a Content Delivery Network (CDN) to serve images from edge servers. A CDN distributes and stores your pictures geographically in servers in different locations, so users load them from the nearest location.
Many CDN services are available, and most are free to use. But if you want premium performance, you want their premium packages. Some of the top WordPress CDN providers optimize images for WordPress performance:
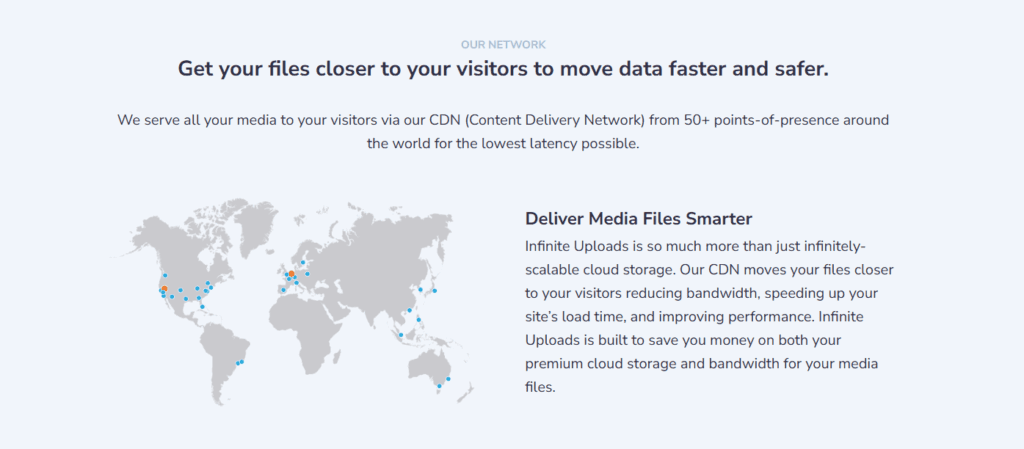
Infinite Uploads CDN
You can also use the Infinite Uploads CDN network, which stores all your data in the cloud and delivers from 50+ global locations for the lowest latency possible.
Cloudflare Polish
On Cloudflare CDN (free or paid), you can use the Cloudflare Polish feature to compress your images and convert them to WebP to optimize them, save storage space, and give a faster loading time.

Jetpack Site Accelerator (Formerly Photon)
Automattic provides a free CDN option, Jetpack, that hosts your images on their global network of servers. Jetpack Site Accelerator optimizes your images in WordPress and serves them with static web files like CSS and JavaScript.
Pro Tip: A CDN also often adds aggressive caching. For example, Optimole delivers images from 450+ global nodes and resizes them per device. So choose your CDN carefully, based on your performance needs.
7. Removing Image EXIF/Metadata
Many pictures, particularly ones taken with phones or cameras, have EXIF metadata, which includes camera settings, GPS location, and copyright information. These metadata are unnecessary, and removing them saves space (a few KBs) and protects privacy.
You can remove image EXIF metadata manually or use a WordPress plugin to automate the process. Let me explain below,
Remove image EXIF/Metadata manually
Manual tools are reliable if you prefer greater control over your images or need to clean them before uploading.
You can also remove metadata before uploading using an image editor.
For example, you could use Adobe Photoshop.
When exporting via Save for Web (Legacy):
- Uncheck "Embed Color Profile"
- Set "Metadata" to None or Copyright Only
If you don't have Photoshop installed, you can use it on Windows or Mac by default.
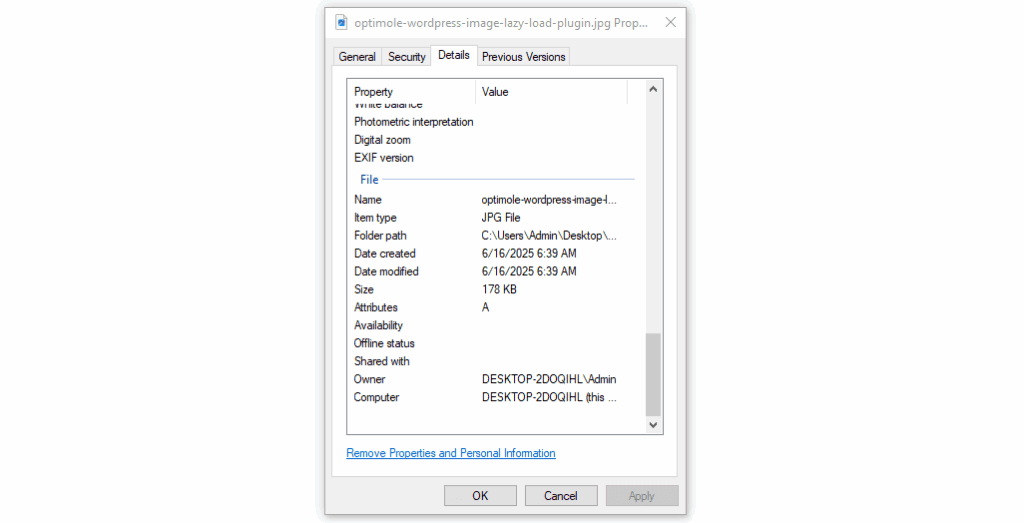
To remove Image EXIF/Metadata in Windows, you can follow the below procedure,
Right-click > Properties > Details > Remove Properties and Personal Information.
To remove Image EXIF/Metadata in MAC, you can follow the below procedure,
Use Preview → Tools > Show Inspector > Info (i) tab
Mac Preview can't manually remove all metadata here like Windows can, so if you are a Mac user, you can use Photoshop, online tools or WordPress plugins to properly remove image EXIF/Metadata on Mac.
Remove image EXIF/Metadata using WordPress plugins
Most regular WordPress optimization plugins allow you to strip off the image metadata. You don't need to install another WordPress plugin for this in particular.
If you use regular WordPress optimization plugins such as WP-Optimize, ShortPixel, Smush, or Imagify, you can remove your image EXIF/Metadata.
- WP-Optimize: Turn on the "Remove EXIF data" checkbox.
- ShortPixel: Activate Setting > Advanced > Remove EXIF.
- Smush: Smush automatically removes metadata by default.
- Imagify: The "Aggressive" and "Ultra" modes strip all metadata by default.
Pro Tip: EXIF/metadata typically makes up only a small portion of the overall image size. If you have millions of images on your website, it might be impactful, but doing it for a few thousand images would only clean a few Megabytes of data.
8. Optimize WordPress Images For SEO
Search engines can't see the images as we do. They rely on texts and metadata to understand the image and connect the search query and image information. Proper image SEO drives organic traffic from Google Image Search while ensuring that your images contribute positively to your content strategy.
I have mentioned some of the best practices to optimize WordPress images for search engines:
Descriptive file names
Use clear, keyword-rich names. For example: use ‘organic-herbal-tea-packaging.jpg’ instead of ‘IMG_1234.jpg’.”. WordPress uses this as the image title/alt by default.
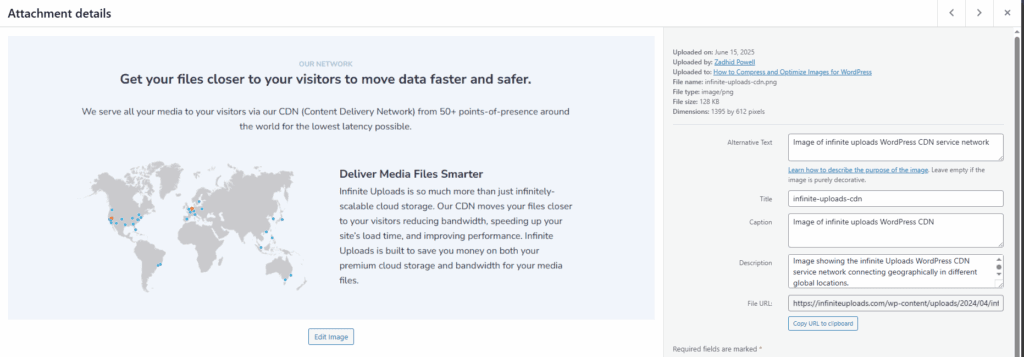
Use Alt Text
Always fill in the alt text field. It helps both screen readers and search engines understand the image. Be descriptive and natural (e.g., alt= "Handmade wooden chair") without keyword stuffing. The best way to write Alt text is to assume explaining the image to a blind person.
Use Titles & Captions
Use titles for internal clarity and captions to provide user-facing context. While captions don't directly affect SEO, they can improve user engagement and content comprehension, particularly on blogs or e-commerce sites.
Use Image Sitemaps
Ensure your images are indexed by adding them to your XML sitemap. Most SEO plugins, like Yoast or AIOSEO, do this automatically. This helps search engines crawl your visuals.
Use Structured data (Schema Markup):
Use schema types like ImageObject within Product, Recipe, or Video schemas. This allows Google to display image-rich search results such as badges and enhanced previews.
Disable Attachment Pages
By default, WordPress creates separate pages for image attachments, which often add little value and can be considered thin content. You can use an SEO plugin to redirect or disable them to avoid thin content issues.
9. Optimize WordPress Images for AEO and LLMO
You may think of Answer Engine Optimization (AEO) and Large Language Model Optimization (LLMO) as similar to SEO processes, but they aren’t the same.
While SEO helps search engines index and rank images, AEO helps AI engines interpret and feature your images in answers.
SEO primarily finds only one image relevant to the context, but AEO gives conversational or step-by-step answers. Hence, relevance in the images is more necessary for AEO.
Yes, I wouldn't deny that both share a fundamental practice, but I will emphasize that AEO requires more semantic meaning, structured context, and machine interpretability.
If you want to optimize your WordPress images for better AEO and LLMO, I suggest you check out a few more practices besides the regular SEO practices I discussed earlier.
Implement Structured Data Around Images
Use particular schema types that would pinpoint the image and its purpose. You can use marks like ImageObject or include image data with relevant schemas such as HowTo and FAQPage.
Add Captions and Contextual Surrounding Text
Short and informative captions provide proper semantic contexts for the AI models to understand and connect the visuals. Ensure that your images are near the descriptive heading or bullet points. It will connect the AI and LLMs to the image with the header and extract.
Use Multimodal Signals
Images in galleries, diagrams, infographics, or step-by-step visuals make AI more likely to cite them in responses. For more AI visibility, include a variety of media, like videos and pictures, along with detailed metadata.
Pro Tip: I mentioned removing your image EXIF/Metadata earlier in the guide. But, if your goal is AI discoverability, consider keeping metadata for step-by-step or instructional images.
Using Cloud Storage to Manage WordPress Images
Optimizing images on your WordPress site may not be sufficient if it contains many images, such as photo galleries, online stores, or blogs. Over time, your media library can slow things down or take up too much server space.
One smart way to handle this is to move your images to cloud storage, which will keep your website and hosting completely stress-free.
Instead of storing every image in your WordPress uploads folder, you can offload them to the cloud and deliver them through a fast CDN service. This keeps your WordPress website light, your server clean, and your visitors happy.
If you want to offload all your WordPress media library files to the cloud, making your WordPress website light, your server clean, and your visitors happy, you can use Infinite Uploads.
Infinite Uloads connects directly with WordPress and automatically moves your media files to the cloud. It also stores your images securely in 50 global locations and delivers faster to your users worldwide.
Why Use External Image Storage?
- Reduces server load, so your site runs faster.
- Speeds up backups by storing fewer files.
- Makes it easier to grow your site over time.
- Comes with automatic backups and easy recovery.
- Works with any plugin or theme, so no coding is required.
- Keep WordPress running smoothly for you and your visitors.


