
I’ve encountered the “Uploaded file exceeds the maximum upload size” error in WordPress more than I care to admit. Ironically, it usually happens when I upload a large video, theme, or backup.
But thanks to WordPress, you can now see the upload size limit directly on the upload media page. It wasn’t available before. Only then can we find out how to upload a file and get the “uploaded file exceeds upload_max_filesize” notice.
In this article, I’ll discuss six different ways I’ve learned to increase the upload limit in WordPress, from editing configuration files like php.ini and .htaccess to using plugins that do the heavy lifting for you.
I’ll also share the tool I rely on for a long-term, scalable solution for handling big files without hitting upload errors. Let me guide you on increasing WordPress maximum file upload size and controlling file limits.
What Is the Maximum Upload Size in WordPress?
Uploading large files can put a heavy load on your server. Thus, WordPress limits the maximum file upload size between 2 MB to 128 MB. Different hosting providers may have different upload sizes based on the type of packages you are using.
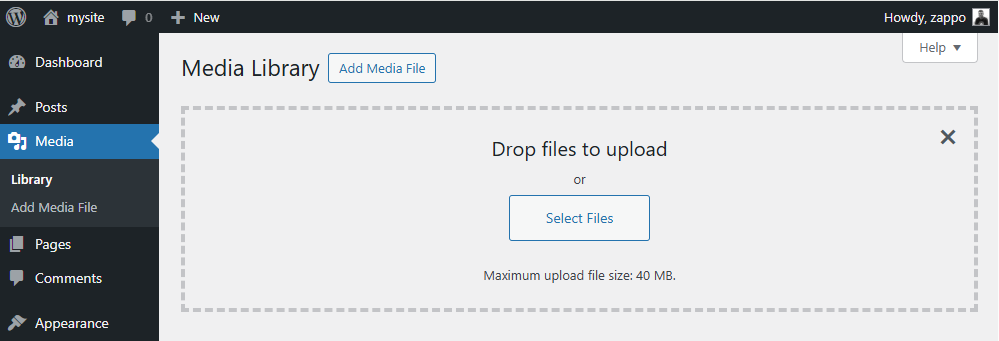
So, I installed WordPress on my localhost to check its system default, as I am hosting it myself and have no bias from the hosting providers. The default WordPress maximum file upload size was 40 MB in my local host without input from the hosting providers.
In most cases, your hosting provider determines the limit set at the server level. WordPress has constants that define upload limits, but it can’t usually override what the server allows. This limit helps to prevent timeouts and keeps server resources in check.
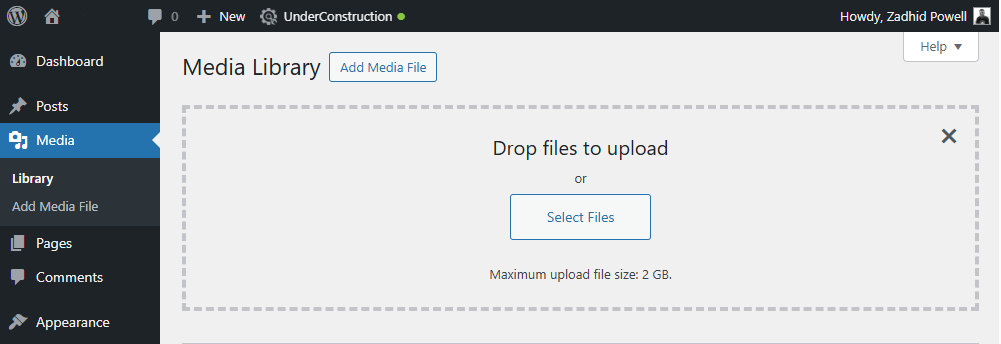
I have a Hostinger Business hosting package and need a larger WordPress maximum file upload size. I am building a cloud system, so I occasionally need to upload large WordPress files. Thus, I changed the maximum file upload size limit to 2GB for personal use.
Do you want to check this for yourself?
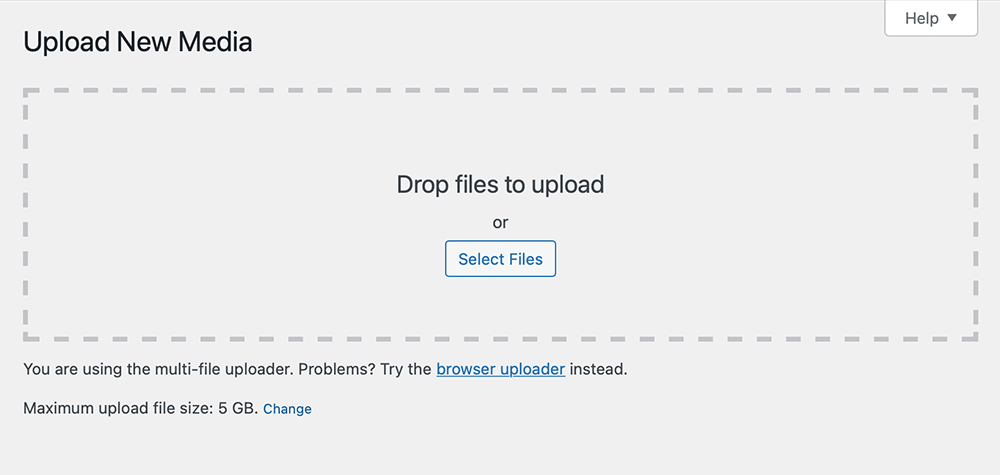
Navigate to your WordPress Media Library > Add Media File.
The following window should take you to the WordPress media uploads page, where you can see your max upload size, just like in the previous two images I shared.
To be sure, try uploading a file that exceeds the maximum limit. You’ll hit an error. It might say something like: “File exceeds the maximum upload size for this site.”
6 Ways to Fix Uploaded File Exceeds Max Size Error
Let me take you through the some of the best and effective ways you can use to fix the uploaded file exceeds the upload_max_filesize error.
1. Increase Maximum Upload Size by Editing php.ini
One of the most direct ways to fix the error is to modify your server’s php.ini file. The php.ini is the main PHP configuration file on your server, where settings like upload size, memory, and time limits are defined. By editing this file, you can raise the values that WordPress inherits.
Step 1: Locate your php.ini file
It’s usually in your web server’s root or a PHP folder. If you’re on shared hosting with cPanel, use the MultiPHP INI Editor in cPanel to find and open php.ini. You might see a “PHP Settings” section on some hosts in the hosting control panel.
Step 2: Edit upload settings
Find the directives for upload and post size. Set them to the desired limit. For example:
upload_max_filesize = 128M
post_max_size = 128M
memory_limit = 128M
max_execution_time = 300
This sample raises the max upload to 64 MB. Make sure post_max_size is equal to or larger than upload_max_filesize (since it affects form data size). It’s also wise to increase memory_limit and execution times for very large uploads as shown above.
Step 3: Save and apply
Save the php.ini file. Changes may apply immediately on some hosts. If not, you might need to restart your PHP service or wait a few minutes for the server to pick up changes.
Step 4: Verify the new limit
In WordPress, go back to Media > Add New and confirm that the maximum upload size displayed has been updated. Try uploading a file that used to be too large – it should now succeed if the new limit covers it.
2. Increase Maximum Upload Size Limit via .htaccess (Apache Servers)
If your site runs on an Apache server, you can use the .htaccess file to increase the upload size. The .htaccess is an Apache configuration file that lets you override specific server settings for your website.
Step 1: Edit the .htaccess file
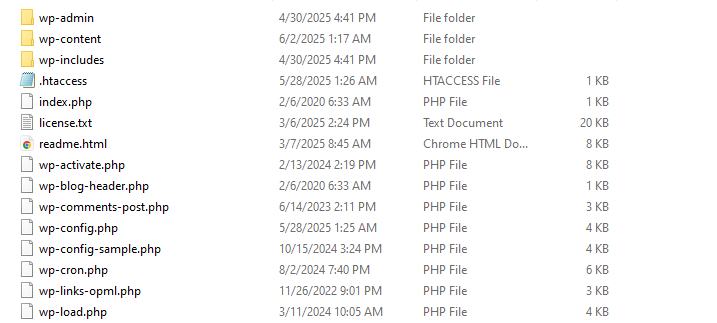
Using FTP or the File Manager in your hosting panel, locate the .htaccess file in the root of your WordPress site (the same folder that contains wp-config.php). Make a backup of this file (in case you need to revert). Then, open it in a text editor.
Step 2: Add PHP value overrides:
Insert the following lines at the end of the .htaccess file:
php_value upload_max_filesize 128M
php_value post_max_size 128M
php_value memory_limit 128M
php_value max_execution_time 300
php_value max_input_time 300
This example raises the upload limit to 128 MB and adjusts related limits accordingly (you can modify the numbers as you want). These directives tell Apache’s PHP handler to use higher limits for this site.
Step 3: Save and Test
Save the .htaccess file and close it. If the syntax is correct, the server will immediately use the new settings for that site. If there’s a typo, you might get a server error. If so, revert to your backup and try again.
Then, please go back to the WordPress Media library and try uploading a large file. If it works, the .htaccess method was successful.
3. Use WordPress Configuration (wp-config.php or Functions.php)
Another way to increase the upload size limit is from within WordPress itself, by adding a little code to your site’s configuration. You can edit your wp-config.php file or add a snippet to your theme’s functions.php (or a custom plugin).
Essentially, you use PHP’s ini_set() function to override the values at runtime. It’s quite useful if you don’t have direct server access, but you can manage WordPress files or run custom code.
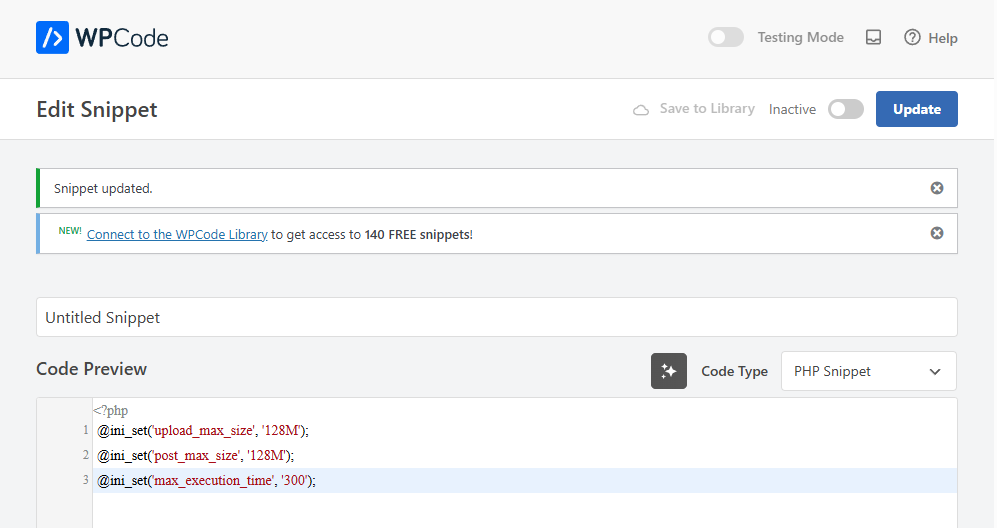
Step 1: Edit wp-config.php (optional)
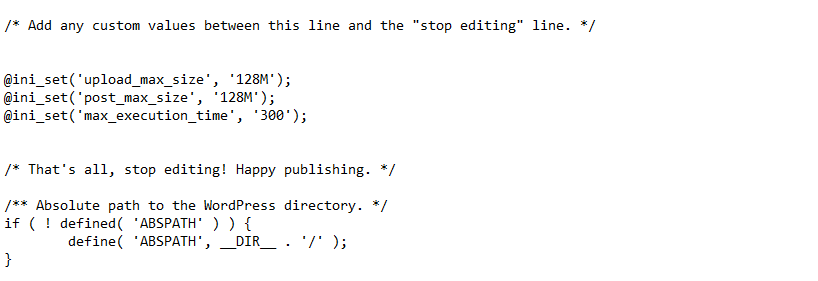
Start by locating the wp-config.php file in your WordPress root folder. Open it for editing and add the following lines above the line that says “That’s all, stop editing!”:
I’m adding 128MB, but if you want more, please specify your expected maximum file upload size in WordPress.
@ini_set('upload_max_size', '128M');
@ini_set('post_max_size', '128M');
@ini_set('max_execution_time', '300');
This will attempt to set the same PHP limits (128 MB upload, 128 MB post, etc.) when WordPress runs.
Step 2: Alternatively, use a code snippets plugin
If you prefer not to directly edit core files, you can install a WordPress snippet plugin like WPCode or Code Snippets. Then, add a new PHP snippet with the same ini_set lines above and activate it. This achieves the same effect without modifying core files.
Step 3: Save and Test
Save your changes after adding the code (either in wp-config.php or via a snippet plugin). Refresh your WordPress admin and check Media > Add New to see if the max upload size increased.
4. Use a WordPress Plugin to Maximum Upload Size
If editing files isn’t your thing, there are plugins specifically designed to increase the upload size limit in WordPress. These plugins provide a simple interface to set a higher limit (up to the maximum your server allows).
WordPress plugins effectively do the same thing as the above methods under the hood (adjusting php.ini or using ini_set), but through a user-friendly dashboard.
Step 1: Install the Big File Uploads WordPress Plugin
To get started fixing the exceeded max uploads error you install the Big File Uploads plugin to your site. Big File Uploads is available free on WordPress.org, is active on more than 10,00,000 sites, is 5-star rated, and is supported by Infinite Uploads.
What makes Big File Uploads special is it doesn’t just allow you to raise your size limit, it also changes the way your files are processed by adding support for multipart uploads
Big File Uploads works with most major hosting providers, whether they use Apache or Nginx. It uploads files in pieces, allowing even large files to be uploaded without timeouts or max file size errors.
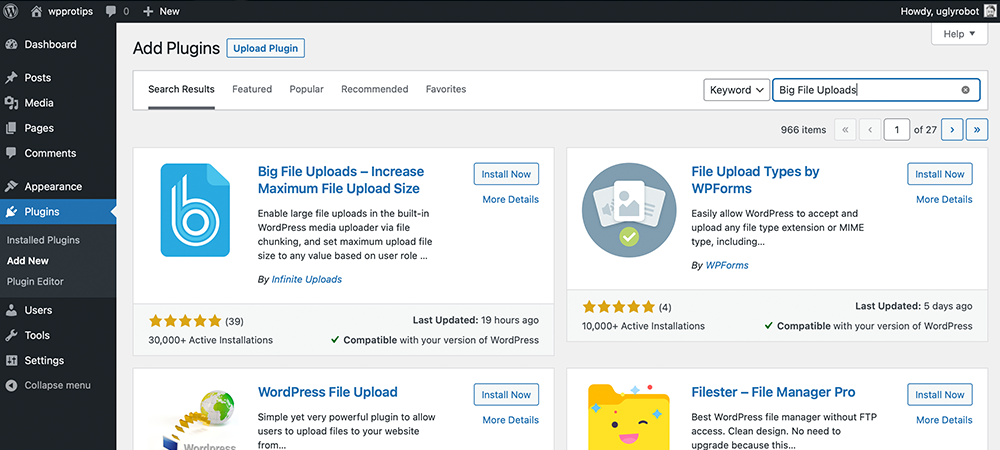
From the WordPress dashboard under the Plugins tab, click the Add New button. Type “Big File Uploads” into the search bar, click Install Now, and then Activate.
When the Big File Uploads plugin is activated, a new menu Big File Uploads tab will be added under the Settings menu.
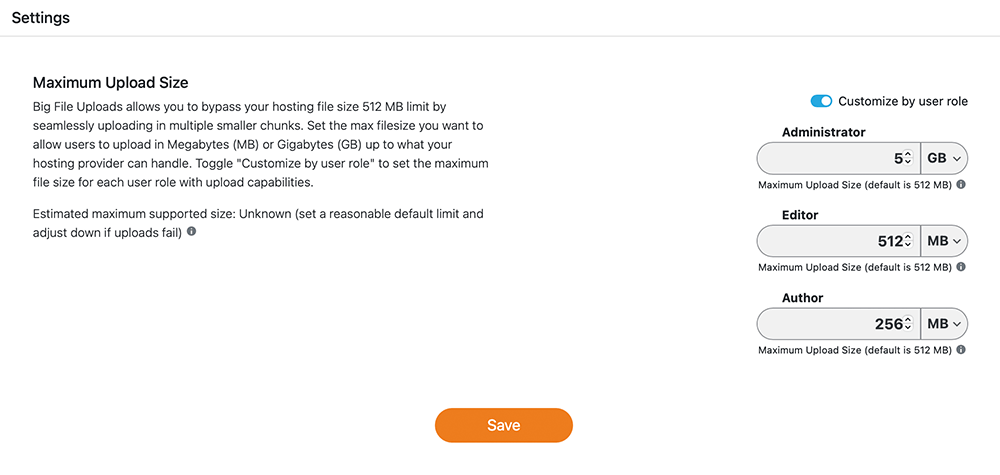
The other benefit to Big File Uploads is it allows you to configure what size files each user role (with upload capabilities) can upload. Say you want Administrators to have the option to upload 5 GB files but want to limit Editors to 512 MB – Big File Uploads can do that.
Now let’s dive into the configuration settings.
Step 2: Change The WordPress Upload Settings
After installing and activating Big File Uploads on your website, navigate to Settings > Big File Uploads in the WordPress dashboard to access the Maximum Uploads Size configuration settings.
Big File Uploads will detect and set your server settings as the default upload limit. Changing the upload limit in the All Users field and saving will affect the maximum upload size for all user roles with upload capabilities. You can limit the limit to megabytes (MB) or Gigabytes (GB).
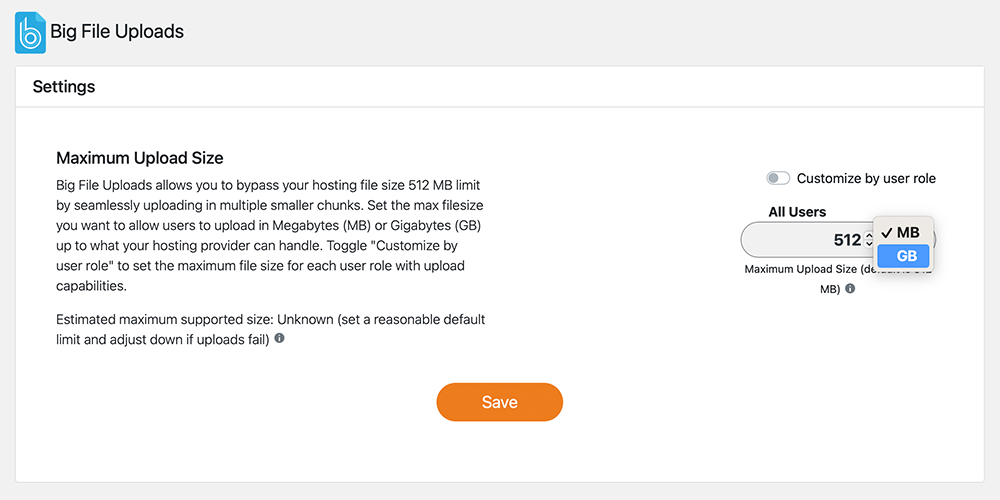
Big File Uploads provides an estimate for the maximum upload limit your host can handle based on the available space in your server’s temp directory. Keep in mind, this is only an estimate but will provide you a good point of reference for deciding what size is right for your setup.
If you use Infinite Uploads to store and serve your uploads, it is infinitely scalable and you can set Big File Uploads to allow any size file you like.
Step 3: Setting Upload Limits Based On User Role
Big File Uploads also lets you set upload limits based on user roles created by third-party plugins like WooCommerce, LMS, and membership plugins.
To adjust based on user role, toggle the “Customize by user role” option. A list of all the users with upload permissions will appear. This will set all roles to the server’s default maximum upload size.
You can increase or decrease the maximum upload size for each role and click save to adjust the permissions.
Step 4: Save and Test
Now, you can check if the expected maximum file upload size has been changed in your WordPress. Users can see the new WordPress upload limit displayed under the WordPress uploader.
If you even need to upload a file larger than the 5GB limit in Big File Uploads settings, the upload_max_filesize will appear again, and you can change it from the button below.
5. Contact Your Hosting Provider for Support
When in doubt, or if you’re uncomfortable with the technical steps above, ask your hosting provider to increase the file size limit in WordPress.
This is often the simplest solution. Hosting support teams deal with this request frequently and can usually bump up your upload max file size limit in a few minutes. In fact, many hosts advertise easy support for the upload_max_filesize issue since it’s a common need.
Reach out via chat or ticket
Log in to your hosting account and find the support contact options (live chat, support ticket, or phone). Simply tell them, “I need to increase the PHP upload_max_filesize limit for my WordPress site” and specify the new value you want (e.g., 500 MB). The support agent should handle it from there.
Use hosting panel tools
Some hosts let you change PHP limits in their control panel. For example, in cPanel, you can use MultiPHP INI Editor to adjust settings. Hosts like Cloudways or Plesk-based panels have similar options (often under PHP Settings). Check your host’s documentation for terms like “PHP settings” or “file upload size.”
Verify the new limit
Once support confirms the change (or after you adjust it in the panel), verify in WordPress admin as usual. The error should be gone when the server-side limit is raised.
6. Use Infinite Uploads: Scalable Solution for Large File Uploads
If you frequently deal with very large files or need virtually unlimited upload sizes, the above methods might feel like temporary fixes. The Infinite Uploads plugin is a long-term solution for these situations.
Infinite Uploads offloads your media files to cloud storage and serves them via a CDN, effectively bypassing the server’s upload size restrictions. You can connect multiple sites and upload all your media without size limits or restrictions using Infinite Uploads.
Cloud storage for media
Instead of storing uploads on your WordPress server (with PHP handling the file), Infinite Uploads uploads files to its cloud platform. This means you aren’t constrained by PHP’s upload_max_filesize directive on your host. You can upload big videos, high-resolution images, or large plugin/theme files without hitting the usual ceiling.
Transparent integration
Once connected, your existing Media Library files can be offloaded to the cloud, and any new uploads go directly to the cloud storage. WordPress will still show them in the Media Library as usual, but the files reside on Infinite Uploads servers. This means your site’s own max upload setting no longer matters. You could upload a 1 GB file through the WP media uploader if needed, and it would work.
Global CDN delivery and performance
As a bonus, Infinite Uploads serves your media through a Content Delivery Network (CDN). Large files will download faster for your users, and you’ll save on your web host’s bandwidth and storage. It’s a win-win for sites with heavy media needs.
Solve it in the Core
If you have followed through, you know the better parts of the six practical ways to fix the “Uploaded File Exceeds Maximum Upload Size” error in WordPress.
These include editing server configuration files like php.ini, .htaccess, or wp-config.php, using plugins like Big File Uploads, adjusting settings via your hosting control panel, or contacting your hosting provider directly.
For an easier, code-free solution, I recommend using Big File Uploads, which also supports multipart uploads and role-based limits.
However, for ongoing projects requiring large or unlimited file uploads, Infinite Uploads is an effective and long-term option to solve the upload_max_filesize issue in WordPress.


